This is one of those recipes that I included on the blog but didn't ever complete the post, so it didn't reach the stage of being published.
It reaches back to 2012 (and it's now 2019), so you'll forgive me if I've forgotten the true in's and out's of the recipe, but what I do remember is that the end result was gorgeous. What reminded me about it was the fact that we're about at the end of plum season again and I really haven't made the most of the little darlings, this year. Hence, I was pondering on what I could make that involved plums - and suddenly remembered this Clafouti.
Well, here it is. The recipe itself couldn't be any easier, in fact the hardest bit about it as I recall, was finding the right dish to put it in! LOL It certainly didn't stay in that dish for long - we made a serious hole in it that first serving.
Somewhere between pancakes and sponge pudding, a clafouti definitely fits into the "comfort food" brackets that you know I so love. Go on, indulge yourself!
PLUM & POMEGRANATE CLAFOUTI (Serves 3-4)
Ingredients :
500g red plums, stoned and quartered
2 tbsp of runny honey
1 tbsp of pomegranate molasses
1 tsp orange flower water
20g unsalted butter
2 medium eggs
3 tbsp caster sugar
1 heaped tbsp self raising flour
50g semi skimmed milk
3 tbsp greek yoghurt
a pinch of sea salt.
Method :
Place the plums, honey, pomegranate molasses and orange flower water into a bowl and mix until the plums are liberally coated, then tip the plum mixture into a large wide, shallow tart dish and level out.
Melt the butter either in a pan, or in the microwave. Take care not to let it burn.
Into a large bowl, place the sugar, eggs and flour. Whisk together until creamy and whilst whisking, add the milk, yoghurt, salt and melted butter. Whisk until all ingredients are incorporated.
Pour the batter over the plums and place into a pre-heated oven at 180degC/350degF/Gas 4. Bake for 30-35 minutes, until the top is slightly domed and a pointed knife inserted into the centre comes out clean.
Serve warm with cream.
Printable version
Showing posts with label honey. Show all posts
27 September 2019
8 June 2019
Lemon & Black Pepper Chicken - super tasty, with a definite zing!
What a very pleasant surprise this meal turned out to be. I really wasn't expecting much from it and hence only took a couple of pictures. You'd have thought I'd know better by now and would take more pictures just in case, but no.
The recipe is incredibly simple - just pan fried chicken breast in a sauce made with slices of lemon, crushed fresh garlic, some chicken stock, lemon juice, runny honey and a whole heap of black pepper. How often it is that the most simple recipes turn out to be the best!
I particularly enjoyed the lemony sauce with the Jersey Royals and the Sweetheart (or Hispi) cabbage. Mmmnnn, but that was sooo good. I'd been craving cabbage, so that might be why, but son & heir agreed the combination was very tasty and a second opinion is always helpful. Feel free to pair the recipe up with whatever accompaniments you fancy - after all, it's your dinner so why not please yourself.
Uncharacteristically, let's head on directly to the recipe and gird your loins for a zingy, fresh tasting chicken sensation.
LEMON & BLACK PEPPER CHICKEN (serves 2)
Ingredients :
1 tbsp olive oil
2 individual skinless, boneless chicken breasts
a pinch of sea salt
half a lemon, sliced thinly
half a lemon, juiced
one clove of garlic, crushed
as much fresh ground black pepper as you want - I used a teaspoonful
1 tbsp runny honey
200ml chicken stock - I used a combination of Knorr stock granules (half tsp) and chicken Bovril (half tsp)
2 tsp approx finely chopped fresh parsley
2 tsp Bisto best chicken gravy granules.
Method :
Heat the olive oil in a good sized frying pan until sizzling hot. Gently add the chicken breasts and sprinkle with a little sea salt. Leave the chicken to brown - you're aiming for it to have an all over golden tan, so don't keep fidgeting it about or it won't sear. Turn the chicken to sear the other side and add the lemon slices to the pan.
In a small bowl, combine the lemon juice, crushed garlic, black pepper, runny honey and chicken stock. When both sides of the chicken are golden, pour the mixture over the chicken into the pan. Allow the sauce to heat through and bubble, reduce slightly and thicken. Turn the chicken from time to time, to keep it basted in the sauce and ensure it is cooked through.
Reduce the heat to medium and include the parsley. Allow a moment or two for the parsley to heat through and add the gravy granules if necessary, to thicken the sauce to your personal taste.
Serve with the lemon slices on top, with a little chopped parsley as garnish and vegetable accompaniments of your choice.
Printable version
The recipe is incredibly simple - just pan fried chicken breast in a sauce made with slices of lemon, crushed fresh garlic, some chicken stock, lemon juice, runny honey and a whole heap of black pepper. How often it is that the most simple recipes turn out to be the best!
I particularly enjoyed the lemony sauce with the Jersey Royals and the Sweetheart (or Hispi) cabbage. Mmmnnn, but that was sooo good. I'd been craving cabbage, so that might be why, but son & heir agreed the combination was very tasty and a second opinion is always helpful. Feel free to pair the recipe up with whatever accompaniments you fancy - after all, it's your dinner so why not please yourself.
Uncharacteristically, let's head on directly to the recipe and gird your loins for a zingy, fresh tasting chicken sensation.
LEMON & BLACK PEPPER CHICKEN (serves 2)
Ingredients :
1 tbsp olive oil
2 individual skinless, boneless chicken breasts
a pinch of sea salt
half a lemon, sliced thinly
half a lemon, juiced
one clove of garlic, crushed
as much fresh ground black pepper as you want - I used a teaspoonful
1 tbsp runny honey
200ml chicken stock - I used a combination of Knorr stock granules (half tsp) and chicken Bovril (half tsp)
2 tsp approx finely chopped fresh parsley
2 tsp Bisto best chicken gravy granules.
Method :
Heat the olive oil in a good sized frying pan until sizzling hot. Gently add the chicken breasts and sprinkle with a little sea salt. Leave the chicken to brown - you're aiming for it to have an all over golden tan, so don't keep fidgeting it about or it won't sear. Turn the chicken to sear the other side and add the lemon slices to the pan.
In a small bowl, combine the lemon juice, crushed garlic, black pepper, runny honey and chicken stock. When both sides of the chicken are golden, pour the mixture over the chicken into the pan. Allow the sauce to heat through and bubble, reduce slightly and thicken. Turn the chicken from time to time, to keep it basted in the sauce and ensure it is cooked through.
Reduce the heat to medium and include the parsley. Allow a moment or two for the parsley to heat through and add the gravy granules if necessary, to thicken the sauce to your personal taste.
Serve with the lemon slices on top, with a little chopped parsley as garnish and vegetable accompaniments of your choice.
Printable version
4 March 2017
Sticky Hoisin chicken and red pepper with onion rice
Well, this one wasn't supposed to be like this at all. However, the Chinese chicken traybake that I'd originally intended to make just wouldn't have suited our different requirements, so I bailed out at the last minute and made this up instead. I think it turned into a very definite win.
As such, I can't give you chapter and verse as to how the recipe came about - I just made it up on the fly! However, I will tell you that I was very impressed with myself for running two pots that required so much watching over and stirring, without burning either of them. LOL I must be improving!
Everyone loved this recipe and hubby even went so far as to declare it delicious and say that he was missing his deep fried King Prawn balls with sweet & sour sauce and prawn crackers that we normally have with a Chinese takeaway. So that is high praise indeed.
If you're not used to juggling two pans, both of which require your attention, you can always just make plain boiled rice or alternatively buy a bag of egg fried rice from the supermarket to go with it. However, it really isn't a difficult thing to get the two pans working well and fortuitously the action does seem to alternate from pan to pan!
As for any Cook's Tips, well the most important one is to ensure you have all your a-chopping and a-peeling done before anything hits a hot pan. Getting a mise en place together in this way is worth dividends when you're cooking Chinese food as you really don't have time to stop and chop a pepper as you go!
It really is worth the 45 minutes of fairly intense cooking action involved in this one, to hear the admiring plaudits from your family as they tuck in happily. So, onwards to the recipe!
STICKY HOISIN CHICKEN AND RED PEPPER WITH ONION RICE (serves 3)
Ingredients :
For the chicken :
1 tbsp olive oil
3 chicken breasts, sliced
sea salt
ground black pepper
1 bunch spring onions, sliced diagonally
3 cloves garlic, chopped finely
As such, I can't give you chapter and verse as to how the recipe came about - I just made it up on the fly! However, I will tell you that I was very impressed with myself for running two pots that required so much watching over and stirring, without burning either of them. LOL I must be improving!
Everyone loved this recipe and hubby even went so far as to declare it delicious and say that he was missing his deep fried King Prawn balls with sweet & sour sauce and prawn crackers that we normally have with a Chinese takeaway. So that is high praise indeed.
If you're not used to juggling two pans, both of which require your attention, you can always just make plain boiled rice or alternatively buy a bag of egg fried rice from the supermarket to go with it. However, it really isn't a difficult thing to get the two pans working well and fortuitously the action does seem to alternate from pan to pan!
As for any Cook's Tips, well the most important one is to ensure you have all your a-chopping and a-peeling done before anything hits a hot pan. Getting a mise en place together in this way is worth dividends when you're cooking Chinese food as you really don't have time to stop and chop a pepper as you go!
It really is worth the 45 minutes of fairly intense cooking action involved in this one, to hear the admiring plaudits from your family as they tuck in happily. So, onwards to the recipe!
STICKY HOISIN CHICKEN AND RED PEPPER WITH ONION RICE (serves 3)
Ingredients :
For the chicken :
1 tbsp olive oil
3 chicken breasts, sliced
sea salt
ground black pepper
1 bunch spring onions, sliced diagonally
3 cloves garlic, chopped finely
1 red chilli, chopped
1 tsp Chinese 5 spice powder
1 red pepper, cored and sliced
4 white mushrooms, sliced
200ml hot water
4 tbsp hoisin sauce
1 tsp Chinese 5 spice powder
1 red pepper, cored and sliced
4 white mushrooms, sliced
200ml hot water
4 tbsp hoisin sauce
2 tbsp clear honey
1 tbsp light soy sauce.
For the rice :
2 individual tbsp olive oil
2 medium eggs, lightly mixed
0.5 tsp Chinese 5 spice powder
sea salt
ground black pepper
1 large brown onion, chopped
200g white rice (I used Basmati), rinsed until the water runs clear
2 medium eggs, lightly mixed
0.5 tsp Chinese 5 spice powder
sea salt
ground black pepper
1 large brown onion, chopped
200g white rice (I used Basmati), rinsed until the water runs clear
400ml good chicken stock
200g petit pois.
Method :
Begin by heating one tbsp of the olive oil for the rice in a wok set over a moderate heat. Crack the eggs into a small bowl and add a pinch of sea salt, a pinch of black pepper and half a tsp of Chinese five spice powder. Whip lightly with a fork. Once the oil is hot, pour the egg into the wok and cook until an omelette has formed. Ensure the egg is solid (you can flip the omelette over if you wish) and remove to a warmed plate and reserve.
Next, place 1 tbsp olive oil into both the wok (for the chicken) and a deep saucepan (for the rice). Heat the wok over a hot heat and the saucepan over a moderate heat. Once they are both hot, add the chicken to the wok and the brown onion to the saucepan, including a pinch of sea salt & black pepper to both.
Cook the chicken until it begins to caramelise, then turn and cook again until it again begins to caramelise. It is not necessary to cook the chicken through at this stage, but it should have two golden sides, at least, after which remove from the pan and set aside somewhere warm.
Cook the onion until transparent and softened and just beginning to caramelise.
While the onion is cooking in the saucepan, add the spring onions, garlic, chilli and five spice to the wok and stir fry for 2-3 minutes. Next, add the red pepper and white mushrooms to the wok and stir fry for another 2-3 minutes. Add the water, cover the wok and bring to a boil.
In the meantime and while the water is coming to a boil in the wok, add the rinsed rice to the onion in the saucepan and stir to combine. Add the chicken stock and cover the saucepan, bringing the contents to a gentle boil. Allow the rice to cook approximately half way and add the petit pois. Cook the rice until just al dente, after which turn off the heat, leave the lid on and allow the rice to steam until the chicken is ready.
Going back to the wok, uncover it and add the hoisin sauce, honey and soy sauce. Stir through and bring to a frisky boil. Re-introduce the chicken and stir through. You are now just waiting for the liquid to reduce in the pan, to a sticky, coating sauce. It's up to you how far you take it, I suggest you taste it as it reduces and stop when you're satisfied with the flavour and texture.
Finally, chop the omelette into small pieces and stir into the rice.
Serve onto warmed plates. You can set aside some of the green parts of the spring onion and a few chilli slices for garnish, if you wish.
Printable version
Method :
Begin by heating one tbsp of the olive oil for the rice in a wok set over a moderate heat. Crack the eggs into a small bowl and add a pinch of sea salt, a pinch of black pepper and half a tsp of Chinese five spice powder. Whip lightly with a fork. Once the oil is hot, pour the egg into the wok and cook until an omelette has formed. Ensure the egg is solid (you can flip the omelette over if you wish) and remove to a warmed plate and reserve.
Next, place 1 tbsp olive oil into both the wok (for the chicken) and a deep saucepan (for the rice). Heat the wok over a hot heat and the saucepan over a moderate heat. Once they are both hot, add the chicken to the wok and the brown onion to the saucepan, including a pinch of sea salt & black pepper to both.
Cook the chicken until it begins to caramelise, then turn and cook again until it again begins to caramelise. It is not necessary to cook the chicken through at this stage, but it should have two golden sides, at least, after which remove from the pan and set aside somewhere warm.
Cook the onion until transparent and softened and just beginning to caramelise.
While the onion is cooking in the saucepan, add the spring onions, garlic, chilli and five spice to the wok and stir fry for 2-3 minutes. Next, add the red pepper and white mushrooms to the wok and stir fry for another 2-3 minutes. Add the water, cover the wok and bring to a boil.
In the meantime and while the water is coming to a boil in the wok, add the rinsed rice to the onion in the saucepan and stir to combine. Add the chicken stock and cover the saucepan, bringing the contents to a gentle boil. Allow the rice to cook approximately half way and add the petit pois. Cook the rice until just al dente, after which turn off the heat, leave the lid on and allow the rice to steam until the chicken is ready.
Going back to the wok, uncover it and add the hoisin sauce, honey and soy sauce. Stir through and bring to a frisky boil. Re-introduce the chicken and stir through. You are now just waiting for the liquid to reduce in the pan, to a sticky, coating sauce. It's up to you how far you take it, I suggest you taste it as it reduces and stop when you're satisfied with the flavour and texture.
Finally, chop the omelette into small pieces and stir into the rice.
Serve onto warmed plates. You can set aside some of the green parts of the spring onion and a few chilli slices for garnish, if you wish.
Printable version
19 May 2016
Mead - *hic* - yep, it's alcoholic and good for you!
Yes, Mead! That apparently old style alcoholic drink that used to be sold by Merrydown in this country, but appears to have fallen off the map. That elixir of life for Norsemen down the ages, who by all accounts had a great liking for the stuff (and who wouldn't!). I gather, also, that it is a stalwart of many a Renaissance Fayre over the pond in the U.S. and perhaps even Canada.
I can remember my parents, way back in the seventies and one Christmas, producing a bottle of Merrydown Mead and being cock-a-hoop that they'd found some. As I was knee-high to a grasshopper at the time, I didn't get to taste any but their happiness at having found it was testament to its popularity (at the time).
As time went on, it seems to have fallen by the wayside as so many good things often do. However, there does seem to be something of a resurgence going on - and in home brewing terms. Now my hubby is a bit keen on dallying about with demijohns and hydrometers, but it was the news that Mead contains a significant number (by which I mean SHEDLOADS) of probiotics, that tipped the balance for us. We're all into probiotics in this house as my use of Kefir (a fermented milk drink) and liking for Kombucha (have yet to try fermenting this one), along with the use of goat milk (unfermented, this time) seem to have made a significant difference to my irritable bowel syndrome. Have a read of this piece here, for more information on that happy side of Mead.
![]() |
| Chicken in a Mead and mustard cream sauce |
This being, primarily, a food blog, I think it is important to underline the very good work that our Mead has been doing in the cooking department. My pork with parsnips and Mead was unbelievably good, the chicken in a Mead and mustard cream sauce was just out of this world and hubby has mounted an armed perimeter guard around the freezer since I made my rhubarb & mead semifreddo, with rhubarb & mead compote. So, you see, Mead is not just for warming your cockles on a chilly night!
So as hubby is the Master Brewer in our house, I shall turn the remainder of this blog post - and the recipe of course - over to him.
There really is no magic involved in Mead, it is quite simply a combination of good quality honey, brewer's yeast and water, left to ferment. The better the honey you use, the better the mead will be, so take care not to get any of the honey blends, as some will contain a sugar syrup.
You can flavour your Mead by adding raisins, spices such as cinnamon and cloves, or any number of other botanicals such as elderflowers, juniper berries and sweet herbs into the first demijohn. It is also possible to make a fruit Mead (called a melomel) by adding fruit (peaches, pineapple, oranges, rhubarb or whatever you want) into the second demijohn. (We haven't tried this one yet!).
As regards the yeast required, baking yeast just won't do, so put that back in the fridge before we go any further. Brewers yeast (or wine making yeast) is what you want - as it is better at converting sugar to alcohol. Champagne yeast is the very best and I found mine on Amazon. Generally, one sachet of yeast is 5g although they can differ. However 5g of yeast is the amount I use in this recipe.
You might be wondering what use the lemon juice is put to, but apparently it helps to wake the yeast up and kickstarts the fermentation process. Sounds likely!
Yes, you do need some specialised equipment for the task, but really, not much of it! Two 5 litre demijohns are a must, together with a length of silicone tubing, an airlock and bung, a large bottle brush for cleaning everything and a good selection of glass bottles to carry the final product. I've found that Grolsch bottles - being swing-topped - are great. It is an easy matter to obtain corks with which to seal wine bottles and these are great when storing the Mead for any length of time. A hydrometer is useful if you want to check the alcohol content by any other means than "have I got a headache" when you wake up in the morning.
There are lots of ways to sterilise glass, the easiest of which is to use a sterilising solution. I use one called "Bruclense" which is easy to use and leaves no chemical residue once rinsed. There are other solutions which are sold to sterilise babies' bottles that do the same job. If you hate the idea of chemicals though, just wash the glass well, rinse thoroughly and then put into an oven at 110 degrees celcius for ten minutes.
Having assembled your small collection of equipment, you'll be raring to go - so here's the recipe.
Ingredients :
1,200 - 1,500g of runny honey (depending on how sweet you want the finished mead)
1 sachet (5g approx.) of brewing or wine yeast (I use champagne yeast)
1 lemon, juice only
5 litres of water.
Method :
In a saucepan, add the honey to 1 litre of the water and warm it up so that the honey dissolves. Make sure not to let the mixture boil, just get it warm enough to be pourable.
Once dissolved, cover and leave to cool to room temperature before pouring it into a clean, sterilised 5 litre demijohn along with the lemon juice, the brewing yeast and then top the demijohn up with the remaining water, leaving a 5 cm air gap at the top. An initial hydrometer reading can be taken at this stage if you're into that kind of thing.
Seal the demijohn with an airlock and bung and leave in a dark place for around 30 days to ferment.
Fermentation should, initially, be quite vigorous (more than one bloop per second) but after 30 days or so, the airlock should be bubbling only very slowly (a bloop every ten seconds or so). This is time to carefully rack the mead into another clean sterilised demijohn, taking care to leave the sediment behind in the original one. (Racking = decanting). Racking can be a tricky procedure and I suggest that you visit YouTube to get a good sense of how it is done. You can take the opportunity to top up with water to the full 5 litres, if you wish. Now is also the time to take a second hydrometer reading, which will give you an idea of the alcohol content at that moment. Mine was 13.5%.
This is also the stage at which any botanicals or fruits can be added. For my second batch of mead, I've used half a cinnamon stick and a few juniper berries but there are all manner of extra flavours that would work very well too. Replace the airlock and bung and leave the whole thing for another 30 days to clear before racking into clean, sterilised bottles.
The mead can be drunk at this stage but the longer it is left in the bottles, the better it becomes. Six months is a good time to wait but it should keep for much longer than that if all of your equipment was sterilised and scrupulously clean.
Cheers!
Cheers!
13 July 2015
Citrus & spice chicken
I've been going through a whole heap of old paperwork recently - which included my many and various files and folders chock-a-block full of collected recipes. In doing so, I have re-discovered several favourites from pre-Rhubarb & Ginger times, one of which being this citrus & spice chicken.
The recipe has developed over the years (as recipes are wont to do) but I note from the paper recipe in my folder, that the original was adapted from the Good Food Magazine's "40 Best Chicken Recipes" booklet. Well, it's been adapted yet again - and very much for the better. The very first recipe was basically a traybake, my first version added several ingredients such as the honey and chilli powder. This last incarnation has separated out the vegetables to be cooked on the hob instead of in the oven, which I much prefer.
Oven cooking the vegetables inevitably led to burned ends and undercooked middles, as the sheer quantity of meat and vegetables in the tray didn't really allow for even cooking. Plus, it is nice to have a small degree of char on the chicken, but not so nice on the peppers and mushrooms.
This way, the chicken has plenty of air space around each piece and the cooking is much more even - particularly if you place the larger pieces to the outside and the smaller pieces to the inside of the tray. The surface attains nice little charred corners, while the chicken itself stays moist and delicious.
Cooking the vegetables in a frying pan enables much more degree of control. Inevitably the leftover marinade isn't enough moisture to see them through the entirety of the cook, but adding a little water from time to time not only allows the vegetables to steam, but also keeps the marinade saucy. This way, you have the relatively dry chicken, accompanied by the saucy vegetables - which provides a lovely balance and completely without burned ends.
Another huge positive to this recipe - apart from the flavour which is really tasty - is its speed. Provided you get the chicken on to marinade in advance, it is a really simple task to prepare a couple of salad veggies, cook some rice, put the chicken in the oven and pan cook the vegetables. From taking the marinating chicken out of the fridge to dishing up, probably only took around 45 minutes in total. I love that - especially when there's such a pay-off by way of flavour.
So what's the flavour like? The chicken flavour is there, no one flavour overrules it and because the curry past is used fairly sparingly and is very much tempered by the use of the yoghurt, it doesn't take precedence. The honey gives a quiet sweetness and the garlic helps to savoury it all up nicely. In fact, don't tell anyone, but if you add the yoghurt, then the lemon juice, then the honey, stir it all together and have a taste - mmmmn, it would make a smashing dessert!
Once the curry paste, oil and garlic are added though, I wouldn't recommend tipping it on top of your strawberries. The oven adds the last element of flavour to the chicken, in the small degree of charring as the tops of the chicken pieces catch in the oven. It all amounts to an absolutely scrumptious whole.
Now, as for Cook's Tips, I don't have many but there are a few worth mentioning.
The recipe calls for the juice of half a lemon. If, however, you don't have a lemon but do have a lime - then no worries, use that instead! You will need the whole lime's juice and the flavour will be slightly different, but no less nice. I have used both in the past and can't decide which one I like the best.
Where the chilli powder is concerned, feel free to add as little or as much as you like. However, if you're new to chilli powder and curry spice, I'd suggest you err on the side of caution to begin with - you can always add a little bit more the next time.
You can certainly freewheel a bit where the accompaniments are concerned. I think the chicken and vegetables would be lovely served in a soft Indian flatbread with some salad alongside. On this occasion, I served the chicken with some basmati rice that I had cooked in chicken stock and turmeric, along with the cooling influence of avocado and cucumber. For my son, who isn't keen on avocado, I served a sliced juicy tomato and cucumber. The chicken is certainly flexible enough in flavour profile, that there are a whole host of accompaniments you could serve with it.
Calories are in the range of 398 per portion, it is low in sodium and high in Vitamins B6 and C, so it could be worse!
I am so happy to have rediscovered this recipe. I think it is going to appear fairly regularly on the menu plan and I recommend it to you. Without the chilli powder, it would be great for children, too.
CITRUS & SPICE CHICKEN (Serves 3)
Ingredients:
For the marinade :
150ml natural yoghurt (I used Greek yoghurt)
juice of half a lemon
1 tsp runny honey
1 tbsp vegetable oil (I used sunflower)
2 generous tsp curry paste or powder
1 garlic clove, crushed
chilli powder to taste (I used 1 tsp Kashmiri chilli powder).
Other ingredients :
3 skinless, boneless chicken breasts cut into large chunks
1 red pepper, deseeded and cut into large slices
half a green pepper, deseeded and cut into large slices
1 onion cut into large slices
6 medium chestnut mushrooms , quartered
1 tbsp olive oil.
Method :
1. Mix together the marinade ingredients in a bowl.
2. Add chicken chunks to the marinade, stir to coat and set aside to marinate for as long as you've got - from 4 hours to 30 minutes.
3. Pre-heat your oven to 180degC/350degF/Gas 4.
4. Place the chicken chunks onto a baking tray, taking care to leave as much of the marinade in the bowl, but without scraping any off the chicken.
5. Bake the chicken for 30 minutes, remembering to turn the tray half way through to ensure even colouring.
6. Add the vegetables to the bowl and stir to coat them in the marinade.
7. Heat the olive oil in a large frying pan and add the vegetables, marinade and 200ml water. Cook, covered, on a medium heat until the peppers are softened and onions are cooked through. You may need to add more water, but only a little at a time.
8. Once the vegetables are cooked, remove the lid and allow the sauce to reduce and thicken, which will only take 2-3 minutes if you haven't added too much water.
9. The chicken is ready once the chunks are cooked through and they have gained a little bit of charred colour.
Serve with steamed basmati rice, avocado and cucumber.
Printable version
The recipe has developed over the years (as recipes are wont to do) but I note from the paper recipe in my folder, that the original was adapted from the Good Food Magazine's "40 Best Chicken Recipes" booklet. Well, it's been adapted yet again - and very much for the better. The very first recipe was basically a traybake, my first version added several ingredients such as the honey and chilli powder. This last incarnation has separated out the vegetables to be cooked on the hob instead of in the oven, which I much prefer.
![]() |
| Marinate, my little lovelies! |
This way, the chicken has plenty of air space around each piece and the cooking is much more even - particularly if you place the larger pieces to the outside and the smaller pieces to the inside of the tray. The surface attains nice little charred corners, while the chicken itself stays moist and delicious.
Cooking the vegetables in a frying pan enables much more degree of control. Inevitably the leftover marinade isn't enough moisture to see them through the entirety of the cook, but adding a little water from time to time not only allows the vegetables to steam, but also keeps the marinade saucy. This way, you have the relatively dry chicken, accompanied by the saucy vegetables - which provides a lovely balance and completely without burned ends.
![]() |
| Ready for the oven - Bacofoil's non-stick aluminium foil is great for this! |
So what's the flavour like? The chicken flavour is there, no one flavour overrules it and because the curry past is used fairly sparingly and is very much tempered by the use of the yoghurt, it doesn't take precedence. The honey gives a quiet sweetness and the garlic helps to savoury it all up nicely. In fact, don't tell anyone, but if you add the yoghurt, then the lemon juice, then the honey, stir it all together and have a taste - mmmmn, it would make a smashing dessert!
Once the curry paste, oil and garlic are added though, I wouldn't recommend tipping it on top of your strawberries. The oven adds the last element of flavour to the chicken, in the small degree of charring as the tops of the chicken pieces catch in the oven. It all amounts to an absolutely scrumptious whole.
Now, as for Cook's Tips, I don't have many but there are a few worth mentioning.
The recipe calls for the juice of half a lemon. If, however, you don't have a lemon but do have a lime - then no worries, use that instead! You will need the whole lime's juice and the flavour will be slightly different, but no less nice. I have used both in the past and can't decide which one I like the best.
Where the chilli powder is concerned, feel free to add as little or as much as you like. However, if you're new to chilli powder and curry spice, I'd suggest you err on the side of caution to begin with - you can always add a little bit more the next time.
You can certainly freewheel a bit where the accompaniments are concerned. I think the chicken and vegetables would be lovely served in a soft Indian flatbread with some salad alongside. On this occasion, I served the chicken with some basmati rice that I had cooked in chicken stock and turmeric, along with the cooling influence of avocado and cucumber. For my son, who isn't keen on avocado, I served a sliced juicy tomato and cucumber. The chicken is certainly flexible enough in flavour profile, that there are a whole host of accompaniments you could serve with it.
Calories are in the range of 398 per portion, it is low in sodium and high in Vitamins B6 and C, so it could be worse!
I am so happy to have rediscovered this recipe. I think it is going to appear fairly regularly on the menu plan and I recommend it to you. Without the chilli powder, it would be great for children, too.
CITRUS & SPICE CHICKEN (Serves 3)
Ingredients:
For the marinade :
150ml natural yoghurt (I used Greek yoghurt)
juice of half a lemon
1 tsp runny honey
1 tbsp vegetable oil (I used sunflower)
2 generous tsp curry paste or powder
1 garlic clove, crushed
chilli powder to taste (I used 1 tsp Kashmiri chilli powder).
Other ingredients :
3 skinless, boneless chicken breasts cut into large chunks
1 red pepper, deseeded and cut into large slices
half a green pepper, deseeded and cut into large slices
1 onion cut into large slices
6 medium chestnut mushrooms , quartered
1 tbsp olive oil.
Method :
1. Mix together the marinade ingredients in a bowl.
2. Add chicken chunks to the marinade, stir to coat and set aside to marinate for as long as you've got - from 4 hours to 30 minutes.
3. Pre-heat your oven to 180degC/350degF/Gas 4.
4. Place the chicken chunks onto a baking tray, taking care to leave as much of the marinade in the bowl, but without scraping any off the chicken.
5. Bake the chicken for 30 minutes, remembering to turn the tray half way through to ensure even colouring.
6. Add the vegetables to the bowl and stir to coat them in the marinade.
7. Heat the olive oil in a large frying pan and add the vegetables, marinade and 200ml water. Cook, covered, on a medium heat until the peppers are softened and onions are cooked through. You may need to add more water, but only a little at a time.
8. Once the vegetables are cooked, remove the lid and allow the sauce to reduce and thicken, which will only take 2-3 minutes if you haven't added too much water.
9. The chicken is ready once the chunks are cooked through and they have gained a little bit of charred colour.
Serve with steamed basmati rice, avocado and cucumber.
Printable version
Labels:
chicken breast,
chicken recipe,
Citrus and spice chicken,
curry,
curry paste,
easy recipe,
garlic,
greek yoghurt,
green pepper,
honey,
lemon,
mushrooms,
quick recipe,
red pepper,
spicy food,
summer eating,
yoghurt
12 September 2013
Tonight's dinner : I cut my finger - does that make me a cook, now?
There is a train of thought in amongst the Shamanic fraternity that it takes a near death experience (preferably with lightning) in order to make a Shaman. So, I was wondering whether nearly taking the top of your finger off on a mandolin, qualifies you as a Cook with a capital "c"?
I'll go with a "yes", I think.
I was slicing parsnips and squash (beautiful parsnips and squash from thevegibox.com), to make this creamy parsnip & squash bake. Poor hubby and son & heir came back from walking the dogs, to find me hyperventilating whilst holding my right hand in the air with my little finger swathed in kitchen paper. Yes, it did leak - copiously. However, with the addition of a dressing, a plaster and a latex glove, I soldiered on like the brave likkle Cook that I now am.
Now, this 'ere bake very definitely deserves its own recipe post - so watch this space and it shall appear. It was utterly delicious, incredibly moreish and comfort food to the Nth degree. Like so many of my favourite recipes, it was so easy to make too! (Well, not counting the first aid requirement).
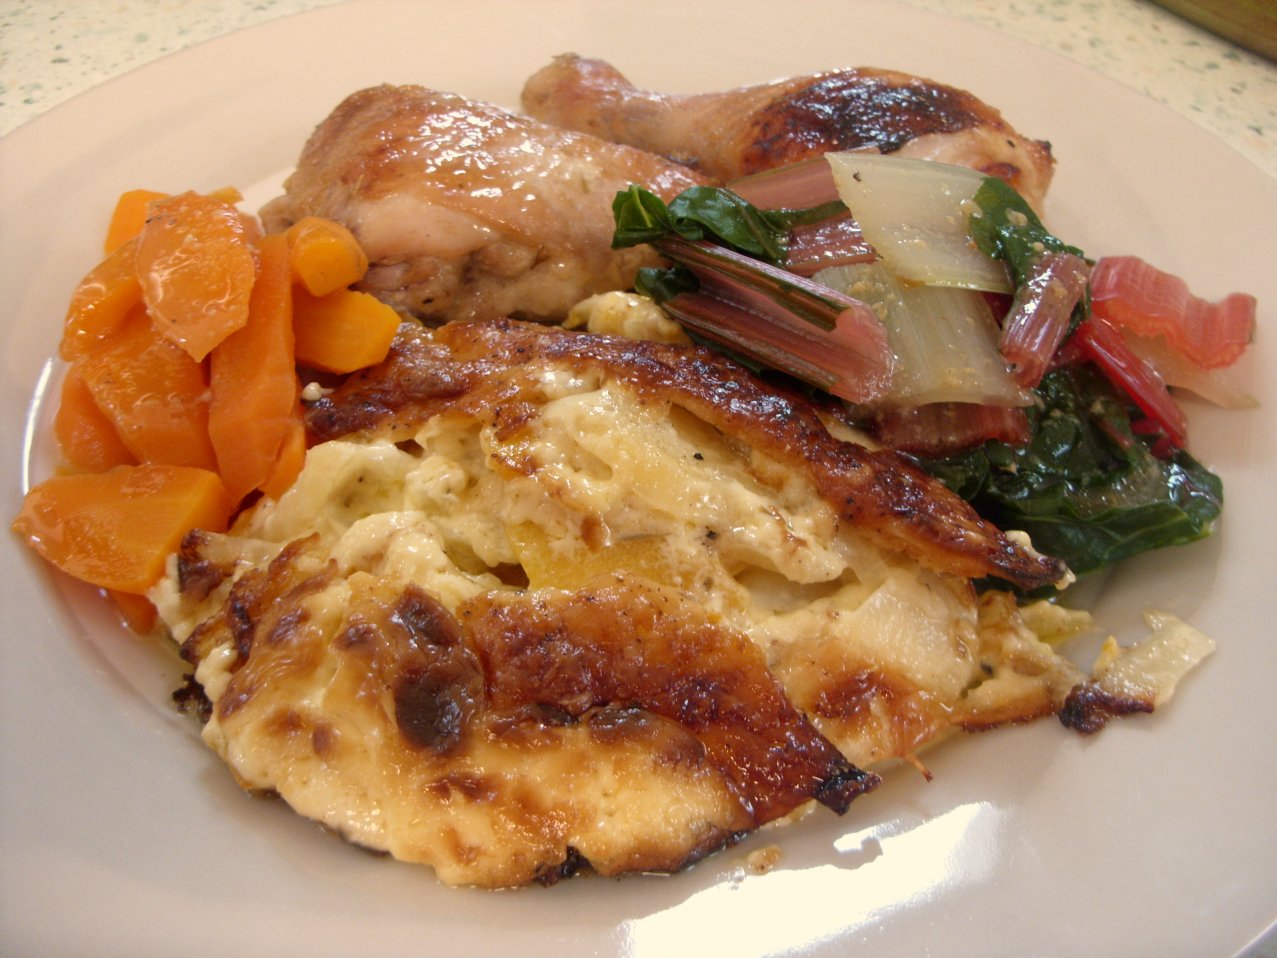
I partnered the bake up with some honey & mustard chicken (gorgeous) together with some steamed young carrots and rainbow chard from thevegibox.com. This was our first go with chard as a side veggie and combined with the cooking juices from the chicken, it was really good. It didn't taste how I was expecting it to - it has a definite spinach quality, whereas I was expecting more of a cabbage quality. Very nice!
The chicken was rolled around in some runny honey that I'd combined with Dijon mustard, a little dried thyme and a pinch of salt and pepper. It baked up well and provided some lovely juices that stood in well instead of having to make a gravy or jus.
The whole family enjoyed the meal and there were clear plates all round. Can't ask for more than that!
I'll go with a "yes", I think.
I was slicing parsnips and squash (beautiful parsnips and squash from thevegibox.com), to make this creamy parsnip & squash bake. Poor hubby and son & heir came back from walking the dogs, to find me hyperventilating whilst holding my right hand in the air with my little finger swathed in kitchen paper. Yes, it did leak - copiously. However, with the addition of a dressing, a plaster and a latex glove, I soldiered on like the brave likkle Cook that I now am.
Now, this 'ere bake very definitely deserves its own recipe post - so watch this space and it shall appear. It was utterly delicious, incredibly moreish and comfort food to the Nth degree. Like so many of my favourite recipes, it was so easy to make too! (Well, not counting the first aid requirement).
I partnered the bake up with some honey & mustard chicken (gorgeous) together with some steamed young carrots and rainbow chard from thevegibox.com. This was our first go with chard as a side veggie and combined with the cooking juices from the chicken, it was really good. It didn't taste how I was expecting it to - it has a definite spinach quality, whereas I was expecting more of a cabbage quality. Very nice!
The chicken was rolled around in some runny honey that I'd combined with Dijon mustard, a little dried thyme and a pinch of salt and pepper. It baked up well and provided some lovely juices that stood in well instead of having to make a gravy or jus.
The whole family enjoyed the meal and there were clear plates all round. Can't ask for more than that!
4 August 2013
Lemon & poppyseed sauce for chicken - that's different!
Well now it's not often that I post up a recipe for just a sauce, so maybe that gives you an indication of how much I rate this particular sauce.
What makes it so special? You may well ask - and it'd be a good question. I reckon it is the juxtaposition (phew, big word!) of the lemon against the soured cream against the savoury shallots against the big textural input of the poppyseeds. It's just like nothing I've ever had before.
I found the recipe for the sauce in the latest edition of the BBC Good Food magazine again (there's going to be a few of those cropping up - it was a great edition!) and once again it isn't out on the website yet. I'm sure it will be there eventually, but until then, you can find it here.
Both myself and the original recipe used it to accompany roasted chicken pieces with roasted root vegetables, which was great. I also added some mashed potato - which went down very well with myself and son & heir, but not so well with potato-hating Hubby. We've resolved to use sweet potato for him in future, as they would go so well with this sauce.
I have also just finished off the remainder of the sauce by putting it over some noodles with sweetcorn added. It was certainly different - and very nice. I think I'd have preferred peas, but we have a glut of sweetcorn, so that got used instead. It didn't matter, I reckon you could eat yesterday's newspaper with that sauce and it'd taste good.
It is simplicity itself to make - and if you think ahead and bake or roast your meat and vegetables, then that will leave you the time to concentrate on cooking the sauce.
One cook's note is to make sure not to reduce it too far, because as soon as it hits the plate it begins to thicken - most mysteriously - so you need it to be verging on the point of being too thin before you serve it.
I used our beautiful Amalfi lemons for it, which gave it a slightly sweeter note than perhaps using normal lemons would have done, but either way I'm sure it would be fab. The shallots gave it that savoury edge, with the lemon creating flavour and tang, the paprika gave wonderful colour and broadened the fruity flavour. Of course, the honey sweetened the whole thing, the chicken stock (I used my favourite Essential Cuisine chicken stock powder) gave it body and the poppyseeds provided that amazing textural element as well as a very different flavour.
The original recipe included some fresh parsley which I left out as I had run out. I have to say that I didn't miss it, so feel free to add some in or leave it out as you wish.
I can imagine that this sauce would be lovely with just about any fish or meat other than smoked types. You would need to be careful over what sort of vegetables you put with it - I doubt that plain boiled cabbage, cauliflower or brussels sprouts would go so well. However, carrots, peas, parsnips, beetroot - all the sweeter flavours of vegetable complement its tanginess perfectly. Something fairly bland like mashed potato or rice (vegetable rice would be very good) would be perfect as it mops up the sauce and gives a different texture to that provided by the poppyseeds.
Just don't make or eat this sauce if you're dining with your boss, or are on an important date - those poppyseeds, they hang onto your teeth!
LEMON & POPPYSEED SAUCE (serves 4-5)
Ingredients :
1 tsp rapeseed or olive oil
1 shallot, finely chopped
1 tbsp poppyseed
1 tsp sweet paprika (not smoked)
200ml chicken stock
1 tbsp clear honey
zest of 1 lemon
juice of half a lemon
150ml soured cream
sea salt & freshly ground black pepper.
Method :
1. Heat the oil in a small saucepan and add the shallot. Cook over a gentle heat, taking care not to allow the shallot to brown. Once the pieces are turning transparent, add the poppyseeds and a teensy pinch of sea salt. Continue cooking until the shallot is completely transparent (around 5-7 minutes).
2. Add the paprika, chicken stock, honey, lemon zest and juice and stir well to combine.
3. Bring to a lively simmer and cook until the liquid has reduced by half.
4. Remove from the heat and add the soured cream. Stir through until completely combined and taste for seasoning. Add a little more salt and a good quantity of freshly ground black pepper.
5. Continue to cook on a gentle simmer until the sauce has again reduced a little and the consistency is that of double cream.
Serve with roast chicken and vegetables such as peas, carrots, roasted sweet potato etc., instead of gravy.
Printable version
What makes it so special? You may well ask - and it'd be a good question. I reckon it is the juxtaposition (phew, big word!) of the lemon against the soured cream against the savoury shallots against the big textural input of the poppyseeds. It's just like nothing I've ever had before.
I found the recipe for the sauce in the latest edition of the BBC Good Food magazine again (there's going to be a few of those cropping up - it was a great edition!) and once again it isn't out on the website yet. I'm sure it will be there eventually, but until then, you can find it here.
Both myself and the original recipe used it to accompany roasted chicken pieces with roasted root vegetables, which was great. I also added some mashed potato - which went down very well with myself and son & heir, but not so well with potato-hating Hubby. We've resolved to use sweet potato for him in future, as they would go so well with this sauce.
I have also just finished off the remainder of the sauce by putting it over some noodles with sweetcorn added. It was certainly different - and very nice. I think I'd have preferred peas, but we have a glut of sweetcorn, so that got used instead. It didn't matter, I reckon you could eat yesterday's newspaper with that sauce and it'd taste good.
It is simplicity itself to make - and if you think ahead and bake or roast your meat and vegetables, then that will leave you the time to concentrate on cooking the sauce.
One cook's note is to make sure not to reduce it too far, because as soon as it hits the plate it begins to thicken - most mysteriously - so you need it to be verging on the point of being too thin before you serve it.
I used our beautiful Amalfi lemons for it, which gave it a slightly sweeter note than perhaps using normal lemons would have done, but either way I'm sure it would be fab. The shallots gave it that savoury edge, with the lemon creating flavour and tang, the paprika gave wonderful colour and broadened the fruity flavour. Of course, the honey sweetened the whole thing, the chicken stock (I used my favourite Essential Cuisine chicken stock powder) gave it body and the poppyseeds provided that amazing textural element as well as a very different flavour.
The original recipe included some fresh parsley which I left out as I had run out. I have to say that I didn't miss it, so feel free to add some in or leave it out as you wish.
I can imagine that this sauce would be lovely with just about any fish or meat other than smoked types. You would need to be careful over what sort of vegetables you put with it - I doubt that plain boiled cabbage, cauliflower or brussels sprouts would go so well. However, carrots, peas, parsnips, beetroot - all the sweeter flavours of vegetable complement its tanginess perfectly. Something fairly bland like mashed potato or rice (vegetable rice would be very good) would be perfect as it mops up the sauce and gives a different texture to that provided by the poppyseeds.
Just don't make or eat this sauce if you're dining with your boss, or are on an important date - those poppyseeds, they hang onto your teeth!
LEMON & POPPYSEED SAUCE (serves 4-5)
Ingredients :
1 tsp rapeseed or olive oil
1 shallot, finely chopped
1 tbsp poppyseed
1 tsp sweet paprika (not smoked)
200ml chicken stock
1 tbsp clear honey
zest of 1 lemon
juice of half a lemon
150ml soured cream
sea salt & freshly ground black pepper.
Method :
1. Heat the oil in a small saucepan and add the shallot. Cook over a gentle heat, taking care not to allow the shallot to brown. Once the pieces are turning transparent, add the poppyseeds and a teensy pinch of sea salt. Continue cooking until the shallot is completely transparent (around 5-7 minutes).
2. Add the paprika, chicken stock, honey, lemon zest and juice and stir well to combine.
3. Bring to a lively simmer and cook until the liquid has reduced by half.
4. Remove from the heat and add the soured cream. Stir through until completely combined and taste for seasoning. Add a little more salt and a good quantity of freshly ground black pepper.
5. Continue to cook on a gentle simmer until the sauce has again reduced a little and the consistency is that of double cream.
Serve with roast chicken and vegetables such as peas, carrots, roasted sweet potato etc., instead of gravy.
Printable version
29 July 2013
Five spice & honey chicken with mushroom noodle stir fry
![]() |
The menu plan this week has had several different re-writings and re-shufflings largely due to circumstances changing at the last minute. As a result, this recipe got bounced off the list, then I forgot to get something else out of the freezer and suddenly it was back on again!
I'm glad I made it though, as it was really rather good.
It's all part of my on-going love affair with the chicken leg. As I've said before, I like chicken breast meat well enough - I just prefer the darker meat. As our butcher sells 5 good sized chicken breasts for £5, I'd been having that right up until it suddenly dawned on me that if I bought a chicken leg at the same time, that amounts to two dinners (three breasts/two breasts & a leg) as opposed to one and a bit. I know, I can't believe I didn't work this out sooner as well - but sometimes the obvious is the last thing we notice.
![]() |
| All dressed in their spicy goo and ready for the oven |
Well, I've done chicken in curry, chicken in citrus, chicken in a hat (alright, maybe not in a hat) but whatever there is to put chicken in, it feels like I've put it in it. However, up until now, I hadn't investigated the Chinese 5 spice route. Can't say that any more!
As I was pondering on what to put with the 5 spice, I had the dulcet tones of hubby running through my head. He was expounding on the fact that "the Eastern thing is the balance of salty/sweet/ sour etc.", so I kind of went along with that - except I totally missed out the sour thing. As they say in America, "so bite me". (Except, I'd really rather you didn't, on the whole). What I wound up with was the 5 spice for flavour, rapeseed oil to encourage the cooking and crisp up the skin on the chicken leg, honey for the sweet (and to caramelise slightly, which always looks great), soy sauce for the salty, a cheeky pinch of dried red chilli flakes for interest - and thought "that'll do!". Yes, I could have gone the whole hog and added some lemon juice, or vinegar or some other source of sour, but I was interested to know how the unbalanced version would come out. As it turned out, it was very nice indeed. (Thank goodness!).
![]() |
| Stir fry ingredients : check. But where's the noodles? |
![]() |
| Yum - looks healthy! |
![]() |
Now, a word must be had as regards oil. If you've been reading along over the years, you'll know that I fairly recently eschewed the use of olive oil in favour of our lovely locally produced rapeseed oil - for the health benefits as much as anything. As much as I love my rapeseed oil, it does have the unfortunate habit of spitting every flipping where if you use it at high temperature. I've got a bit fed up with it doing that - and consequently ruining whatever I happen to be wearing at the time, as I've pretty much always forgotten to put an apron on. We've always got sunflower oil in the house, as there are just some things that are better fried in sunflower than rapeseed (not many though, I'll grant you that!). However with a stir fry, because the veggies are fried for so short a time it always feels as though the oil is much closer to the surface than with other types of cooking and consequently, you want an oil that has a lovely flavour. My oil of choice is groundnut oil. Not surprisingly, it has a lovely, light and delicate nuttiness that goes so well with stir fry dishes and complements curried dishes too, without any of the heaviness that accompanies a mixed vegetable oil or indeed olive or rapeseed. If you haven't tried groundnut oil, I heartily recommend you get some in and give it a go. Not as your everyday oil - you want something healthy and full of the lovely omega fats for that - but for stir fries and curries. You'll be surprised.
So there we have it! I don't have any special points to make as regards the cooking, as that is simplicity itself. As regards the chicken, you can cook the breasts for the same time as the legs, so long as you remember to joint the leg portion. Just cut across the hinge joint and separate it into a drumstick and a thigh. That way it will cook a lot more quickly and correspond with the time it takes the breast to cook.
Use your own choice of stir fry veggies - they all take roughly the same amount of time to cook. Just remember if you're adding any extra veg., to cut it into similar sized pieces so that it all cooks in the same time scale. I sliced my mushrooms and cut the mange tout peas into three, which did the trick.
Mmmmn .... yummy chicken rules!
FIVE SPICE & HONEY CHICKEN with MUSHROOM NOODLE STIR FRY (serves 3)
Ingredients :
3 chicken portions (I used 2 skinless boneless breasts and 1 leg)
1 tbsp rapeseed oil
2 tbsp runny honey
2 rounded tsp Chinese five spice
a good pinch of dried red chilli flakes
1 tbsp light soy sauce plus another 2 tbsp
a pinch of sea salt & ground black pepper
2 tbsp groundnut oil
4 large chestnut mushrooms, sliced
2 cloves garlic, chopped
40g mange tout, each cut into three pieces
400g pack of fresh stir fry vegetables (cabbage, carrot, beansprouts, pepper etc.)
2 tbsp dark soy sauce
1 tbsp fish sauce
1 tbsp mirrin
2 tsp grated ginger (from a jar, but feel free to use fresh)
3 sheets of dried egg noodles.
Method :
1. Score the chicken breasts lightly across in a diamond pattern, to encourage the absorption of their marinade. Score the leg portion similarly.
2. In a bowl, mix together the rapeseed oil, honey, 5 spice, chilli flakes, 1 tbsp light soy sauce and some salt and pepper. Add the chicken and toss until completely coated. Allow to sit for as long as until you have the baking dish and veggies for the next stage prepared.
3. Slice the mushrooms and mangetout and chop the garlic.
4. Into a small bowl, add the 2 tbsp light soy sauce, the dark soy sauce, fish sauce, mirrin and ginger and stir to combine.
5. Place the chicken onto a baking dish with a lip - as it will generate some liquid that you don't want to spill all over the kitchen floor - and place into a pre-heated oven at 190degF/375degC/Gas 5 for 30 minutes or as long as until the juices from the chicken run clear.
6. When the chicken has just 15 minutes to go, bring a saucepan of water to the boil and add the groundnut oil to a wok. Heat the oil until almost smoking, then add the sliced mushrooms and stir fry for 2-3 minutes. Add the contents of the stir fry pack, the mangetout and the garlic and stir fry until tender.
7. When the chicken has just 5 minutes to go, add the sheets of dried noodles to the boiling water and simmer for 4 minutes or until the noodles are soft. Drain and return to the saucepan.
8. Add the soy sauce/mirrin/fish sauce/ginger mixture to the wok and allow to frizzle and reduce whilst you add the noodles. Toss and stir to make sure the noodles are coated in the sauce and vegetables.
9. Remove the chicken from the oven and serve with the noodle stir fry alongside.
Printable version
12 January 2013
Soy Braised Chicken with leeks - gentle sweet flavours
This lovely, gently flavoured dish was inspired by a photograph of a similar dish that I spotted in the BBC Good Food magazine this month.
As I recall, the original recipe had spring onions in it and as I don't do very well with spring onions - my tummy sometimes rejects them - and had a leek waiting for me to find it a job to do, it seemed a fairly obvious swap.
I'm still getting back into the swing of cooking following on from a nasty bout of the flu. Hence, I didn't really want to get involved in a long cooking procedure - so this recipe turned out to be perfect. If you do the entire process all in one go, you could probably be in the kitchen for some three hours or more - but I split it into various instalments. Well, it gave me a chance to have a bit of "downtime" inbetween the action.
We had bought an organic chicken earlier in the week, to have at the weekend. However, neither of us were in any fit state to be making roast chicken, so it had gone into the freezer. So as to make the most of the price of the chicken, I decided to joint it and make a stock for soup with the carcass. I reckoned that I could get at least three meals from the one chicken, that way. In fact, we've had two main meals and two lunches - with a leg still left to be used!
Once we'd taken son & heir to school, I got on with jointing the chicken (which I'm getting a lot better at!). It's not often that I get the opportunity to use organic chicken (although it would always be my first choice, if I could afford it) and this one was a beauty. The knife went through the breast meat like a hot knife through butter, which bode well for the tenderness of the cooked chicken. It wasn't a corn fed chicken, but the fat was a lovely deep yellow colour. I was surprised at how bruised the breast meat appeared to be in places - but I figure that milling around outside with its pals, I guess a chicken is bound to get bumps and scrapes.
The two breast fillets, a drumstick and a thigh went into a cling film covered bowl with the marinade and into the fridge for later.
The remainder of the carcass went into the slow cooker with a couple of carrots, some celery, an onion and a garlic clove, plus some herbs and a good quantity of water and some seasoning. There it stayed for the day, chuckling away and making some beautiful stock. I eventually stripped the chicken of all the tiny little bits of meat and made a Jewish-style chicken soup with the stock, which I'll blog soon.
It was a late pickup from school that day, so I needed to put the casserole together before we left to collect son & heir.
The chicken smelled wonderful as I browned the pieces in the frying pan and my hopes for a great dinner rose a little bit further.
It really wasn't a difficult procedure to get the casserole together and I finished with 10 minutes to go. We turned the oven on as we left to pick up son & heir. Once we got home, it was an easy matter of cooking some rice and broccoli - and serving it all up.
I had debated thickening the sauce, but looking at it, it seemed to me as though it would entirely change the character of the dish to have the sauce thick. It was supposed to be light and fluid - and there was broccoli and rice to soak it up with, so I took a chance and left it. Hubby would have preferred it thicker - I was anticipating that - but I was very pleased with it.
I very much liked the gentle flavours provided by the soy, mirrin and honey - which added to the flavour of the leek and broad beans, made it a balanced dish. Or so I thought, anyway. Hubby doesn't like broad beans much and would have preferred the sweetness of peas, rather than that slight bitterness that an un-shucked broad bean brings. Yes, perhaps I should have shucked the broad beans, but can I refer you back to the flu comment? Just the thought of sitting there shucking broad beans was enough to almost send me back to bed.
Son & heir appeared to enjoy the flavours, although he did agree with his Dad about the bitterness from the broad beans. I couldn't register said bitterness at all - all I could predominantly taste was the sweetness from the mirrin and honey, with the saltiness of the soy sauce!
So, I would advise caution when making this recipe. If your family is very anti thin sauces or bitter flavours, perhaps you should consider thickening the sauce with a little cornflour and using peas instead of broad beans. Alternatively, you could make something completely different!
I would be very happy to have this recipe again - although sadly I doubt I'll be making it in quite the same way. Bye bye broad beans and hello cornflour! *wink*
SOY BRAISED CHICKEN WITH LEEKS (serves 3)
Ingredients :
2 tbsp light soy sauce
3 tbsp mirrin
1 tbsp runny honey
a pinch of sea salt
2 boneless chicken breasts plus 1 thigh and 1 drumstick, skin on
1 tbsp rapeseed oil
1 small onion, finely chopped
1 leek, washed, halved lengthways and chopped
1 tsp grated ginger
100ml chicken stock
a good handful of frozen broad beans or peas.
Method :
1. Put the soy sauce, mirrin, honey and sea salt into a bowl and stir to combine.
2. Add the chicken pieces and stir to make sure they are all liberally covered with the marinade - then cover with cling film and leave for a minimum of half an hour.
3. Heat the oil in a frying pan and brown the chicken pieces on a high heat. Keep an eye on the chicken, as it will colour very quickly because of the sugars in the marinade.
4. Once browned, place the chicken into a casserole dish.
5. Add the onion to the frying pan and cook on a medium heat for 3-5 minutes, until softened. Add the leek and ginger and stir to combine.
6. Add the chicken stock and broad beans or peas. Allow them to heat through and taste the sauce for seasoning. If you think it is a little light on flavour or salt, add the remainder of the marinade and stir through.
7. Decant the sauce and vegetables into the casserole dish, cover and put into a moderate oven (180degC/350degF/Gas 4) for 45 minutes to an hour.
8. If, at the end of this time, you feel the sauce is either too liquid or not tasty enough, remove the chicken to a warmed bowl and cover with foil. Either decant the sauce into a saucepan, or place the casserole dish (presuming it can cope with being on a direct heat) onto a gentle heat and reduce the sauce until it has reached a satisfactory consistency or the flavour has intensified sufficiently.
Serve with plain white rice and some steamed broccoli.
Printable version
As I recall, the original recipe had spring onions in it and as I don't do very well with spring onions - my tummy sometimes rejects them - and had a leek waiting for me to find it a job to do, it seemed a fairly obvious swap.
I'm still getting back into the swing of cooking following on from a nasty bout of the flu. Hence, I didn't really want to get involved in a long cooking procedure - so this recipe turned out to be perfect. If you do the entire process all in one go, you could probably be in the kitchen for some three hours or more - but I split it into various instalments. Well, it gave me a chance to have a bit of "downtime" inbetween the action.
We had bought an organic chicken earlier in the week, to have at the weekend. However, neither of us were in any fit state to be making roast chicken, so it had gone into the freezer. So as to make the most of the price of the chicken, I decided to joint it and make a stock for soup with the carcass. I reckoned that I could get at least three meals from the one chicken, that way. In fact, we've had two main meals and two lunches - with a leg still left to be used!
Once we'd taken son & heir to school, I got on with jointing the chicken (which I'm getting a lot better at!). It's not often that I get the opportunity to use organic chicken (although it would always be my first choice, if I could afford it) and this one was a beauty. The knife went through the breast meat like a hot knife through butter, which bode well for the tenderness of the cooked chicken. It wasn't a corn fed chicken, but the fat was a lovely deep yellow colour. I was surprised at how bruised the breast meat appeared to be in places - but I figure that milling around outside with its pals, I guess a chicken is bound to get bumps and scrapes.
The two breast fillets, a drumstick and a thigh went into a cling film covered bowl with the marinade and into the fridge for later.
The remainder of the carcass went into the slow cooker with a couple of carrots, some celery, an onion and a garlic clove, plus some herbs and a good quantity of water and some seasoning. There it stayed for the day, chuckling away and making some beautiful stock. I eventually stripped the chicken of all the tiny little bits of meat and made a Jewish-style chicken soup with the stock, which I'll blog soon.It was a late pickup from school that day, so I needed to put the casserole together before we left to collect son & heir.
The chicken smelled wonderful as I browned the pieces in the frying pan and my hopes for a great dinner rose a little bit further.
It really wasn't a difficult procedure to get the casserole together and I finished with 10 minutes to go. We turned the oven on as we left to pick up son & heir. Once we got home, it was an easy matter of cooking some rice and broccoli - and serving it all up.
I had debated thickening the sauce, but looking at it, it seemed to me as though it would entirely change the character of the dish to have the sauce thick. It was supposed to be light and fluid - and there was broccoli and rice to soak it up with, so I took a chance and left it. Hubby would have preferred it thicker - I was anticipating that - but I was very pleased with it.
I very much liked the gentle flavours provided by the soy, mirrin and honey - which added to the flavour of the leek and broad beans, made it a balanced dish. Or so I thought, anyway. Hubby doesn't like broad beans much and would have preferred the sweetness of peas, rather than that slight bitterness that an un-shucked broad bean brings. Yes, perhaps I should have shucked the broad beans, but can I refer you back to the flu comment? Just the thought of sitting there shucking broad beans was enough to almost send me back to bed.
Son & heir appeared to enjoy the flavours, although he did agree with his Dad about the bitterness from the broad beans. I couldn't register said bitterness at all - all I could predominantly taste was the sweetness from the mirrin and honey, with the saltiness of the soy sauce!
So, I would advise caution when making this recipe. If your family is very anti thin sauces or bitter flavours, perhaps you should consider thickening the sauce with a little cornflour and using peas instead of broad beans. Alternatively, you could make something completely different!
I would be very happy to have this recipe again - although sadly I doubt I'll be making it in quite the same way. Bye bye broad beans and hello cornflour! *wink*
SOY BRAISED CHICKEN WITH LEEKS (serves 3)
Ingredients :
2 tbsp light soy sauce
3 tbsp mirrin
1 tbsp runny honey
a pinch of sea salt
2 boneless chicken breasts plus 1 thigh and 1 drumstick, skin on
1 tbsp rapeseed oil
1 small onion, finely chopped
1 leek, washed, halved lengthways and chopped
1 tsp grated ginger
100ml chicken stock
a good handful of frozen broad beans or peas.
Method :
1. Put the soy sauce, mirrin, honey and sea salt into a bowl and stir to combine.
2. Add the chicken pieces and stir to make sure they are all liberally covered with the marinade - then cover with cling film and leave for a minimum of half an hour.
3. Heat the oil in a frying pan and brown the chicken pieces on a high heat. Keep an eye on the chicken, as it will colour very quickly because of the sugars in the marinade.
4. Once browned, place the chicken into a casserole dish.
5. Add the onion to the frying pan and cook on a medium heat for 3-5 minutes, until softened. Add the leek and ginger and stir to combine.
6. Add the chicken stock and broad beans or peas. Allow them to heat through and taste the sauce for seasoning. If you think it is a little light on flavour or salt, add the remainder of the marinade and stir through.
7. Decant the sauce and vegetables into the casserole dish, cover and put into a moderate oven (180degC/350degF/Gas 4) for 45 minutes to an hour.
8. If, at the end of this time, you feel the sauce is either too liquid or not tasty enough, remove the chicken to a warmed bowl and cover with foil. Either decant the sauce into a saucepan, or place the casserole dish (presuming it can cope with being on a direct heat) onto a gentle heat and reduce the sauce until it has reached a satisfactory consistency or the flavour has intensified sufficiently.
Serve with plain white rice and some steamed broccoli.
Printable version
Subscribe to:
Posts (Atom)


