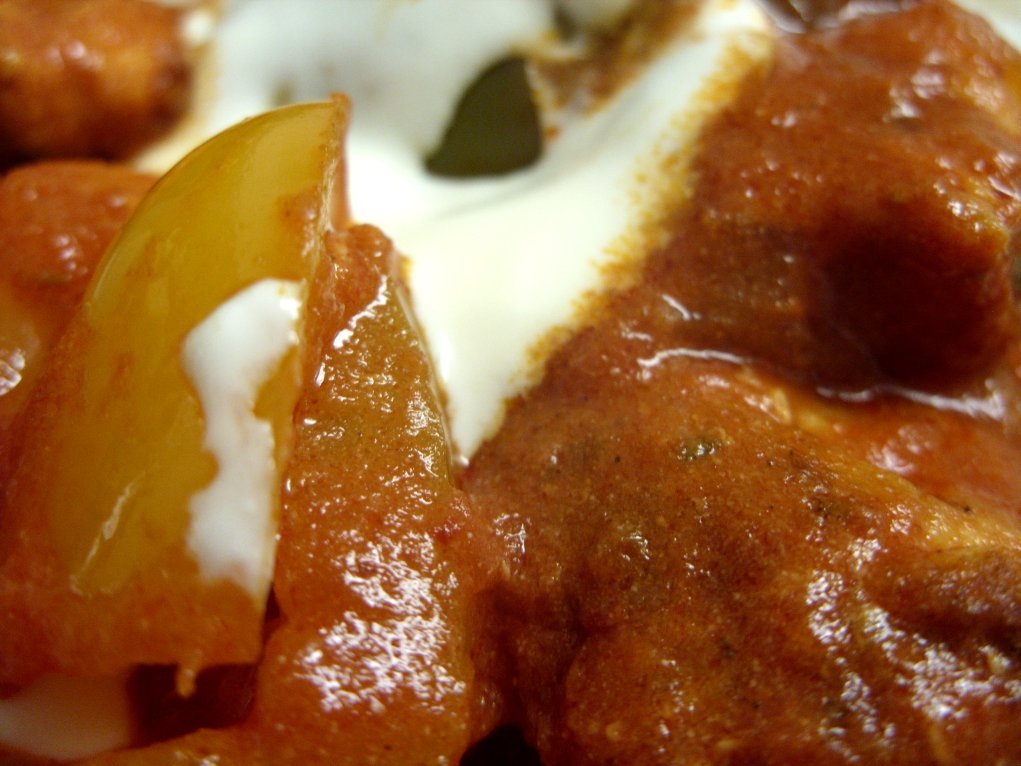
Showing posts with label soured cream. Show all posts

8 August 2017

Cheddar & chorizo quiche : a super-tasty surprise!

For some reason I decided to make a quiche. I haven't made one in literally ages and I don't really have a reason for it. But I was considering what to make for dinners this week and up popped "quiche" in my head. Well, it seemed like a good idea - particularly if I got some ready made pastry, that would make it a lot easier. So I did.  You can make your own pastry if you wish - feel free!  On a good day, so would I.

I already had some finely sliced chorizo in the freezer, left over from a paella. The idea of some good, mature cheddar with chorizo seemed to have merit. Ultimately, I also added some char-grilled red pepper - just a little bit - and a handful of chopped fresh parsley.  I also had a rush of blood to the head and added a teaspoonful of vegetable stock powder (bouillon, in other words) and I'm glad I did.  It didn't make a huge difference to the flavours, but it just savouried (is that a word?) everything up nicely.


The big difference with this quiche is that I took it upon myself to use sour cream.  I figured that the slight sourness of the cream would work well with the rich cheese and smokeyness of the paprika in the chorizo and so it did.


I think this is one of the best quiches I've made in a very long time.  I wasn't sure how it would all work out, but it worked out perfectly. Definitely a "do-again" quiche.

I have two Cook's Tips for you - firstly, there is no failure to using shop bought, ready rolled pastry.  It's quick, it's so simple to use and these days there are some really lovely tasting ones out there.  I got mine from Asda and it's perfectly acceptable.

Secondly, don't be tempted to skip the part-baking of the pastry case. It really does help to eliminate those soggy bottoms that can make quiche eating something of a trial.  All you need is some greaseproof paper and a pot of ceramic baking beans (or a quantity of dried beans - my Mum used hers for years and her pastry had an unmistakeable nuttiness because of them). It only adds 20 minutes to the baking time and in that time you can be making the filling. As the Nike ad. says, "just do it!".

Anyway, to the recipe!


CHEDDAR AND CHORIZO QUICHE   (serves 4-6)

Ingredients :

Approx. 300g shortcrust pastry (sufficient for an 8" flan dish, approx. 1" deep)
4 large eggs
250ml soured cream
a good pinch of ground black pepper
1 tsp vegetable stock powder (or vegetable bouillon powder)
40g finely sliced chorizo, sliced into small ribbons
50g mature cheddar cheese, grated
2 spring onions, sliced diagonally
1 tbsp char-grilled red pepper (from a jar), rinsed and sliced small
1 tbsp fresh parsley, chopped fine.

Method :

Your first job is to part-bake the pastry case.  So, pre-heat your oven to 180degC/350degF/Gas 4.  Then, cut a square of pastry that is significantly bigger than the baking dish or tin you will be using and gently sink it into the tin, making sure there are no bubbles under the pastry and it is pressed gently into the corners.  Trim off the excess with a sharp knife.

Cut a piece of greaseproof paper that is correspondingly bigger than the baking tin and crumple it up as though you're going to throw it away, then smooth it out again.  You'll find when it comes to laying it over the pastry, it will fit better now!  Lay it over the pastry and lightly smooth it across the base.  Pour in your baking beans in an even layer.

Place the tin centrally into the oven and bake for 20 minutes.  You can use this time to make the filling.

Break each of the eggs into a cup and pour them into a large bowl.  Doing this ensures that if one of your eggs is off or even slightly dodgy, you don't lose the lot!  Add the soured cream, black pepper and stock powder and give everything a good whisk to combine.  Add the chorizo ribbons, grated cheese, red pepper, spring onions and parsley and stir until everything is combined.

Remove the pastry case from the oven and gently lift out the baking beans by holding the greaseproof paper.  Set the baking beans aside to cool down.

Using a slotted spoon, spoon the solids from the mixture into the pastry case and distribute them around evenly.  Pour the leftover liquid into the pastry case.  You may find that you have slightly more than will go in - and better to do it this way around than find your quiche is full of egg mixture and there's no room for the chorizo!

Gently place the quiche into the oven and bake for 30-35 minutes, until the filling has risen, turned golden and feels fairly firm when pressed.

Remove from the oven and place onto a cooling rack for 5-10 minutes.  If your tin is a loose-bottomed one, you can now remove the quiche from the tin and place it back onto the cooling rack.  Serve whilst still a little warm with a crunchy garden salad.

Printable version

4 August 2013

Lemon & poppyseed sauce for chicken - that's different!

Well now it's not often that I post up a recipe for just a sauce, so maybe that gives you an indication of how much I rate this particular sauce.

What makes it so special?  You may well ask - and it'd be a good question.  I reckon it is the juxtaposition (phew, big word!) of the lemon against the soured cream against the savoury shallots against the big textural input of the poppyseeds.  It's just like nothing I've ever had before.

I found the recipe for the sauce in the latest edition of the BBC Good Food magazine again (there's going to be a few of those cropping up - it was a great edition!) and once again it isn't out on the website yet.  I'm sure it will be there eventually, but until then, you can find it here.


Both myself and the original recipe used it to accompany roasted chicken pieces with roasted root vegetables, which was great.  I also added some mashed potato - which went down very well with myself and son & heir, but not so well with potato-hating Hubby.  We've resolved to use sweet potato for him in future, as they would go so well with this sauce.

I have also just finished off the remainder of the sauce by putting it over some noodles with sweetcorn added.  It was certainly different - and very nice.  I think I'd have preferred peas, but we have a glut of sweetcorn, so that got used instead.  It didn't matter, I reckon you could eat yesterday's newspaper with that sauce and it'd taste good.


It is simplicity itself to make - and if you think ahead and bake or roast your meat and vegetables, then that will leave you the time to concentrate on cooking the sauce.

One cook's note is to make sure not to reduce it too far, because as soon as it hits the plate it begins to thicken - most mysteriously - so you need it to be verging on the point of being too thin before you serve it.

I used our beautiful Amalfi lemons for it, which gave it a slightly sweeter note than perhaps using normal lemons would have done, but either way I'm sure it would be fab.  The shallots gave it that savoury edge, with the lemon creating flavour and tang, the paprika gave wonderful colour and broadened the fruity flavour.  Of course, the honey sweetened the whole thing, the chicken stock (I used my favourite Essential Cuisine chicken stock powder) gave it body and the poppyseeds provided that amazing textural element as well as a very different flavour.


The original recipe included some fresh parsley which I left out as I had run out.  I have to say that I didn't miss it, so feel free to add some in or leave it out as you wish.


I can imagine that this sauce would be lovely with just about any fish or meat other than smoked types.  You would need to be careful over what sort of vegetables you put with it - I doubt that plain boiled cabbage, cauliflower or brussels sprouts would go so well.  However, carrots, peas, parsnips, beetroot - all the sweeter flavours of vegetable complement its tanginess perfectly.  Something fairly bland like mashed potato or rice (vegetable rice would be very good) would be perfect as it mops up the sauce and gives a different texture to that provided by the poppyseeds.

Just don't make or eat this sauce if you're dining with your boss, or are on an important date - those poppyseeds, they hang onto your teeth!


LEMON & POPPYSEED SAUCE   (serves 4-5)

Ingredients :

1 tsp rapeseed or olive oil
1 shallot, finely chopped
1 tbsp poppyseed
1 tsp sweet paprika (not smoked)
200ml chicken stock
1 tbsp clear honey
zest of 1 lemon
juice of half a lemon
150ml soured cream
sea salt & freshly ground black pepper.

Method :

1.  Heat the oil in a small saucepan and add the shallot.  Cook over a gentle heat, taking care not to allow the shallot to brown.  Once the pieces are turning transparent, add the poppyseeds and a teensy pinch of sea salt.  Continue cooking until the shallot is completely transparent (around 5-7 minutes).

2.  Add the paprika, chicken stock, honey, lemon zest and juice and stir well to combine.

3.  Bring to a lively simmer and cook until the liquid has reduced by half.

4.  Remove from the heat and add the soured cream.  Stir through until completely combined and taste for seasoning.  Add a little more salt and a good quantity of freshly ground black pepper.

5.  Continue to cook on a gentle simmer until the sauce has again reduced a little and the consistency is that of double cream.

Serve with roast chicken and vegetables such as peas, carrots, roasted sweet potato etc., instead of gravy.

Printable version 

24 November 2012

Chicken Paprikash - easier than I thought!

I have made various paprika chicken dishes over the years, with - it has to be said - a mixture of success and failure.  As a result, I've become a bit nervous of the types of recipe that involve tomatoes (particularly tinned), chicken and paprika.

However, just lately I've seen a few recipes for Chicken Paprikash float past my consciousness and had found myself being drawn in to the idea once again.  After all, my paprika pork recipes seem to be successful, so there really was no reason why a chicken version wouldn't work.

Particularly now I've the right paprika.

Now, because nobody tells you - I shall pass on the wisdom of my years of getting it wrong.  

It seems as though buying paprika is one of those things that is fraught with misadventure.  In the past, I've had your usual supermarket-gleaned small pots of paprika, graduating to a small pot of smoked paprika.  They were okay - but I seemed to be missing out on the rich roasty toasty flavours that I see reported in food magazines and spoken of on food t.v.  So I began to consider (we're going back a number of years here) whether my little pots of paprika were really quite up to the job - and maybe there was a more "authentic" type of paprika that offered the flavours I was missing.

We kept our eyes open for different types and began to see recipes requesting the use of "sweet" and "hot" paprika.  Aha!  So there was different types available!  Why does nobody tell you that?  Why did it take me a number of years to establish that there are as many types of paprika in the world as there are recipes?  Well, that's the way it seems - I suspect there may be a few more recipes than types of paprika, in reality.  Only a few, mind.


So our first score was with a tin of smoked paprika.  This was before I realised that there was such an animal as a "sweet smoked" paprika.  I also didn't notice that there was a heat rating on the tin.  Ours was the hottest, at 3 chillies.  So that explained why, when I used three teaspoonfuls of paprika in a recipe once, it tasted appalling.  You see?  Nobody tells you these things.

After a period of some months spent looking, we eventually sourced some of the sweet smoked paprika - and tranquillity was once more restored in our recipes.

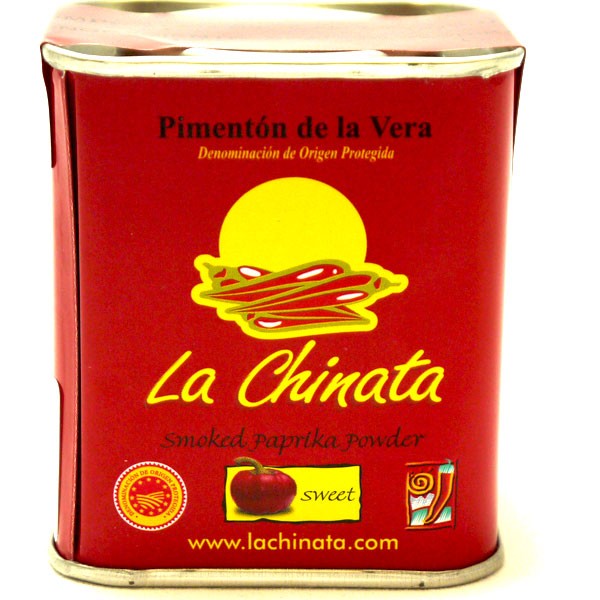
Now, note please that I said "tin".  If your paprika doesn't come in a tin, unless you've bought it on the continent somewhere, I suspect that you're being short changed in your paprika use.  So, if you too have some little jars of paprika quaking nervously in your spice cupboard, I suggest you give them a ceremonial heave-ho into the bin and source some La Chinata Paprika - but watch out for the chilli rating, to establish which one you've got!

So anyway, I've digressed.

I had been looking at the various recipes that floated past my consciousness and picking out the bits that I liked, rejecting the bits that we wouldn't like and pondering over the gaps.


It seems as though Chicken Paprikash is a particularly American recipe - although I may be wrong in that.  (NOTE!  See comment at the end of this posting, regarding the origins of Paprikash!).  I gather that there are two ways of eating it - one where the sour cream is included in the recipe and the other where you eat it with sour cream alongside.  I decided to go with the "sour cream alongside" version, although I will admit to hedging my bets with regard to that until it was almost ready to serve.  I reckoned that if the paprika or tomato was too strong, I'd just use the cream to calm it all down a bit.


As it was, the recipe - my version of the recipe - came together remarkably easily and didn't need calming down at all.  It's wonderful when you've got the right ingredients to begin with - god bless those little tins of paprika.

One of hubby's favourite vegetables is the sweet pepper (capsicum pepper) and so he was very happy to have both red and green versions in evidence.  The tomato cooked down beautifully and didn't become so acidic that it made the whole thing uncomfortable to eat and even the chilli flakes blended very happily into the whole, leaving their warmth and tangy spiciness as evidence of their presence.

I was really very pleased with the way this one turned out - it could so easily have degenerated into a disaster, but instead was a resounding success.


23 January 2018

I've just been contacted by my Hungarian friend Kate, who tells me the following :

"Chicken paprikash is a Hungarian dish. And there is no other "paprikash" dish we have (aka pork, etc). And what makes it "paprikash" is the authentic proper Hungarian paprika you use. Not smoked. Never smoked. (This is not a criticism! It is just a misconception peeps have that in Hungary we have smoked paprika. We don't. That is a Spanish thing. Hungarian paprika is not smoked. Ever.)

Anyway, I digress...  the other thing that really caught my eyes was chicken breast as meat. No. Nope. No how, not ever, nuh-huh!!! 😁😁😁 Chicken paprikash is traditionally made with either a combo of thighs and drums, or legs, or just thighs. Dark meat is where it's at!!"

❤"  
So there we are then!  The wrong end of the stick has been duly grasped and waved around, then corrected.  LOL  Hence, what we have here is very much "my version" of a true Paprikash.

CHICKEN PAPRIKASH   (feeds 3)

Ingredients :

2 tbsp rapeseed oil
2 onions, peeled and finely chopped
1 garlic clove, finely chopped
3 skinless, boneless chicken breasts cut into large chunks
1½ tsp dried oregano
1½ tsp sweet smoked paprika
½ tsp hot smoked paprika
½ tsp finely ground black pepper
pinch of sea salt
400ml can of chopped tomatoes
2 heaped tsp of tomato puree
a pinch of red chilli flakes
1 tsp sugar
1 yellow capsicum pepper, cored, de-seeded and chopped into large chunks
1 green capsicum pepper, cored, de-seeded and chopped into large chunks
100ml soured cream.

Method :

1.  In a large bowl, place the chicken chunks, the oregano, both types of paprika, black pepper and sea salt, plus half the garlic.  Stir to coat the chicken in the spices and leave to one side.

2.  To a deep wok or frying pan, add the rapeseed oil and the onions.  Fry on a moderate heat for 5 minutes or so, until the onion is transparent, softened and turning golden.

3.  Add the garlic and fry for another minute or so, stirring.

4.  Remove the onions and garlic onto a plate with a slotted spoon.

5.  Increase the heat under the frying pan and add a little more rapeseed oil, if necessary.

6.  Once the pan is very hot, add the chicken chunks and fry until caramelised on two sides.

7.  Reduce the heat to moderate, and add the tinned tomatoes, the tomato puree, chilli flakes, sugar and capsicum pieces, along with the onion/garlic mixture.  Mix well to amalgamate and cover with a lid (or a baking tray, in my case!).  Simmer for 30 minutes, stirring occasionally.

8.  Once the capsicum is tender and the chicken is cooked through, remove from the heat and add two thirds of the soured cream.  Stir through.

9.  Serve with white rice and a dollop of soured cream on the side.


29 April 2011

Honey mustard chicken with herb salad & jacket potatoes

In an attempt to put some lighter and remotely healthy dishes on the menu list, I hit upon the half-way house that is "something with salad and a jacket potato" idea.  The something being the star of the show, the salad being the healthy bit and the jacket potato takes on the role of the filler.

You see, I've discovered that if you go from big old hearty stews with dumplings, enormous bowls of steaming pasta, lovely warming soups etc. straight to salads, what you wind up with are a lot of peckish chaps by 9pm.

So, in this intervening period (Spring, some call it) I've been trying to hit upon nice half-way house types of recipes that suit the weather and suit everyone's need for something fresher and lighter for dinner.  Of course, needless to say, by next week it'll be sub-zero overnight and we'll be hankering for the old Shin of beef stews again - but I might as well try!

This Honey Mustard Chicken recipe is a perfect example of a recipe of the type.  The chicken is served hot, as is the jacket potato - so both warm you up a bit on a chilly evening.  However, the salad provides that fresh flavour and crunch that your tastebuds have been hankering for, after a couple of months of root vegetables.

In fact, this chicken recipe is the first for aeons that the glaze has actually gone right - and glazed the chicken, instead of falling off and resisting all attempts to have it do any glazing.  Instead, it normally winds up laying in the bottom of the pan sulking, claiming it's "not in their job description" and "a real cook would know how".

This glaze - whether it was the hotter temperature, or the size of the pan I got right - worked perfectly and the chicken came out of the oven suitably glazed, with a lovely soft, perfectly cooked middle.

Because I was cooking the Jacket Potatoes at the same time, I had the oven temperature up at 200 deg C instead of 180/190 deg C - which is what I would normally cook chicken at.  It seems as though I shall have to try this hotter temperature again, as it seemed to do the trick beautifully.

A word about the Jacket Potatoes themselves.  They were Asda's Extra Special Marabel potatoes, which I would heartily recommend.  They are sweet and fluffy - and the skins taste really richly potato-like.  Oh, and ignore the "won't need butter" instruction on the label - they might not NEED butter, but every jacket potato should have SOME butter!

July 2018

I have just made this yummy chicken dish again - except this time I paired it with some delicious paprika roast potatoes and a mixed salad with cherries.  I had forgotten how good the chicken tasted and how easy it was to make!  Here's the picture of today's incarnation.  :D


HONEY MUSTARD CHICKEN WITH HERB SALAD & JACKET POTATO  (serves 3)

Ingredients :

2 tbsp clear honey
1 tbsp grain mustard
half a lime, juice only
3 skinless chicken breasts

3 baking potatoes
1 tbsp olive oil
salt and pepper
3 knobs of butter
3 tbsp soured cream
3 tsp chopped fresh chives

A bag of herb salad
9 cherry tomatoes
some cucumber slices

Method :

Pre-heat oven to 200deg C/400deg F/Gas 6.

Take the three baking potatoes and clean them thoroughly, removing any dodgy looking eyes or scratch marks and rub in the olive oil to the skins of the potatoes and place onto a baking sheet.  Season both sides of the potatoes, then place into the oven for an hour.

Mix the honey, mustard and lime juice together in a small bowl.

Trim the chicken breasts of any fat and arrange them in a baking dish.  Spoon the honey/mustard/lime juice mix over, taking care to cover every inch of the chicken.

Place into the oven for 20-25 minutes or until the chicken is white all the way through and not showing any pink liquid when pierced with a knife.

In the meantime, open a bag of herb salad and arrange a portion onto each of the three plates.  Add the cherry tomatoes and cucumber.

When done, place a jacket potato alongside the salad.  Cut a cross into the top of each and squeeze gently to raise the flesh of the potato.  Add a knob of butter, a tbsp of soured cream and sprinkle the chives over.

Add the chicken with a little of the cooking juices spooned over and serve.

Printable version

14 April 2011

Spicy chicken with Mango Salad

I should, really, be entitling this one "Spicy chicken with mango salad (providing your grocery delivery contains a ripe mango)".  However, let's assume that mine did - and I'll tell you about it anyway.

Sorry about the dappled light - it was a pleasant evening!
This is one of those "had it before, last summer, liked it, decided to have it again" dishes.  Except (there always is, isn't there?) there is a difference this time, in that because we now have a shiny new non-stick (and it IS non-stick) frying pan, I decided to pan fry the chicken.  Last time I cooked the chicken in the oven, which results in a bit of a different finish.  Still nice, but it doesn't have the lovely crunchy crust of garam masala and curry powder that the chicken breast develops while it is cooking in the pan.

I also found it a lot easier to decide when the chicken was "just" done, which left it lovely and moist.  With oven cooking, you're at the mercy of the cooking time given by the recipe and the vagaries of your own oven.  You can't keep on checking it, because every time you open the oven door you're letting all the lovely heat out and so the chicken slows down the cooking process.  More often than not, it results in a very slightly overcooked chicken.  With pan frying, it was perfect.

True honours must go to the lime and sour cream dip/accompanimentNow I love lime and will eat it raw given the chance, so I have a suspicion that I enjoyed it rather more than the chaps did.  In fact, son & heir wouldn't touch it following on from a taster on the end of a piece of naan bread.  Hubby used the prescribed amount to accompany his chicken and dress his salad and agreed that it went very well with both - and as a dip for the somewhat surplus to requirements naan bread that was recommended by the recipe.  As for me, I took the remainder of the naan bread and the lime dip and ate it later on when I was watching t.v., it was that nice!


As I say, I really don't know what the naan bread was supposed to bring to the dish and definitely wouldn't have it again.  If you're desperate to have some carbohydrate input into the dish, a potato salad or maybe potato wedges would have been nicer.

One point of difference between the photograph and the recipe is the way we dealt with our cucumber.  In order to save hubby's sore mouth (where he'd bitten himself the night before) we sliced the cucumbers far more thinly than prescribed.  I don't think it mattered, but you may have wondered why!


The dish received a mixed reception from the chaps, in that hubby thought the chicken was rather one-dimensional and wouldn't be rushing to have it again, although equally he wouldn't say no if we did.  Son & heir hated the lime dip (~sob~) but liked the chicken.  Personally, I liked all of it and would very happily have it again tomorrow.  So this leads me to think that perhaps it's something of a "girl's dish", rather than something that appeals to big rufty tufty chaps.


SPICY CHICKEN WITH MANGO SALAD (serves 3)


Ingredients :


3 skinless, boneless & trimmed of all fat, chicken breasts
a drizzle of olive oil
1-2 tbsp garam masala (depending on the size of the chicken)
1-2 tbsp madras curry powder (as above)
sea salt
freshly ground black pepper
1 large ripe (ha!) mango
half a cucumber, pips removed and sliced into chunks diagonally
half a small red onion, sliced finely
a few Romaine lettuce leaves, shredded
a handful of fresh coriander leaves
4 tbsp sour cream
grated zest and juice of half a lime


Method :


1.  In a large plastic bag, add the chicken, the olive oil, garam masala, curry powder, salt and pepper.  Seal the bag and massage the mixture together until the chicken has been liberally coated.  Put to one side to briefly marinade.


2.  Mix the sour cream together with the lime zest and juice, season and mix thoroughly.
Put to one side in the fridge to stay cool.


3.  Heat a griddle or frying pan until hot.  Add the chicken and cook each side for 6-10 minutes over a low to moderate heat, allowing a crust to form.  Try not to flip from side to side, as it takes the contact between the pan and the chicken to really cook that crust.  You will find that the chicken becomes ever so slightly charred in places, which all adds to the flavour, but don't overdo it!


4.  While the chicken is cooking, prepare the salad by peeling and slicing the mango into thin wedges.  Place in a large bowl and add the cucumber pieces, lettuce, onion and coriander and toss together.  Season.


5.  To serve, pile the salad onto plates and slice each chicken breast into three.  Place with the salad and serve a dollop of the lime/sour cream mixture by the side.


Tuck in!


.

9 March 2011

Austrian Beef Goulash

Not so long ago, I had a crack at making Hungarian Beef Goulash.  It wasn't so terribly successful in that the broth/sauce was far too thin for hubby's tastes and the paprika didn't feature well enough in the general flavour.

I resolved to have another go at another time, as once I'd fixed the thin broth issue, the paprika issue should be easier to define.  However, in the meantime, I discovered this "Austrian Beef Goulash" recipe.

Now this intrigued me, as I wondered what made it "Austrian", as opposed to "Hungarian".

Having made the dish, I think the largest differences are the degree of tomato that is employed, plus the lack of caraway seeds.  In truth, though, it really is very similar.

Oddly enough, even though the recipe uses two tablespoonfuls of paprika, hubby still declared the paprika flavour to be lacking.  I might have to use three tablespoonfuls in future, although I am a tad nervous of overdoing it for everyone else!

I used beef shin in mine, as I am trying  - where possible - to use cheaper cuts of meat.  Doing that is good for my purse and good for the global waste issue.  I extended the cooking time of the original recipe to some three and a half hours (at a low heat) to ensure that the fat was all rendered down and the meat super-tender.  Shin of beef really does lend itself to this type of cooking, as the flavours were superlative.

It is worthwhile, when cutting up the beef, to make the cubes a little bit larger than one normally would for this kind of meal.  The sauce becomes quite thick and we've discovered that it is difficult to find smaller cubes when it comes to plating up.  You don't want to plate up two ladlefuls of sauce, whilst leaving all the beef in the pan!

One other advantage to using shin of beef, is that Jonty and Basil (the dogs) get the offcuts.  From the moment my feet touched the kitchen floor, Jonty (the Saluki) was in attendanceHe's a very attentive companion, as he watches everything being got out of the larder, pan cupboard and fridge.  He begins to lick his lips as the onions go into the pan, as he knows the next job will be to cut up the meat.  I think, however, he just doesn't understand why I insist on calling Basil (Jack Russell) to come and share the haul.  He'd be really much happier if I'd leave Basil sleeping and let him (Jonty) have the lot!

AUSTRIAN GOULASH (feeds 3-4)

Ingredients :

3 tbsp sunflower oil (sunflower is best, as it can attain a greater heat than olive)

2 large onions, sliced
2 garlic cloves, grated
4-5 chesnut mushrooms, quartered
600g shin of beef, cut into large cubes
2 tbsp paprika (more, if you desire)
2 tbsp plain flour
salt & pepper
3 tbsp tomato puree
2 tbsp wine vinegar
1 tsp mixed herbs
125ml red wine
400g can tomatoes or 500ml passata
350ml beef stock
2 large red peppers, cut into rings
142ml carton soured cream
chives, chopped, to garnish


Method :

1.  Heat a tablespoonful of the oil in a flameproof casserole over a medium to low heat, and cook the onions until soft - approx 5 minutes or so.


2.  Add the garlic and mushrooms and continue cooking and stirring for another five minutes or so, then set aside.


3.  Add the remainder of the oil and, on a high heat, add the beef and sear until browned.


4.  Return the onion mixture to the pan and add the flour, seasoning, paprika, tomato puree, vinegar and herbs.  Stir well, then add the wine and bubble for a minute or so.


5.  Add the tomatoes, stock and bring to the boil.  Stir all the time, to avoid lumps forming in the sauce.  Once boiling, check the seasoning.


6.  Cover and place in the oven for two hours.


7.  Remove from the oven to add the peppers and stir through.  Put back in the oven for another hour.


8.  Serve with white rice, sour cream and chopped chives sprinkled over.


.
 

4 March 2011

Kielbasa Polish Sausage with Red Cabbage

I don't really know what it is about the Polish cuisine, but I really, really enjoy making Polish - even Polish-sounding - dishes.  I've never met a Polish person that I didn't like, (hiya Rad!) and if anyone suggested going there for a holiday, I'd seriously consider it.

We had already discovered Kielbasa sausage (available from Asda in Bournemouth) and are confirmed Kielbasa fans.  Hence, when I spotted a recipe involving "Polish sausage", I knew what we were talking about.

I was looking for a dish that would be relatively easy to make.  One that either I could make earlier in the day and just pop in the oven to get on with cooking, or one which didn't require me to chivvy it along.  The reason for this is that I knew that today was going to be a fairly busy day - as indeed, it turned out to be - and that I also wanted to cook some chicken liver pate for us to have on Saturday for supper.

My disability is one of those conditions that results in your having the best of your energy supplies available in the morning (usually), which is why we do the shopping etc. then.  Some evenings, it really is more than I can do to cook a meal - which is why you'll find items being bumped from the menu list.  However, because I meal plan, I was able to find an easy recipe that would mean I had "enough left in the tank" to tackle the pate later on.  Oh how I envy those people who can spend the evening baking!  At one time I would have been able to do that, but then I was far too busy gallivanting around with my horses!

The recipe begins with the requirement to pour a kettle of boiling water over your sliced cabbage.  Now I've absolutely no idea why you're required to do that - except for the fact that I noticed it changed the flavour slightly, bringing out the sweetness of the cabbage.  It also lost that "rawness" that features in dishes like coleslaw and ran colour all over the sink.  Well, that was fine, because my chopping board was already purple, my hands were an interesting blue colour and the colander was all the colours of the rainbow!  As for my t-shirt, well, all I can say is I forgot to put my pinny on again.  *sigh*

However, the most entertaining part of the whole recipe (apart from eating it, of course!) was the chemical reaction involved when you pour the five tablespoons of lemon juice over the purple cabbage and watch it turn hot Chinese pink.  Who knew you could use purple cabbage leaves as litmus paper?  Not me.

A point of note is the involvement of the sugar/cornflour mixture.  I was a tad dubious about this, as my cabbage wasn't producing much in the way of juice.  The lemon juice and the wine hadn't really helped much either, so I was cautious when adding the cornflour mixture.  Just as well, as everything dried up and I was required to add around 100ml of water with each half of the cornflour mixture.  The end result was a lovely glossy sauce which, coupled with the sour cream on the potatoes, was more than enough to moisten what would otherwise have been a dry dish.

I absolutely adore the juxtaposition of the colours.  The dark purple-pink of the cabbage against the white of the sour cream, with the lurid green of the chives lifting everything and providing that splash of green that makes a dish look so tempting.  The flavours went so well together, too.  The cabbage took on the flavour of the Kielbasa almost instantly and both flavours went so well with the lemon, butter and wine.  To quote Masterchef - it worked.  It worked all the better for the rich nuttiness of the oven-baked potatoes, together with the sour cream bringing its lovely creaminess to the table, with the chives adding that alternative level of flavour.

Would I make this one again?  You bet I would - even though son and heir didn't like the cabbage overly much.  ~shrug~  He's got the jacket potato and the sausage, he won't starve!
Look at those colours!
 KIELBASA SAUSAGE WITH RED CABBAGE  (serves 4)

Ingredients :

1 large red cabbage, sliced
2 litres boiling water
2 tablespoons butter
2 shallots, finely chopped
5 tbsp lemon juice
125ml red wine
half a tsp salt
quarter of a tsp ground black pepper
2 tsp dark brown soft sugar
1 tbsp cornflour
400g Kielbasa sausage, sliced
3 large potatoes, suitable for cooking in their jackets
1 tbsp olive oil
sea salt
black pepper
1 small tub sour cream
handful of chives, chopped fine.

Method :

1.  Place the cabbage in a colander and pour the boiling water over the cabbage.  Allow it to drain well.  Pre-heat your oven to 180deg.

2.  Melt the butter in a large heavy-bottomed saucepan.  Add the shallots and cook for around 5 minutes or until golden, transparent and sweet.

3.  Add the cabbage and stir in the lemon juice.  Cook and stir for around 5 minutes, until the cabbage is pink.  Marvel at the magic that created that colour!

4.  Add the wine, salt and pepper, then cover and simmer on a low heat for 45 minutes.

5.  Prepare the potatoes ready to be baked in their jackets.  Check them over thoroughly, removing any blemishes and wash them carefully.  Prick each potato with a sharp knife three or four times each side.

6.  Place a tablespoon of olive oil on the centre of a baking dish and dip each potato into the oil.  Rub the oil over each potato, making sure it is completely covered, then place each around the baking dish, with enough room between the potatoes to allow a through flow of air.

7.  Season each potato well, especially with salt.  There's nothing nicer than a lovely salty potato skin.  Place them in the oven to bake for around 1 hour, turning them over half way through the baking time.

8.  Mix together the sugar and cornflour with a little water and add - half at a time - to the cabbage.  You may well need to add 100ml of water with each addition of the cornflour mixture, if you're not seeing a sauce appearing.  Stir well, to avoid the cornflour setting into lumps.

9.  Add the sausage pieces, stir well to combine, then cover and resume simmering for 30 minutes more.  You'll need to stir the pot every 10 minutes or so and watch the liquid levels, adding a little more water if needs be.

10.  Once the potatoes are done (when a vegetable knife inserted into them runs through without restriction), cut a cross into the top of each one, press the sides (through a tea-towel if they're too hot to touch) to bring some of the flesh to the surface and top with a dollop of sour cream and a sprinkle of chives.

Serve. 

 
Related Posts Plugin for WordPress, Blogger...