Showing posts with label baking. Show all posts

30 November 2018

Pork And Apple Pie - think a lighter textured pork pie!

The moment I saw this recipe in the Take a Break - My Favourite Recipes magazine, I knew I had to give it a go.  I've done a couple of variations on a pork and apple pie already - Kentish Pie and Ham & Apple Pie - both of which are really popular with the family, so I reckoned this would also be a hit.  Little did I know just how much of a hit it would prove to be!  It's hard to say which way I like it best - room temperature, or direct from the fridge.  All I know is that it is delicious and especially good with mustard or piccalilli!

Of course, apart from the delicious flavour of this pie and the lightness of the gorgeous pastry, one of the very best things about it is just how simple it is to make.  I suppose it all hinges on your using a tasty sausagemeat for it as you won't get good things back if you don't put good things in to begin with!  I picked a 72% pork sausagemeat, which was seasoned with sage, nutmeg, mace and black pepper.  Inevitably, I tinkered about with the quantities, plus I used smoked back bacon, which inevitably has more flavour than unsmoked and more meat than fat, I swapped the leek for a small red onion because hubby hates leek and also added more sage until my nose told me there was enough.


Contrary to the original recipe, I pan fried the bacon before adding it to the filling mix as I was a bit nervous about it discharging too much water in the cooking.  I also baked the pie in a loose bottomed sandwich tin (the recipe states to bake it free form on a baking tray) basically because my crimping is rubbish and I would have hated for it to have come apart during the baking or got washed away by all the water from the bacon.


All of my tinkering about with the recipe worked perfectly, resulting in a nicely shaped, full of filling, golden baked pie that will grace our Boxing Day buffet table very nicely thank you.  It will be lovely with the pickles and salad that accompanies the cold meats and cheeses and make a fabulous centre piece for the table.


Many thanks to Laurie Burley of Cornwall for sending in her delicious pie recipe to the magazine - I know it has instantly become a family favourite!

PORK AND APPLE PIE   (serves 6)

Ingredients :

For the pastry :

225g plain flour
140g cold diced butter
a pinch of sea salt
a quarter tsp of black pepper
1 tsp English mustard powder
2 egg yolks kept separate - one for the pastry and another for glazing
2 tbsp or thereabouts, of cold water (I used carbonated mineral water).

For the filling :

400g of your favourite pork sausagemeat
100g smoked back bacon, finely diced
1 sharp eating apple (I used a Braeburn), peeled, cored and finely diced
1 small red onion, finely diced
2 heaped tsp finely chopped fresh parsley
1 tsp dried sage
half a tsp ground black pepper.

Method :

Using a food processor (you can opt to rub in the butter, if you prefer), put the flour, diced butter, sea salt, black pepper and mustard powder in to the bowl and whizz for as long as it takes to get to tiny breadcrumb stage.  Add the one egg yolk and half the water and blitz again.  You are aiming for the crumbs to clump together and form a mass.  You may need to add the remainder of the water and continue blitzing until the clumps form.  Don't add too much water too soon, or you will potentially end up with a too wet mixture.  Some loose mixture is acceptable as it will all come together in the cling film.

Spread a large piece of cling film out across the worktop and tip the contents of the processor on top.  Fold the cling film over the top and gently press and pat the pastry together so that it forms a cohesive whole.  Then fold each end up to seal and place into the fridge for a minimum of 15 minutes.

Pre-heat the oven to 190degC/375degF/Gas 5.

Heat a frying pan and add the diced bacon.  Dry fry until all the moisture has evaporated and the pieces are beginning to turn golden.  Set aside.

Taking a large bowl, add the sausagemeat, cooked bacon, diced apple, diced onion, chopped parsley, dried sage and pepper.  Using your hand, squish and mix the ingredients together until everything is evenly distributed.  Try not to massage the mixture into a lump, but keep the texture light and broken up.

Reclaim your pastry from the fridge and roll out half of it to line an 8" sandwich tin - a loose bottomed one helps to get the pie out at the end of baking.  Trim the pastry off neatly and level with the top edge of the tin.

Place the sausagemeat mixture gently into the pastry case and distribute it evenly, making sure to not press down too hard.  Remember, you want to keep the texture light.  Level off with the top of the tin.

Taking your egg intended for glazing, brush a little egg around the inside edge of the small amount of pastry above the level of the meat.

Roll out the second piece of pastry and place over the top of the tin to create the pie's lid.  Ease the pastry down onto the top of the meat filling and press lightly to create a seal around the edge where the egg wash is.  Trim off neatly and crimp the edges in a pretty pattern.

Cut a cross into the centre of the pastry and turn back each quarter of the cross, to allow the steam to escape whilst baking.  You can decorate the surface with pastry leaves or whatever you want, at this stage.

Finally, egg wash the surface of the pastry and place into the oven for 30 minutes.  When the time is up, reduce the oven temperature down to 170degC/325degF/gas 3 and bake for another 15-20 minutes or until a knife inserted into the centre of the meat sends back some resistance, indicating that the meat is cooked, and the pie is lovely and golden in colour.

Remove from the oven and cool for 10-15 minutes on a wire rack.  While the pie is still quite warm, remove from the tin (this is where the loose bottomed tin comes in SO handy) and gently place back onto the wire rack to cool.

Serve at room temperature with pickles and salad, or chips and baked beans.  The pie is just as good served directly from the fridge, to have with pickles and salad or to take on a picnic.

Printable version

8 August 2017

Cheddar & chorizo quiche : a super-tasty surprise!

For some reason I decided to make a quiche. I haven't made one in literally ages and I don't really have a reason for it. But I was considering what to make for dinners this week and up popped "quiche" in my head. Well, it seemed like a good idea - particularly if I got some ready made pastry, that would make it a lot easier. So I did.  You can make your own pastry if you wish - feel free!  On a good day, so would I.

I already had some finely sliced chorizo in the freezer, left over from a paella. The idea of some good, mature cheddar with chorizo seemed to have merit. Ultimately, I also added some char-grilled red pepper - just a little bit - and a handful of chopped fresh parsley.  I also had a rush of blood to the head and added a teaspoonful of vegetable stock powder (bouillon, in other words) and I'm glad I did.  It didn't make a huge difference to the flavours, but it just savouried (is that a word?) everything up nicely.


The big difference with this quiche is that I took it upon myself to use sour cream.  I figured that the slight sourness of the cream would work well with the rich cheese and smokeyness of the paprika in the chorizo and so it did.


I think this is one of the best quiches I've made in a very long time.  I wasn't sure how it would all work out, but it worked out perfectly. Definitely a "do-again" quiche.

I have two Cook's Tips for you - firstly, there is no failure to using shop bought, ready rolled pastry.  It's quick, it's so simple to use and these days there are some really lovely tasting ones out there.  I got mine from Asda and it's perfectly acceptable.

Secondly, don't be tempted to skip the part-baking of the pastry case. It really does help to eliminate those soggy bottoms that can make quiche eating something of a trial.  All you need is some greaseproof paper and a pot of ceramic baking beans (or a quantity of dried beans - my Mum used hers for years and her pastry had an unmistakeable nuttiness because of them). It only adds 20 minutes to the baking time and in that time you can be making the filling. As the Nike ad. says, "just do it!".

Anyway, to the recipe!


CHEDDAR AND CHORIZO QUICHE   (serves 4-6)

Ingredients :

Approx. 300g shortcrust pastry (sufficient for an 8" flan dish, approx. 1" deep)
4 large eggs
250ml soured cream
a good pinch of ground black pepper
1 tsp vegetable stock powder (or vegetable bouillon powder)
40g finely sliced chorizo, sliced into small ribbons
50g mature cheddar cheese, grated
2 spring onions, sliced diagonally
1 tbsp char-grilled red pepper (from a jar), rinsed and sliced small
1 tbsp fresh parsley, chopped fine.

Method :

Your first job is to part-bake the pastry case.  So, pre-heat your oven to 180degC/350degF/Gas 4.  Then, cut a square of pastry that is significantly bigger than the baking dish or tin you will be using and gently sink it into the tin, making sure there are no bubbles under the pastry and it is pressed gently into the corners.  Trim off the excess with a sharp knife.

Cut a piece of greaseproof paper that is correspondingly bigger than the baking tin and crumple it up as though you're going to throw it away, then smooth it out again.  You'll find when it comes to laying it over the pastry, it will fit better now!  Lay it over the pastry and lightly smooth it across the base.  Pour in your baking beans in an even layer.

Place the tin centrally into the oven and bake for 20 minutes.  You can use this time to make the filling.

Break each of the eggs into a cup and pour them into a large bowl.  Doing this ensures that if one of your eggs is off or even slightly dodgy, you don't lose the lot!  Add the soured cream, black pepper and stock powder and give everything a good whisk to combine.  Add the chorizo ribbons, grated cheese, red pepper, spring onions and parsley and stir until everything is combined.

Remove the pastry case from the oven and gently lift out the baking beans by holding the greaseproof paper.  Set the baking beans aside to cool down.

Using a slotted spoon, spoon the solids from the mixture into the pastry case and distribute them around evenly.  Pour the leftover liquid into the pastry case.  You may find that you have slightly more than will go in - and better to do it this way around than find your quiche is full of egg mixture and there's no room for the chorizo!

Gently place the quiche into the oven and bake for 30-35 minutes, until the filling has risen, turned golden and feels fairly firm when pressed.

Remove from the oven and place onto a cooling rack for 5-10 minutes.  If your tin is a loose-bottomed one, you can now remove the quiche from the tin and place it back onto the cooling rack.  Serve whilst still a little warm with a crunchy garden salad.

Printable version

28 February 2016

Caraway & Lemon Sponge Cake - deliciously light as a feather!

I can't remember why I suddenly had a notion to make a caraway seed cake, all I know is that I'd been trying to make one for the last week or so.  Well, when I say "trying to" what I mean is trying to find time, rather than trying to and failing in a welter of eggs, butter and flour!

It has been an absolute dog's age since I last made a caraway seed cake and I recall the last one was very successful.  I've used caraway in various savoury recipes (braised red cabbage, that sort of thing) and had plenty to call upon in the cupboard - which always helps.


So this cake is actually a collaboration between Saint Delia Smith of hallowed baking and cooking fame and myself.  You see, I took Delia's Caraway Seed Cake recipe (just click on the link to see it) and adapted it with somewhat spectacular results.  It's often an extremely dodgy thing to do, adapting something like a cake recipe, but I've always been a tryer.

Because I'm me, I just had to consider a bit of a spin on an old favourite and decided to pair lemon up with the caraway.  It seemed to me to be a compatible pairing.  Delia's recipe uses ground almond and I didn't want that, so out that went and I simply replaced it with the same amount of flour.  To up the lemon influence, I added a small amount of lemon essence along with the lemon zest.

Oh boy, what a team we make, Delia and I.  The cake baked well, rose beautifully and smelled divine.


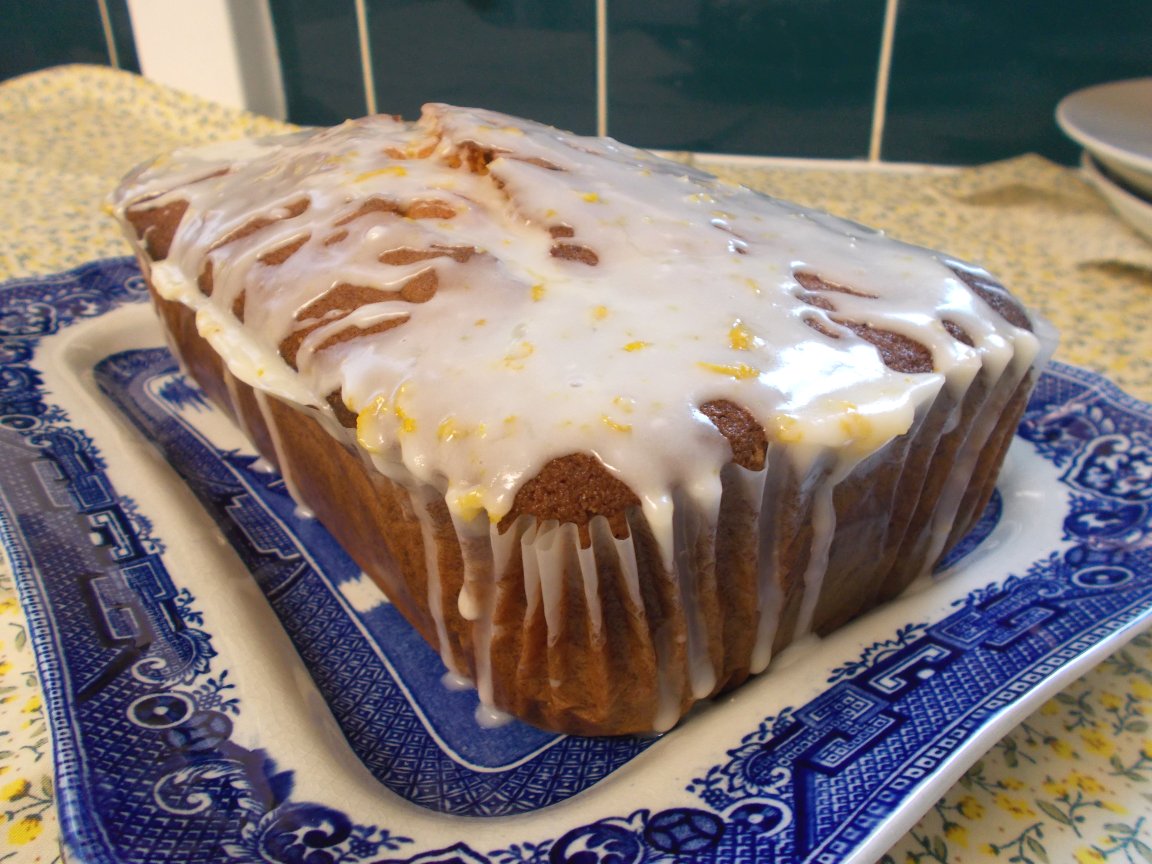
The addition of the lemon juice drizzle icing is perfect in that it adds a yummy zing to the cake and the caraway comes in once the lemon calms down, adding a deliciously warm aromatic element to the flavour.


The texture of the cake is just perfect, if I say so myself.  Light as a proverbial feather, it dances across your tongue like a deliciously cakey zephyr, leaving mouthwatering lemon and comforting caraway flavours.  Mmmmmn, get the kettle on Mother, I'll cut us another slice!

CARAWAY & LEMON SPONGE CAKE

Ingredients :


225g self raising flour

175g salted butter at room temperature
175g golden caster sugar
3 rounded tsp caraway seeds
zest of 1 lemon
half a tsp of lemon essence
3 large eggs
4 tbsp milk (I used skimmed goat milk).

For the icing :

3 tbsp icing sugar
zest of 1 lemon
juice of half a lemon.

Method :

Pre-heat the oven to 180degC/350degF/Gas 4.

Prepare a 2lb loaf tin by lining with either a pre-formed tin liner or with baking parchment.

Take a large mixing bowl and add all the cake ingredients (not the icing ingredients!).

Now, using an electric hand whisk, mix the lot up until you have a smooth, creamy consistency.  It really is as easy as that.

Spoon the mixture into the prepared tin.  Take a moment to level the surface to achieve a more even bake.

Place into the oven on a low shelf for 60-65 minutes or until a skewer inserted in the middle comes out clean.  It will be worthwhile checking the cake at around 40 minutes and placing some baking parchment over the top (we know this as "putting a hat on it!") if the cake looks particularly brown.

Once done, let the cake cool in the tin for some 10 minutes, then remove onto a cooling rack.

Once the cake is cool, mix together the icing ingredients in a small bowl and drizzle the icing over the top of the cake.  Allow some time for the icing to dry - and tuck in!

Printable version


6 December 2015

One bowl apple cake - moist, cinnamon rich and fantastic

It's been a while since I made a cake.  Well, the last one was for son & heir's birthday back in October - a zebra cake - which I haven't blogged yet.  (But I will!).  This one is nothing like as adventurous as that one, but you know?  I'd say this one was just as successful, if not more so.

I've said before about how recipes that have me dotting about the kitchen, doing one process after another, are no good these days.  Well that goes for baking too.  So you can imagine the attraction of seeing this recipe - one bowl?  Count me in!

Not only is it one bowl, but there's no messing about with whisks other than a hand whisk to blend the eggs in, there's no "mix this with that in one bowl, then that with this in another, oh and you'll need another smaller one for this and maybe to put that on a plate", thus creating a mountain of washing up.  Nope.  One bowl, a set of measuring cups (ones that microwave - for the butter, you know), a chopping board, knife and/or peeler and you're done.  I like that.
 
Hot out of the oven

I found the original recipe on Facebook and consequently, I have no idea who to attribute it to.  However, thank you - whoever you are - for your cake!  I'm not sure what - other than the simplicity of the preparation - it was that attracted me to this cake recipe.   After all, it's really just apples and cinnamon and I could get an apple/cinnamon fix from making an apple crumble.  It just looked like it would be munchy.  Munchy is good.

With a cup of tea?
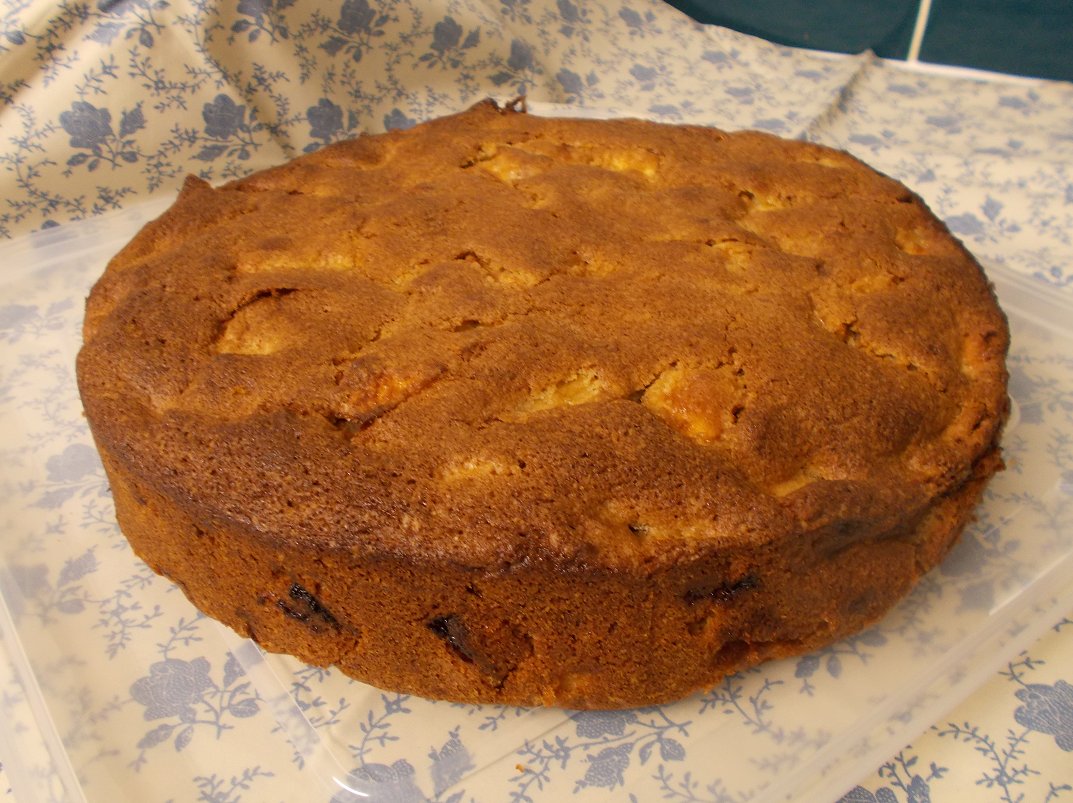
Having made the cake, I'm absolutely in love with it.  It has a lovely, slightly crunchy, caramelised top (which you could sprinkle some sugar onto, if you're not already scared by the amount of sugar in it, like I was), the cake itself is as light as a feather, the apple is cooked and juicy but not wet - it's perfect.  Perfect to have with a cup of coffee in the morning, at tea time in the afternoon or as a dessert.  Hubby reckons it'd be great with vanilla ice cream and I see his reasoning, however I like it with creme fraiche as the slight tanginess of the creme fraiche is a lovely partner to the sweetness of the cake.

Who am I kidding?  I'd eat this cake at any time of the day and with or without a drink alongside.  I really think it has taken the crown as my very favourite cake.  Sorry, coffee and walnut cake, you've just been superceded!
 
Cooled and ready to cut

Oh and don't think you need lovely fresh apples to make it work, either.  I used two very old and leathery Russets, one ancient Jazz, one sad and decrepit old Braeburn and two new, fresh and lively Braeburns.  Once they're peeled and in the cake, you can't tell the difference.  So, don't waste those wrinkly, sad apples - give them a splendid job to do and make this cake!

Or maybe with coffee - everything goes!
I have made some adaptions from the original recipe, in that I've reduced the sugar slightly (by a quarter of a cup), swapped the vegetable oil for melted butter, stipulated self raising flour and decreased the baking powder by a half teaspoonful to reflect that.  I shouldn't admit it, but I was amazed that the cake came out as well as it has, considering how much alchemy goes into cake baking.  It doesn't normally do to tinker about with recipes, but I definitely got away with it (and for the better, I am sure) in this instance.

Now, if you'll excuse me, I have a tea plate here and it is embarrassingly empty.  I believe I have some cake somewhere that will do the job nicely ...  

ONE BOWL APPLE CAKE   (serves 8-10)

Ingredients :

2 large eggs
1.5 cups golden caster sugar
2 heaped tsp cinnamon
half a cup of melted salted butter
6 medium crisp apples
2 cups self raising flour

1.5 tsp baking powder.

Directions :

Preheat oven to 180degC/350degF/Gas4.


In a large bowl, mix the eggs, sugar, cinnamon and melted butter.

Peel and slice the apples and add to mixture in bowl (coating as you go to keep apples from turning brown).

Mix together the baking powder and flour and add to the ingredients in the bowl. Mix quickly but well until all of the flour is absorbed by the wet ingredients.

Pour mixture into a lined 9″ round springform pan. Bake for approximately 55 minutes or until a skewer inserted into the middle, comes out clean.

Printable version

13 June 2015

Cornish Pasties - this time with suet pastry

For some reason, I had been hankering after making some Cornish Pasties for the longest time.  However, as hubby is always somewhat dubious about my pastry I hadn't broached the thorny subject.  What made the difference in this instance, was the advent of the suet pastry recipe from Jamie Oliver that I used in the making of the Kate & Will's Wedding Pie.  This pastry has been so successful that it has become both my menfolk's casing of choice for all savoury pies and pasties.

So when I suggested home made Cornish Pasties - for "English baking week" on one of my favourite Facebook pages - but made with the gold star of pastry recipes, hubby was won over and agreed.

Ready for the oven
Now I will admit that as regards the other Cornish Pasty recipe on Rhubarb & Ginger, it doesn't differ a very great deal.  However, I thought it was good to make a whole new blog posting about these pasties as opposed to simply making a note on the original recipe.  Clarity, and all that.  *wink*

All baked and ready for their paper bags and adventure!
Aside from the issue of the pastry, the only other significant differences between the two recipes are that this one uses chopped steak (rather than steak mince) and this one also utilises a half a crumbled Oxo cube by way of seasoning, to just up the flavour profile a wee bit.  Oh - and I paired mine with some healthy stir fried vegetables, whereas the menfolk had the ubiquitous man food of hash browns and baked beans with theirs.

The pasties turned out to be so very successful, as the pastry really is tasty and firm enough to easily cope with the filling.  Hubby felt that there still wasn't enough black pepper in them (even with my including it in the pastry!) for his liking and I do have to agree.  I think another half a teaspoonful would have done the trick, so feel free to add extra to the filling if you're a fan of peppery Cornish pasties.

I ate the one leftover pasty the following day for my lunch.  It was just as good, if not better, cold - and with some tasty pickle or relish would not be out of place on the lunch menu of any good Cornish pub.


Now I have a few Cook's Tips for you :

1.  It really is very important that the pastry is handled and worked as little as possible.  The longer it is handled or worked, the tougher it will bake.  As regards the water, I have found that carbonated mineral water adds a little lift, but if you don't have carbonated just ordinary very cold tap water will be sufficient.

2.  I roll the pastry out between two pieces of cling film rather than on a floured surface, which is by far the cleanest way I know of it do it.  Now this has the added benefit, once you've cut out your circle, of providing you with some cling film to close over the top of the pastry and prevent it from drying out while you make the other three!  I found it was worth turning the pastry over before adding the filling, as it was easier to pick it up from the cling film, that way.


3.  If you are using steak, rather than steak mince, you should ensure that the meat has a little bit of fat marbling it, for flavour.  Too lean and your pasties won't have that lovely beefy flavour.

4.  The black pepper is an essential - and more rather than less.


5.  A simple but most effective tip is always to egg wash before you cut the slits or holes in the pastry.  Do it the other way around and the holes will fill with egg which will seal as it cooks - and your pasties will unzip themselves in order to let the steam out.  It is also worth taking care to not let the egg drip off onto the paper lining or it will burn as the pasties cook.

There.  Who'd have thought making pasties could be so complicated?  *chuckle*  It isn't complicated at all really - it's just a matter of avoiding some of the little things that could so easily spoil what would otherwise be a perfect bake.

So now all you need is to find some brown paper bags in which to put your hot pasties, then off you go to somewhere suitably rural in which to eat them, along with lashings of ginger beer and some slabs of fruit cake.  Oh - that would be Dorset pasties then, not Cornish.  *wink*

Either way, in front of the t.v. or on a windswept hillside - enjoy them!

CORNISH PASTIES (suet pastry version)

Ingredients :

For the pastry ...
-  300g all purpose (plain) flour
-  100g vegetable suet
-  100g salted butter
-  pinch of sea salt
-  pinch of fresh ground black pepper
-  120ml very cold water (I use refrigerated and carbonated mineral water).

For the filling ...
-  300g lean beef steak, cut into strips, then diced finely
-  a medium onion, diced
-  1 medium sized potato, peeled and diced finely
-  one quarter (or less) of a swede (rutabaga), peeled and diced finely
-  a good pinch of sea salt
-  1 heaped tsp of freshly ground black pepper (more if you like it!)
-  half a beef Oxo cube, crumbled.

Optional : 1 tsp chopped fresh parsley.

1 egg, for egg wash.

Method :

1.  Firstly make the pastry, by placing all the ingredients but the water into a bowl.  Rub the butter into the flour (doesn't matter if some suet comes along for the ride) until you have small cornflake shapes.

2.  Add the water, mixing through with a knife until the dough begins to come together.  You may need a little more water, or a little less, so add it in a couple of instalments to be on the safe side.  Do not knead the dough at all.  Just pat and push it until it comes together in a ball.

3.  Wrap in cling film and leave to rest in the fridge for a minimum of 30 minutes.

4.  Take the filling ingredients and mix together in a bowl, making sure to crumble the half Oxo cube finely and mix it in well.

5.  Cut the pastry into four even sized pieces and roll each one out into a 4-5 inch circle.

6.  Egg wash around the edge of half of each circle.

7.  Divide the filling evenly between the four pastry circles, placing it on the opposite side to the egg wash.

8.  Fold the free edge gently over the top of the filling, pressing down lightly around the edges to seal.

9.  Crimp the edge in whichever manner you feel most confident, the important thing being that the edges are very well sealed.

10.  Place onto a parchment or non-stick silver foil lined baking tray.

11.  Egg wash the four pasties.

12.  Cut a couple of slits (or make holes) in the top of each pasty.

13.  Bake in a pre-heated oven at 200degC/400degF/Gas 6 for 10 minutes, then reduce the heat to 180degC/350degF/Gas 4 for another 40 minutes.  Remember to turn the baking tray half way through the cooking, to achieve an even bake.

Serve either hot from the oven, or cold the following day with a pickle such as my Rhubarb & Apple Relish.  Gorgeous!

Printable version


3 April 2015

Really Lemony Lemon Sponge Birthday Cake

This year was my mum's 80th birthday.  Now I know you're not supposed to broadcast a lady's age, but there comes a time when it is to be celebrated rather than hidden - and I reckon that 80 is that time.

My mum's birthday has been the source of some amusement and confusion over the years, because it arrives so quickly after Christmas - the 6th January - and she'd got fed up with having a Chrisbirthday.  One year we even tried delaying her birthday until May.  Of course, we all forgot and she didn't get a birthday at all that year.  Ooops.

In order to make a fuss of her, this year I decided to lay on an afternoon tea with every little tasty morsel in flavours that she would like and in sizes that would mean both her and my Dad could sample a little bit of everything.  As I know only to well, the older you get the smaller your capacity for tasty morsels becomes!


So we had a lovely tea, which consisted of Emmenthal & Bacon Quichelets, egg mayonnaise & cress sandwiches, Bavarian ham & wholegrain mustard sandwiches, a tiny salad in a leaf and almond & raspberry biscuits.  All of which were delicious and all of which led up to the piece de resistance - the lemon sponge birthday cake.

For one of my Dad's birthdays, I had made a big, butch, manly chocolate & beetroot cake which went down very well.  However, I needed something a lot more ladylike and refined.  I pondered on coffee cake, as I know she makes a wonderful coffee and walnut cake - but I doubted that mine would be able to compete and anyway, I felt it would be better to make something that wasn't "usual" for her.

Lemon top right being the interloper in the bunch!
Just that week, we'd bought some fantastic Sicilian lemons for use in drinks and I'd been able to sample how sweet and juicy they were.  This, naturally, brought the idea of the lemon sponge to the fore.  The Sicilian lemons would be perfect, as they were huge - so would provide a good quantity of lemon zest, they were as sweet as a dessert fruit and the intensity of the lemon aroma and zing was just incredible.  It just so happened that I also had a little bottle of Sicilian Lemon concentrate in the baking cupboard.  I felt sure that with a lemon curd filling, the cake would be perfect.

For the last 15 years or more, whenever I've been required to produce a sponge cake, I've used Delia Smith's All In One Sponge recipe.  I've made coconut versions, chocolate, lemon, coffee - just about every combination you could think of, so I didn't have to look very far for a tried and tested recipe.

However, this was an 80th birthday cake - so a dash of icing sugar on the top with a few sprinkles just wasn't going to cut it.  I needed to think up something a bit better as regards decoration.


So what do you think?  I reckon I thought up something a bit better than icing sugar and sprinkles.  *wink*

Now this was the very first time I had ever used fondant icing on anything - much less a very important birthday cake.

I made the cake the day before and kept it overnight in a freezer bag so as to ensure it didn't dry out at all.

The day before the tea party, I set to with fondant icing, apricot jam and lemon curd.  Well, the lemon curd bit was easy enough - a nice thick covering on top of one sponge and then delicately lay the second on top.  So far so good.

Next, was painting the surface and sides with watered down apricot jam - enough to help the fondant icing to stick nicely.

Then because the colour of the base icing was white, I spent a good ten minutes or so cleaning up every single little cake crumb (and sponge cakes are very good at shedding cake crumbs) from the working surface.

The leaves are finished, now for the flowers!
This next was the bit that I was the most nervous about, as I knew I had just one go at getting it right.  I had to roll the icing out (which it does very well, no arguing at all) to a shape that would easily cover the cake without any holes or gaps and make sure it didn't crack on the way from worktop to cake.  Deep breaths.  Well, it went perfectly.  As per the instructions, I draped the icing over the rolling pin and with a quick but steady "whoop!", whooped it over and flump - on top it went and couldn't have been better.  It sat perfectly (and without any militant crumbs to break the pristine whiteness), covered beautifully and I was able to trim it up so easily.  I don't really know what I was worried about.  *wink*

The next job was to smooth and stroke the white icing, so as to gain a slightly shiny surface rather than the matte one that is natural for the icing.  That took another ten minutes or so and a clean pastry brush certainly helped with removing the loose sugar grains.


All that was left was to cut out the leaves (easy done, with a set of differently sized icing cutters) and flowers (ditto), marble the icing with green food colouring and cut out more leaves, paint the plain coloured leaves (yes, every one was painted with food colour) in different shades and patterns and form some of the leaves (the ones to go on top) into distorted shapes so as to give the leaf trail some movement.

I used lemon juice to wet each leaf and flower before settling them into place on the cake.  Well, why turn down the opportunity to get a little more lemon flavour in there?  The icing is flavoured with vanilla naturally, so there was no clash in flavours.

The whole process of filling and decorating the cake took around three hours, all in all.  Every minute spent was worth it though.  If it wasn't for the fact that we'd all be shaped like bowling balls, I would make many more cakes that require extensive decoration!

I love how the cake looked when it was finished.  If I've ever been proud of something I've created, it was this.  Mum looked suitably impressed and happy with it when we produced it along with a truly appalling rendition of "Happy Birthday To You" and I hope its prettiness helped to smooth over the worst of the singing.

As for the recipe, I have set it out below as there are a couple of little baking variations to Delia's original recipe and if you want a REALLY lemony lemon sponge, you might want to follow along.

I haven't detailed the decoration in the recipe as you can serve the sponge very successfully with just a sprinkle of icing sugar on top.  You could even drizzle some lemon syrup over it once you've filled it - and some dairy cream would be delicious in the middle with the lemon curd if you're feeling summery too.  The world is your oyster with this sponge cake recipe, it really is that forgiving!  For dessert or with a cup of tea, it will do the lot.

Now, in an enormous departure for Rhubarb & Ginger - and as an indication of just how pleased I was with this cake - I took a 365 degree video of it.  Feel free to gasp in awe and exclaim in admiration, I'll hear you!


REALLY LEMONY LEMON SPONGE CAKE   (serves 6-12 depending on size of slice!)

Ingredients :

175g self raising flour
1 tsp baking powder
3 large eggs
175g caster sugar
175g softened unsalted butter
the zest of 1 large lemon
the juice of half a large lemon
1 tsp Sicilian lemon extract
4-5 tbsp lemon curd.

Method :

1.  Take a very large mixing bowl. Measure out the flour and baking powder and using a sieve, sift into the bowl.

2.  Now simply add all the other ingredients (apart from the lemon curd, which is for the filling) to the bowl and whisk everything together until you have a smooth, well-combined mixture.  Provided the butter is good and soft, this shouldn't take longer than a couple of minutes.

3.  You should have a soft mixture that is of dropping consistency.  If it seems a little too stiff, you can always add some more lemon juice or a tablespoonful of warm water to mobilise it a bit.

4.  Divide the mixture between two eight inch (20cm) tins that have a piece of greaseproof paper or cooking parchment covering the base of each and that have been lightly buttered.  Level out the surface but leave a very slight dip in the centre to prevent the cake from crowning too much as it rises.  Place on the centre shelf of a pre-heated oven at 170degC/325degF/Gas 3. It will take 30-35 minutes to cook – but don't open the oven door to check it until 25 minutes have elapsed.

5.  You will know when the cakes are done, by touching the centre of the cake lightly.  If your finger leaves no impression - and the cake springs back - it is cooked.

6.  Leave the cakes to cool slightly on a cooling rack, before removing them from their tins.  Leave them sat upon the paper layer, on the cooling rack, to cool completely.

7.  Once utterly cold, carefully remove the paper layer and decide which is to be the bottom layer and which the top.  Place the bottom layer onto your cake plate top surface down.  Coat the cake in the lemon curd - generously - and carefully lay the second cake on top.

8.  You are now free to decorate the cake in whichever way you feel appropriate!

Printable version


14 October 2014

Anzac biscuits - a terrific emergency biscuit recipe

You know, I'm sure hubby wasn't planning on making biscuits today.  Not as far as I was aware, anyway.  This morning we went and got the bulk of the week's food shopping in, then came home and hubby put the shopping away while I had a shower. Then, I discovered that he was busily making biscuits - Anzac biscuits, which turned out to be the scrummiest, most naughty thing! SO many calories per biscuit, but so yummy with their coconut and oats.

Do I hear you asking "what is an Anzac biscuit and why is it called so"?  Both of which are very good questions.

Well I first tripped over Anzac biscuits in a supermarket (can't remember which one) which was stocking packets of them around about Remembrance Sunday time.  A percentage of the proceeds were going to injured servicemen, as I recall.  Well, being soldier's daughter, I bought a couple of packets for the charity point of view, hoping they'd be nice.  They were more than nice, they're a fabulous accompaniment to a cup of coffee, or chai tea, or even builders' tea.  They're the old fashioned HobNob, made before HobNobs were even a twinkle in their creator's eye.

As for why they are called "Anzac Biscuits", well Anzac biscuits have long been associated with the Australian and New Zealand Army Corps (ANZAC) which was established in World War I.  It has been claimed the biscuits were sent by wives to soldiers abroad because the ingredients do not spoil easily and the biscuits kept well during naval transportation. So you can see the Forces connection.


It must have been a wonderful moment to receive a parcel from home which contained a package of these wonderfully, munchy, crunchy biscuits.  A little bit of heaven in an awful lot of hell.

Now from a current perspective, the speed at which hubby brought the biscuits together and baked them - probably around half an hour at the most - makes them one of the most agreeable "spur of the moment" or "last minute, Mother's on her way" biscuits to make.  The end result is certainly worth more than the time they took to make!


So, if you fancy some baking or you're cooking with your kids, give them a history lesson while they are baking and make some Anzac biscuits.  Your next cup of tea will thank you.

ANZAC BISCUITS   (makes 20)

Ingredients :

85g porridge oats
85g desiccated coconut
100g plain flour
100g caster sugar
100g butter, plus extra butter for greasing
1 tbsp golden syrup
1 tsp bicarbonate of soda

Method :

1.  Combine all the dry ingredients except the bicarbonate of soda together in a bowl.

2.  Melt the butter in a decent sized pan (it needs room to expand) over a low heat.

3.  Add the golden syrup to the butter.

4.  Put the bicarbonate of soda into a small cup, add the boiling water and mix.

5.  Remove the butter mixture from the heat and allow to cool for 30 secs or so.

6.  Pour in the bicarbonate of soda mixture to the butter and watch it froth!

7.  Quickly mix all the wet ingredients into the dry ingredients before you lose the froth and stir well until completely mixed.

8.  Make a flattened disc out of a spoonful of the mixture and place onto a lined baking sheet.  Make sure to leave at least 1" between each disc.

9.  Bake in a preheated oven at 180degC/350degF/Gas 4 for 8-10 minutes, watching them like a hawk to make sure they don't burn.

10.  Put each biscuit on a cooling rack until absolutely cold.


Calories per portion (1 biscuit) : 118 (wince) - however, they do keep well in an airtight tin!  (Reference : Calorie Counter).


10 March 2014

When life sends you rhubarb - make Rhubarb & Custard Cake!

Rhubarb and custard cake.  Now there's a duo of loveliness, embodied in a name.  Firstly, rhubarb and custard - who can resist?  Then, cake!  How on earth do you combine rhubarb, custard and cake, without turning it into trifle?  Well, read on, because it is possible, beautifully possible.

I have introduced you to Ruby, our rhubarb plant, on previous occasions.  We now have two of them, as because Ruby was growing so well (and about to take over the garden), we split her into two.  In this way, RubyTwo was born.  In fact, because a bit fell off and got planted into a pot just to see whether it would flourish - which it did - there was  actually a RubyThree as well.  However, RubyThree has now gone to live with the-neighbour-across-the-road-with-the-caravan and is now happily living in their back garden.  Which means, of course, that we now have one less person to donate rhubarb to when Ruby and RubyTwo are in full production mode.

However (I digress), Ruby and RubyTwo only gave themselves a few weeks off over winter and are back with a bang.  All that water seemed to agree with them and here we are at the beginning of March able to harvest rhubarb that hasn't been forced!  Most unusual - and most delicious!


Hiding its light under a bushel of icing sugar!
During the menu planning round at the beginning of the week, I had put a High Tea on the menu for Saturday.  Son and heir loves a High Tea and it is often an excuse to bake in some way, shape or form.  I had planned to make some yummy sausage rolls to go with coleslaw, but these got shot down in flames for various reasons and, in fact, I escaped doing any baking at all.

I had asked hubby - who is evolving as the Senior Cake Baker of the family - whether he would be able to bake us a cake to go with High Tea, so he set to pondering on what type.  In the meantime, the new BBC Good Food magazine dropped through the letterbox.  Hiding in amongst its plump, luscious pages, was a little booklet of bakes where he spotted the Rhubarb & Custard cake.  The recipe is on their website, at http://www.bbcgoodfood.com/recipes/10500/rhubarb-and-custard-cake if you should fancy giving it a go yourself.

Ruby during the height of February's storms - completely unbothered.
Now I had given the recipe a once-over look in the past and registered that it was quite an involved process (by my standards), so hadn't ventured to make it.  Hence, when hubby announced an interest in it, I posed the question whether he was prepared for all the stages involved with it and happy that it wasn't too much "fiddling around".  We both hate recipes that have you doing one process here, then getting out a whole other set of equipment for another process there, then back to the first lot for another process - so dull!  However, he'd read it through and was happy with it - so off we went.

I have to admit, I was still in bed dreaming of fairies and unicorns (a.k.a. snoring my head off) when he ventured forth into the garden and gave Ruby her first haircut of the year.  As I was when he baked his first batch of rhubarb for a bit too long and converted it to rhubarb compote.  He was only following the recipe!  Indeed, I had moved on to dreaming of bacon sandwiches for breakfast (a.k.a. snoring even louder) when he gave Ruby her second haircut of the year and successfully roasted his rhubarb pieces by roasting covered for just 5 minutes, then uncovered for another 5-6 minutes - a change to the original recipe that I have reflected in my version below.

I came to at about the time he was ready to put the cake into the oven, mainly because he brought me one of the whisks to taste the custard infused cake batter.  Mmmmn - it was good!


The process, you see, is to dry out the rhubarb by baking it in the oven, then cooling.  Meanwhile, you make up the cake batter - which has the custard mixed in.  Oooh, interesting!  Then, you layer rhubarb and cake batter into the tin, finally finishing with blobs of custard and pieces of rhubarb on top.

It smelled spectacular as it was baking, but took an awful lot longer than the recipe stated.  Either they got the recipe wrong, or nobody tested it before publishing.  In all, I would say that it took about 30 minutes longer than the recipe states - so be prepared if you decide to make it.

Just baked and smelling sooooo good!
All in all, with the false start, it probably took hubby around 3 hours or so to make the cake.  However, is it worth it?  Oh my goodness yes!

The texture is a very different to that of a sponge-like cake.  Throw those ideas out of the window, as although it has significant substance, its texture is robust rather than heavy.  The custard has given the cakey part that lovely vanilla custard flavour that can't help but go so well with the rhubarb that is shot through the cake like little pink stained glass windows.

This cake is the perfect crossover between a tea time cake and a dessert style cake.  It would be as at home with a cup of tea as it is with a drizzle of additional custard and a spoon, so made an absolutely perfect addition to a High Tea.  However, when you add a spoonful or two of the rhubarb compote to the plate, it transforms into a full-on rhubarb lover's treat.

Cooling ..... is it ready, yet?
Yes, you'll need time in which to make this cake - but if you need rhubarb, you know who to ask!

RHUBARB & CUSTARD CAKE    (serves 10-12)

Ingredients :

400g rhubarb
50g caster sugar
250g butter, softened plus extra for greasing
150g ready made custard (Ambrosia, not home-made)
250g self raising flour
half a tsp baking powder
4 large eggs
1 tsp vanilla extract
250g golden caster sugar
icing sugar, for dusting.

Method :

1.  Heat oven to 200C/fan 180C/gas 6.

2.  Rinse the rhubarb and shake off excess water. Trim the ends, then cut into little-finger-size pieces.

3. Put onto a baking tray, tip over 50g caster sugar, toss together, then shuffle rhubarb so it’s in a single layer. Cover with foil, then roast for 5 mins. Remove foil. Give everything a little shake, roast for 5 mins more or until tender and the juices are syrupy.

4.  Carefully drain off the juices before you let the fruit cool.

5.  Butter and line a 23cm loose-bottomed or springform cake tin and pre-heat your oven to 180C/fan 160C/gas 4.

6.  Reserve 3 tbsp of the custard in a bowl.

7.  To a large bowl, add the butter, flour, baking powder, eggs, vanilla, sugar and remaining custard.  Beat together until creamy and smooth.

8.  Spoon one-third of the mix into the tin, add some of the rhubarb, then dot with one-third more cake mix and spread it out as well as you can - there's no need to be too clinical about this though!

9.  Top with some more rhubarb, then spoon over the remaining cake mix, leaving it in rough mounds and dips rather than being too neat about it. Scatter the rest of the rhubarb over the batter, then dot the remaining custard over.

10. Bake for 50 mins until risen and golden, then cover with foil and bake for 30-40 mins more. It’s ready when a skewer inserted into the middle comes out clean. Cool in the tin, then dredge with icing sugar when cool.

Printable version


Related Posts Plugin for WordPress, Blogger...