Showing posts with label Facebook. Show all posts

6 December 2015

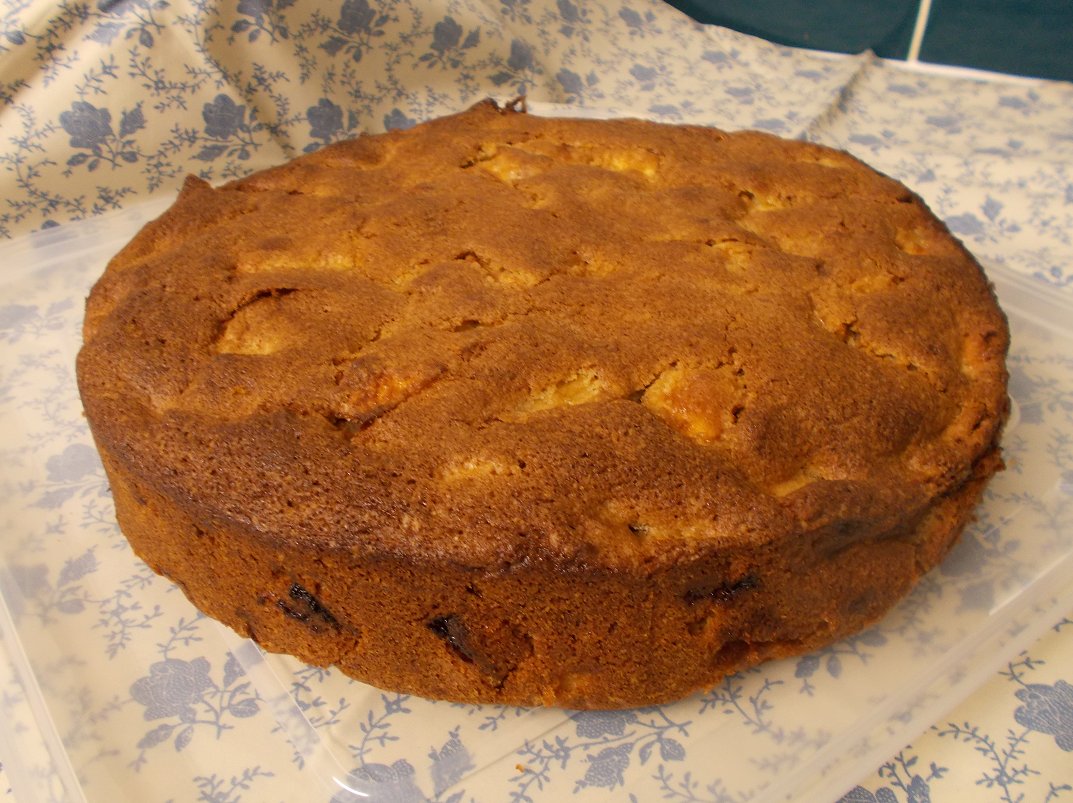
One bowl apple cake - moist, cinnamon rich and fantastic

It's been a while since I made a cake.  Well, the last one was for son & heir's birthday back in October - a zebra cake - which I haven't blogged yet.  (But I will!).  This one is nothing like as adventurous as that one, but you know?  I'd say this one was just as successful, if not more so.

I've said before about how recipes that have me dotting about the kitchen, doing one process after another, are no good these days.  Well that goes for baking too.  So you can imagine the attraction of seeing this recipe - one bowl?  Count me in!

Not only is it one bowl, but there's no messing about with whisks other than a hand whisk to blend the eggs in, there's no "mix this with that in one bowl, then that with this in another, oh and you'll need another smaller one for this and maybe to put that on a plate", thus creating a mountain of washing up.  Nope.  One bowl, a set of measuring cups (ones that microwave - for the butter, you know), a chopping board, knife and/or peeler and you're done.  I like that.
 
Hot out of the oven

I found the original recipe on Facebook and consequently, I have no idea who to attribute it to.  However, thank you - whoever you are - for your cake!  I'm not sure what - other than the simplicity of the preparation - it was that attracted me to this cake recipe.   After all, it's really just apples and cinnamon and I could get an apple/cinnamon fix from making an apple crumble.  It just looked like it would be munchy.  Munchy is good.

With a cup of tea?
Having made the cake, I'm absolutely in love with it.  It has a lovely, slightly crunchy, caramelised top (which you could sprinkle some sugar onto, if you're not already scared by the amount of sugar in it, like I was), the cake itself is as light as a feather, the apple is cooked and juicy but not wet - it's perfect.  Perfect to have with a cup of coffee in the morning, at tea time in the afternoon or as a dessert.  Hubby reckons it'd be great with vanilla ice cream and I see his reasoning, however I like it with creme fraiche as the slight tanginess of the creme fraiche is a lovely partner to the sweetness of the cake.

Who am I kidding?  I'd eat this cake at any time of the day and with or without a drink alongside.  I really think it has taken the crown as my very favourite cake.  Sorry, coffee and walnut cake, you've just been superceded!
 
Cooled and ready to cut

Oh and don't think you need lovely fresh apples to make it work, either.  I used two very old and leathery Russets, one ancient Jazz, one sad and decrepit old Braeburn and two new, fresh and lively Braeburns.  Once they're peeled and in the cake, you can't tell the difference.  So, don't waste those wrinkly, sad apples - give them a splendid job to do and make this cake!

Or maybe with coffee - everything goes!
I have made some adaptions from the original recipe, in that I've reduced the sugar slightly (by a quarter of a cup), swapped the vegetable oil for melted butter, stipulated self raising flour and decreased the baking powder by a half teaspoonful to reflect that.  I shouldn't admit it, but I was amazed that the cake came out as well as it has, considering how much alchemy goes into cake baking.  It doesn't normally do to tinker about with recipes, but I definitely got away with it (and for the better, I am sure) in this instance.

Now, if you'll excuse me, I have a tea plate here and it is embarrassingly empty.  I believe I have some cake somewhere that will do the job nicely ...  

ONE BOWL APPLE CAKE   (serves 8-10)

Ingredients :

2 large eggs
1.5 cups golden caster sugar
2 heaped tsp cinnamon
half a cup of melted salted butter
6 medium crisp apples
2 cups self raising flour

1.5 tsp baking powder.

Directions :

Preheat oven to 180degC/350degF/Gas4.


In a large bowl, mix the eggs, sugar, cinnamon and melted butter.

Peel and slice the apples and add to mixture in bowl (coating as you go to keep apples from turning brown).

Mix together the baking powder and flour and add to the ingredients in the bowl. Mix quickly but well until all of the flour is absorbed by the wet ingredients.

Pour mixture into a lined 9″ round springform pan. Bake for approximately 55 minutes or until a skewer inserted into the middle, comes out clean.

Printable version

15 July 2015

Roast Spiced Hedgehog of Pork with Gooseberry sauce

Roasting a hedgehog?  Whatever next!  Oh, don't panic - I've not gone THAT exotic - my "Hedgehog" was a piece of hedgehog cut pork - i.e. hatch marks had been cut across the top surface of the piece of pork topside.

Farmer's Choice (Free Range) Ltd  contacted me again and asked whether I would like to devise a recipe for them to use on their new Facebook page for the Dorset and Bournemouth area (Farmers Choice Bournemouth & Dorset).  Naturally, I said yes please!  After all, the produce from Farmer's Choice is so good, why would anyone in their right mind turn them down?

Perfectly roasted and ready to carve
I, pretty much straight away, knew what I was going to go for.  I had been playing about in an imaginary way, with a recipe for spiced roast pork with a gooseberry sauce.  I'd been hoping that our little gooseberry bush would come up with the goods, but regrettably the birdies got there first.

Ready for the oven
I had also been waiting for a suitable piece of pork to turn up in the supermarket for a reasonable price, but that hadn't happened either.  So immediately I went to the pork joint section of the Farmer's Choice website and my eye was caught by the Pork Topside Hedgehog.  As it turned out, I couldn't have asked for a better cut.  With absolutely no waste and as lean as they come, this joint was perfect for everyone in the family and with careful but easy roasting, resulted in a super tender and flavoursome roast which wasn't dry at all.

My order, in the end, became the pork, some gooseberries, a bulb of fennel (also for the sauce) and a wild card entry of a bag of game meat for a game pie which I haven't made yet.  That's what happens when you give me the pick of a site full of produce, you see.  Personally, I think I was very restrained and I'm sure there are many who would have asked for a whole lot more.

The pork recipe was really incredibly simple.  I just wanted something to flavour the outside of the meat with and give it a lovely colour, rather than something to marinate the joint in for hours and provide a more overall kind of flavour input.


As such, the oil-based rub that I came up with - of olive oil, thyme, sweet smoked paprika, garlic, lemon juice and ye olde salt and pepper - was just perfect.  It was able to sink easily into the cut marks across the top of the pork and gave a beautiful colour once roasted.  The flavour was subtle but very much there, depending on how much of the outside of the pork you had on your fork.  Subtlety, folks, I'm all about the subtlety (and poetry, looking at that last sentence).  Well, where roast pork is concerned, anyway.


The roasting was as easy as falling off a log (and I've fallen off a few in my younger days, so I know how easy that is).  For a 1155g piece, I gave it one and a half hours at 180degC (350degF/Gas 4), then gave it a baste and checked the internal temperature was in the range of 77degC - 80degC (meat thermometer - SO useful!) and as such was likely to be done, but still fairly firm.  I then covered the roasting dish with a good layer of aluminium foil and put it back at the much reduced temperature of 130degC for another hour.  Once the hour was up, the whole package was rested for 20 minutes in a warm (but not hot) place.  The meat wasn't fall-apart tender, but I don't much like that in a roast pork joint.  It held together, but you could easily cut it with just a fork.  It was perfect.

You little beauties!
The gooseberry sauce was just wonderful.  The sharpness of the gooseberries cut through the richness of the pork and refreshed the palate, ending on a soft note of fennel which left you ready for the next bite.  The sauce is a little more time-consuming to make, but if you tackle it ahead of time (which I recommend, to give it time to cool) it really doesn't impinge on your day much at all.

The two recipes are really so simple that I don't even have any COOK'S TIPS for you, other than to recommend you keep hold of the fluffy tops and offcuts of your fennel to include in soup or stock, for which they are invaluable.

The finished gooseberry sauce, hiding its zing behind a benign appearance
Gooseberries and pork.  Mmmnnnn, our new favourite thing.  In fact, my hubby was so taken with the combination, he remarked that he hadn't ever had a better piece of roast pork in all his forty-mumble years.  Now that's quite a compliment.


ROAST SPICED HEDGEHOG OF PORK with GOOSEBERRY SAUCE   (Serves 4-5)

Ingredients :

For the gooseberry sauce :
1 tsp yellow mustard seeds
1 tbsp olive oil
1 bulb of fennel, sliced finely and tops discarded
1 large banana shallot (or equivalent), diced finely
small pinch of salt
quarter of a tsp dried thyme
quarter of a tsp finely ground black pepper
quarter of a tsp vegetable stock powder
1 tbsp & 50ml water
125g dessert gooseberries, tops and tails removed
25g granulated sugar.

For the pork :
1kg or thereabouts topside of pork, mine was hedgehog cut
1 tbsp olive oil
1 tsp sweet smoked paprika
1 tsp dried thyme
1 clove of garlic, grated
2 tsp lemon juice
pinch of sea salt
half a tsp freshly ground black pepper.

Method :

1.  Begin, ahead of time, by making the gooseberry sauce.  Heat a small pan and once hot, add the mustard seeds to toast.  Once they start to pop, decant into a small bowl and reserve.

2.  Heat the olive oil and add the fennel and shallot, plus the sea salt.  Cook gently until the shallot is transparent and the fennel has begun to soften.

2.  Add the pepper, dried thyme, vegetable stock and water.  Bring to a simmer and cook until the fennel is tender.

3.  Taking a stick blender, carefully blend until thoroughly combined, but still retaining texture.  Decant into a bowl and reserve.  Replace the pan onto the heat.

4.  Add the gooseberries directly to the pan and add a tablespoonful of water.  Cover the pan and allow the gooseberries to heat through, giving the pan a little shake every now and then, to prevent them from sticking.  This should only take around 5 minutes if the gooseberries are ripe.

5.  Once the berries are softened and their juice is beginning to escape, add the fennel mixture and mustard seeds and stir to combine.

6.  Add the sugar and remaining 50ml of water.  Stir well, then bring to a simmer and cook until the sauce has reduced to a loose jammy consistency.  Taste for seasoning and adjust if necessary, likewise if you think the sauce needs more sugar, correct that too.  Be cautious with the sugar, as you want the sauce to stay tart and not become jam-like.

7.  Once you are happy with the flavour and consistency, decant into a bowl and allow to cool.

8.  Remove the pork from the fridge a good half hour ahead of time.

9.  Place into a roasting tin and mix the seasoning ingredients (oil, paprika, thyme, garlic, lemon juice, salt and pepper) together.

10.  Spoon the seasoning mix over the top of the pork and rub into all the cracks and crevices.

11.  Put into a pre-heated oven at 180degC/350degF/Gas 4 for an hour and a half.

12.  Remove the pork from the oven and baste it with the juices, then cover with tinfoil and return to the oven.

13.  Turn the oven down to 130degC/250degF/Gas 2 and cook for another hour.

14.  Remove the pork from the oven and baste it again, then replace the tinfoil and leave it in a warm place to rest for 30 minutes, before carving.

Printable version


20 June 2014

Slow Cooker Char Sieuw Pork .. or Char Sui ... or however you want to spell it!

I have a lovely Facebook friend, Mab, who very recently made Char Sui Pork - and it looked SO good, I just had to have a go at it myself.  

I knew that any version of Char Sui Pork that I might make would be quite different to Mab's version, as I had my fat-phobic menfolk to take into account.  After all, if I'm intending on making something so delicious, I can't possibly leave them out of the experience!  Now Char Sui (or Sieuw) Pork should, ordinarily, be made with a quite fatty piece of meat so that as it cooks the fat will baste the meat, keeping it moist and flavourful.  Obviously, in the circumstances, I couldn't do that.  So I had to think hard about how I was going to keep the meat tender and juicy, whilst rendering down the majority of the fat.

So the first thing to think about was the cut of meat.  Pork shoulder is okay for me to use in things like Pulled Pork, as the very nature of the dish means that I can remove any unrendered fat at the "pulling" stage.  However, it's not much use for anything else - because of the lovely (well, I think they're lovely) veins of fat that run through the meat.  The meat of choice, then, for my menfolk is loin.  Fortunately, our local butcher sells six pork steaks for £2.99 that are cut across the loin and are just perfect.  The back of each steak has a neat line of fat that helps in the cooking process and can be removed in a twinkling just before serving.  Of course, you do still have to concentrate on keeping the meat moist, as loin can dry out and become unpalatably sawdust-like when you're not concentrating.  As such, I have included pork shoulder in the recipe - but if you have to cater for fat-phobics, then go for some loin with the fat still attached.

Now the original recipe - which I used as a guide more than instructions - was for an oven cooked pork.  However, knowing how my menfolk like their pork to be tender, I opted for the sure fire guarantee that is the slow cooker.  Give a car tyre enough time in a slow cooker and I reckon it'll become palatable somewhere along the line.

See the difference between this (still cooking) and the finished article. Huge.
However, just cooking the pork in the slow cooker wasn't enough.  You are required to marinate the pork before cooking - to enable those lovely flavours to gain a good toehold in the meat.  Because a slow cooker takes so long - the clue's in the name, folks - I felt that marinating as well as cooking was a bit of overkill.  Spending 7 hours in the slow cooker - in all its marinating juices and flavours - would be a splendid way of giving them a toehold of deliciousness, with marination taking place as it went along.

The end result worked very well indeed!  The aromas wafting through the kitchen and beyond, were just incredible.  I took the lid off at half time and turned the pork steaks over, which were looking pretty much done.  However, the difference a number of hours more made to the meat by way of colour and flavour was incredible.  So don't be tempted to take it out too soon.  It is well worth the extra time.


Also, save the cooking liquid as it makes a fabulous basic sauce for either noodles, or with rice.  Not to mention that being so tasty, it would be criminal to throw it away!

Having taken the pork out of the slow cooker, saved the saucy juices and removed the fat, I basted each piece with a little of the cooking liquid (again, to prevent the meat drying out too much) and drizzled with honey.  Into a very hot oven for around 10 minutes - or under a hot grill would do fine - just to get the charred edges and you're there.

This pork was so good that it moved Son & heir to shout from the living room to the kitchen to say that he thought it to be "absolutely fantastic".  Gosh, there's approval!  I will admit that I had to agree with him - considering the huge flavours that had been jostling for position all day, to be able to still taste the pork under it all was something of a miracle, I thought, but you could.  Being scrupulously honest, it didn't taste like the "red pork" that you find in Chinese Takeaway meals - but did it taste authentically "Chinese"?  Yes, it certainly did.

The vegetable noodles - made using a sliced Portobello mushroom, Bok Choy greens, spring onions and beansprouts - were very happy to have the cooking liquid added to them and accompanied the meat very well indeed.  I am sure the meat would do very well in a stir fried rice dish too - and it'd be well worth making a little extra just for that!

So thank you, Mab.  Now, what are you making tomorrow?  :D

SLOW COOKER CHAR SIEUW PORK   (serves 3)

Ingredients :

2 tbsp light soy sauce
1 tbsp dark soy sauce
120g sachet black bean sauce
120g sachet hoisin sauce
2 tbsp oyster sauce
2 tbsp medium Sherry
2 tbsp Chinese cooking wine (Mirrin is acceptable)
2 tsp sugar
1 tsp five spice powder
1 tsp garlic powder
1 star anise
freshly ground black pepper
1 bay leaf
1kg Pork shoulder, cut into thick steaks or thick strips
Runny honey for drizzling.

Method :

1.  Mix all the ingredients together well, except for the pork and honey.  Pour the resultant sauce into the slow cooker and spread out until the base is completely covered.

2.  Place each steak or strip of pork into the sauce and turn until completely coated.  Then lay out in the slow cooker in one level layer - or successive level layers.  You need to maintain the layers so that when it comes to turning at half time, the pork is easier to get at.

3.  Turn the slow cooker on to low and cook for 7-8 hours.  You can reduce the cooking time, by increasing the heat.

4.  Around 4 hours into the cooking time, remove the lid and turn each steak over, giving them a baste in the sauce if possible.

5.  When the cooking time is done, remove the pork from the slow cooker and place onto a flat baking tray.  You can take this opportunity to remove any fat that is surplus to requirements.

6.  Spoon a little of the sauce over the steaks, then drizzle with honey and place into a hot oven (220degC) for 10-20 minutes (or alternatively, place them under a hot grill for a similar time), so as to get the charred edges.

Serve with noodles, rice or just a spoon and a good t.v. programme.

Printable version


Related Posts Plugin for WordPress, Blogger...