Showing posts with label cake recipe. Show all posts

12 August 2017

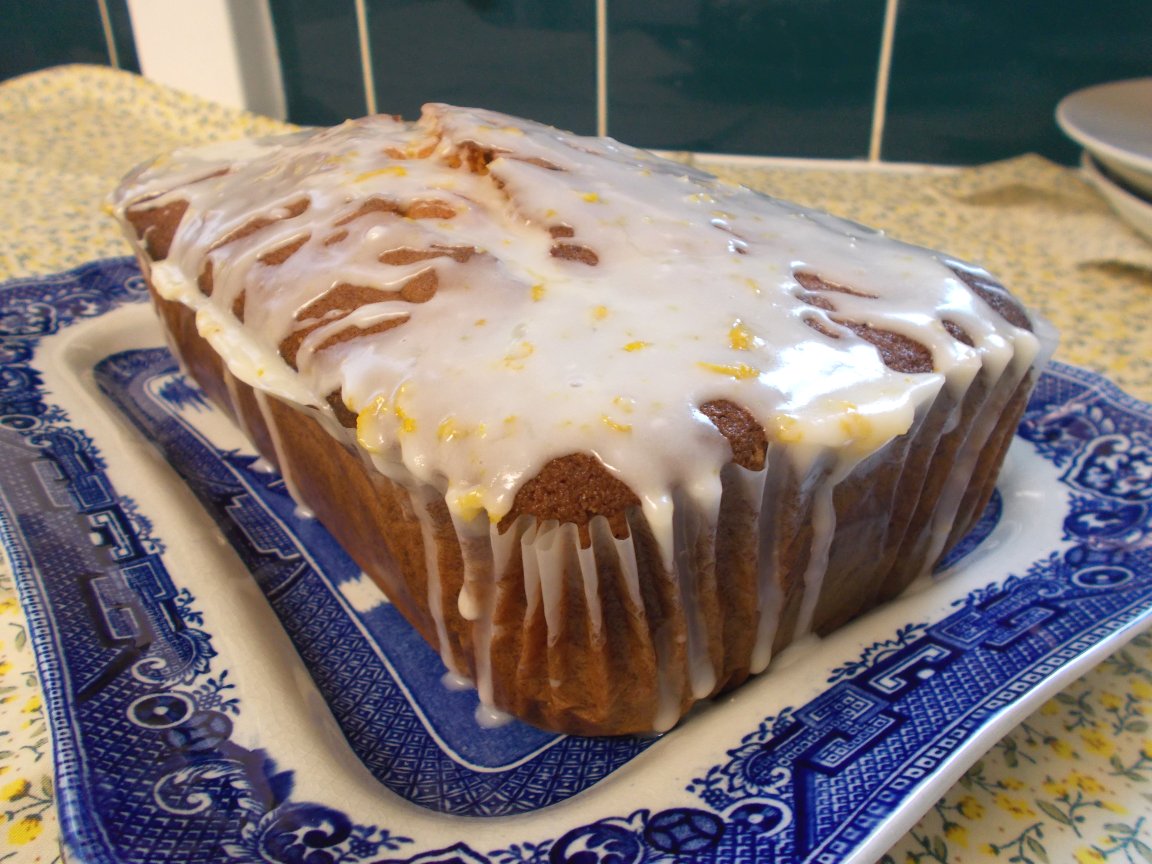
Reduced sugar Lemon & Courgette Loaf - perfect with a cup of tea

If you are anything like me and enjoy a good ramble through recipe websites and magazines, you can't help but have noticed the trend towards including vegetables in sweet cakes and loaves.  I think it has largely come over from the States, but I also can't help thinking that perhaps this is what used to go on during the war when sugar was rationed and cake ingredients were at a premium.

Anyway, this was my first go with including courgette - and it's very good!  With the lemon in there too, you don't notice the courgette flavour but it has a distinct effect upon the texture of the cake/loaf.  (I can't help but call it a cake, because it looks so much like one and tastes so much like one!  However, the original recipe touts it as an American breakfast bread.  Well, considering cornbread, I suppose it fits!).  This is a very robust cake in that the texture of the cake crumb is almost bouncy.  Not rubbery, it just has a degree of resistance to the tooth, without being dry or crumbly.  I like it a lot.


My lovely Facebook friend Ann recommended the loaf to me - for which thank you very much, Ann!  The original recipe came from the Lemon Tree Dwelling blog (see here) - where, incidentally, it is referred to as a "bread".


Now, along with trying to reduce our consumption of carbohydrates (Conscience : "Oh yes? Why are you making cake then, Jenny, eh?", me : "Shut up and get back in your bed!"), we have also been trying to reduce our consumption of processed sugar.  That's a real tricky one where sweet baking is concerned.  I won't entertain the use of lots of the sweeteners that are out there today - and particularly not anything with aspartame or acesulfame in it. However, we have found that Truvia (a stevia based sweetener) is acceptable.

Hence, you will find that the ingredients include a quantity of Truvia along with a much reduced quantity of caster sugar.  The original quantity of sugar is 0.75 of a cup, so if you want to make a full sugar version - there you go.  :)  That may also help you in calculating how much of another sweetener of your choice, you are likely to need.

Oh and yes, because this is an American recipe (originally), the ingredients are in cups. All I can suggest is that if you haven't already, you get yourself a set of cup measures.  SO much easier than trying to convert from cups to grams!


One other thing - the original recipe says to use vegetable oil.  Because I'm me and butter tastes SO much nicer, I just melted the right amount of butter in the microwave and used that instead.  ~proud face~  What?  It was low calorie enough, alright?

Right then, excuses over, I thoroughly recommend you give this recipe a try.  Make sure to have it baked and iced before cup of tea time in the afternoon, right?  You'll be glad you did.

REDUCED SUGAR LEMON & COURGETTE LOAF   (makes around 12 slices)

Ingredients :

One and a half cups of plain flour
A half tsp bicarbonate of soda
A quarter tsp baking powder
A quarter tsp salt
A third cup of Truvia

A quarter cup of caster sugar
1 cup of finely grated, unpeeled courgette
A quarter cup of melted butter
1 egg
2 tbsp lemon juice
2 tbsp finely grated lemon zest

For the drizzle icing :

Half a cup of icing sugar
1 tbsp lemon juice
1 tsp lemon zest

Method :

Prepare a 1lb loaf tin by either greasing and lining with baking parchment, or by use of a ready made loaf tin liner.  Pre-heat your oven to 180degC/350degF/Gas 4.


In a medium mixing bowl, combine the flour, bicarbonate of soda, baking powder, and salt.  Stir them together thoroughly and set aside.

In a separate, large, mixing bowl combine the Truvia, sugar, grated courgette, melted butter, egg, lemon juice, and lemon zest. Stir to combine.

Add the contents of the dry ingredients bowl to the courgette mixture and stir just until combined.  You may need to add a wee drop of warm water, if the mix appears too stiff.

Spoon the mixture into your prepared loaf tin and level the surface.

Bake for 50-55 minutes or until golden brown and a skewer comes out clean.

Cool in the pan on a wire rack for a few minutes, then remove the loaf from the pan and cool completely.

Once cool, combine the ingredients for the icing and drizzle over the loaf.  Allow a little time for the drizzle to dry - while you're making a cup of tea is about perfect.


29 August 2016

Classic Victoria Sandwich Cake

Do you know, I was absolutely flabbergasted to discover that I have never blogged a recipe for a classic Victoria Sandwich cake? I still can't quite believe it. 

I have been making Victoria Sandwiches, also known as Victoria Sponge cakes, since I was about 8 years old!  It is one of my most vivid memories, walking into the living room of our house in Oakley, Basingstoke, proudly bearing my lovely Victoria Sandwich that I'd made (with the help of my Mum, of course!) for my Dad's approval and for us to have with a cup of tea.

How on earth has this stalwart of baking escaped from being included on Rhubarb & Ginger?  The answer is, I have no idea.  However, I shall now remedy this and my favourite recipe is set out below.  In fact, it is almost the same recipe as the Mary Berry Victoria Sandwich cake, the only differences being that I use 1 tsp of vanilla essence in the cake mix and always fill the cake with jam and cream (and sometimes, as in the latest one, with fresh fruit, too).


This recipe has never failed me and always turns out a lovely deep, moist sponge cake that is man enough to cope with the weight of the jam, cream and extra fruit as well as its other half, without collapsing at all.  It is so disappointing to have the bottom half of your cake flatten and compressed by the weight above it, so it is quite important to have a mix that can hold some weight!


It doesn't matter whether you use home made, the shop's best or a cheap as chips jam - they all work and this really is a cake to suit all pockets.  If you can't afford to use all butter, then by all means use whatever your budget will allow.  The flavour will be slightly different, but the cake will be just as well received and I bet there won't be much left!

So, be it an economy version or a ridiculously outrageous, filled with whipped cream and buckets of fruit version, I've never known this cake to be turned down.  It's as easy as winking to whip up - just bung it all in one bowl and whisk away and takes just a twinkling to bake.  In fact, the longest and most arduous part about this whole recipe is waiting for the cake to cool so that you can fill it and get stuck in!

CookBlogShare

What's this?  Well, for the first time ever, I've linked up with the 
Cook Blog Share's recipe linkup.   Hopefully, if you click
 on the following link you'll be taken to
the Easy Peasy Foodie blogwhere you will find lots of new 
and interesting recipes to consider.  Yummy!

CLASSIC VICTORIA SANDWICH CAKE   (serves 8-12 slices)

Ingredients :

4 large eggs
225g caster sugar
225g self raising flour
2 tsp baking powder
225g butter, at room temperature, plus a little to grease the tins
1 tsp vanilla essence.

For the filling & decoration :

150g raspberry jam
300ml whipping cream
75-100g fresh or frozen raspberries, saving 4-5 whole, good raspberries for the top
1 tsp icing sugar.

Method :

Pre-heat your oven to 180degC/350degF/Gas 4.

Taking two 8 inch (20cm) sandwich tins (loose bottomed ones are great for this!), cut out a circle of baking parchment to sit in on the base.  Then, using the little dab of extra butter, grease the tins, lay the parchment in and grease the parchment.

Break the eggs into a large bowl (it's as well to break them individually into a cup, then tip them into the bowl, just in case one turns out to be a bit dodgy.  That way you don't lose all the eggs at once!) and give them a light mixing.  Add the sugar, flour, baking powder, butter and vanilla essence and set to the lot with a whisk.  Whisk until just combined - don't over-whisk or your sponge will turn rubbery.  The mixture should be what's known as a "dropping" consistency, which has nothing to do with what horses leave behind them and everything to do with how easily it falls from your spoon.

Decant half the mixture into each prepared cake tin and carefully level the contents.

Gently place the tins onto the centre shelf of your oven (don't lean one on the other, or you'll wind up with a wonky cake) and bake for 25 minutes.  Don't be tempted to open the door and peek at how they're doing, or turn your hand to some panel beating beside the oven while the cakes bake - as these things will guarantee to make your sponge drop and become a pancake.  You don't want that.

At the end of the 25 minutes, the cakes should be smelling delicious and (yes, you can look now) should be coming away from the edges of the tin.  If you give the centre a little press, the cake should spring back like an olympic trampolinist.

Take them out of the oven and place onto a wire rack for some 10 minutes, to just let them get over the change in circumstances and cool a little.  If you have loose bottomed cake tins, this is where they come into their own, as you can remove the cakes from the tins without fear of calamity.

If you are baking the cakes the day before you'll need them, leave them on the parchment paper for support and once they are totally cold, pop them into a freezer bag each.  They'll keep perfectly until the following day.

Otherwise, carefully remove the baking parchment once the cakes are totally cool and place one upside down on your cake plate.

Carefully smooth loads of jam over the surface of this cake, then whip up the cream and even more carefully smooth generous amounts of cream on top of the jam.  If you're going the whole hog and including raspberries (or other fruit), now is the time to embed it into the cream.  Add a little more cream on top of the fruit (to help the upper cake stick and stop it from entertaining any ideas of sliding off onto the floor) and oh so carefully add the second layer of cake - flat side down, baked side up.

Lastly, take a tea strainer and sieve a little icing sugar all over the top of your cake and add the few raspberries that you kept back for decoration.  (Provided your son hasn't eaten them, as mine very nearly did).

Take a photograph of your cake before you alert the family to the fact that it is ready to be eaten, because it's not going to be around for long!

Printable version


28 February 2016

Caraway & Lemon Sponge Cake - deliciously light as a feather!

I can't remember why I suddenly had a notion to make a caraway seed cake, all I know is that I'd been trying to make one for the last week or so.  Well, when I say "trying to" what I mean is trying to find time, rather than trying to and failing in a welter of eggs, butter and flour!

It has been an absolute dog's age since I last made a caraway seed cake and I recall the last one was very successful.  I've used caraway in various savoury recipes (braised red cabbage, that sort of thing) and had plenty to call upon in the cupboard - which always helps.


So this cake is actually a collaboration between Saint Delia Smith of hallowed baking and cooking fame and myself.  You see, I took Delia's Caraway Seed Cake recipe (just click on the link to see it) and adapted it with somewhat spectacular results.  It's often an extremely dodgy thing to do, adapting something like a cake recipe, but I've always been a tryer.

Because I'm me, I just had to consider a bit of a spin on an old favourite and decided to pair lemon up with the caraway.  It seemed to me to be a compatible pairing.  Delia's recipe uses ground almond and I didn't want that, so out that went and I simply replaced it with the same amount of flour.  To up the lemon influence, I added a small amount of lemon essence along with the lemon zest.

Oh boy, what a team we make, Delia and I.  The cake baked well, rose beautifully and smelled divine.


The addition of the lemon juice drizzle icing is perfect in that it adds a yummy zing to the cake and the caraway comes in once the lemon calms down, adding a deliciously warm aromatic element to the flavour.


The texture of the cake is just perfect, if I say so myself.  Light as a proverbial feather, it dances across your tongue like a deliciously cakey zephyr, leaving mouthwatering lemon and comforting caraway flavours.  Mmmmmn, get the kettle on Mother, I'll cut us another slice!

CARAWAY & LEMON SPONGE CAKE

Ingredients :


225g self raising flour

175g salted butter at room temperature
175g golden caster sugar
3 rounded tsp caraway seeds
zest of 1 lemon
half a tsp of lemon essence
3 large eggs
4 tbsp milk (I used skimmed goat milk).

For the icing :

3 tbsp icing sugar
zest of 1 lemon
juice of half a lemon.

Method :

Pre-heat the oven to 180degC/350degF/Gas 4.

Prepare a 2lb loaf tin by lining with either a pre-formed tin liner or with baking parchment.

Take a large mixing bowl and add all the cake ingredients (not the icing ingredients!).

Now, using an electric hand whisk, mix the lot up until you have a smooth, creamy consistency.  It really is as easy as that.

Spoon the mixture into the prepared tin.  Take a moment to level the surface to achieve a more even bake.

Place into the oven on a low shelf for 60-65 minutes or until a skewer inserted in the middle comes out clean.  It will be worthwhile checking the cake at around 40 minutes and placing some baking parchment over the top (we know this as "putting a hat on it!") if the cake looks particularly brown.

Once done, let the cake cool in the tin for some 10 minutes, then remove onto a cooling rack.

Once the cake is cool, mix together the icing ingredients in a small bowl and drizzle the icing over the top of the cake.  Allow some time for the icing to dry - and tuck in!

Printable version


6 December 2015

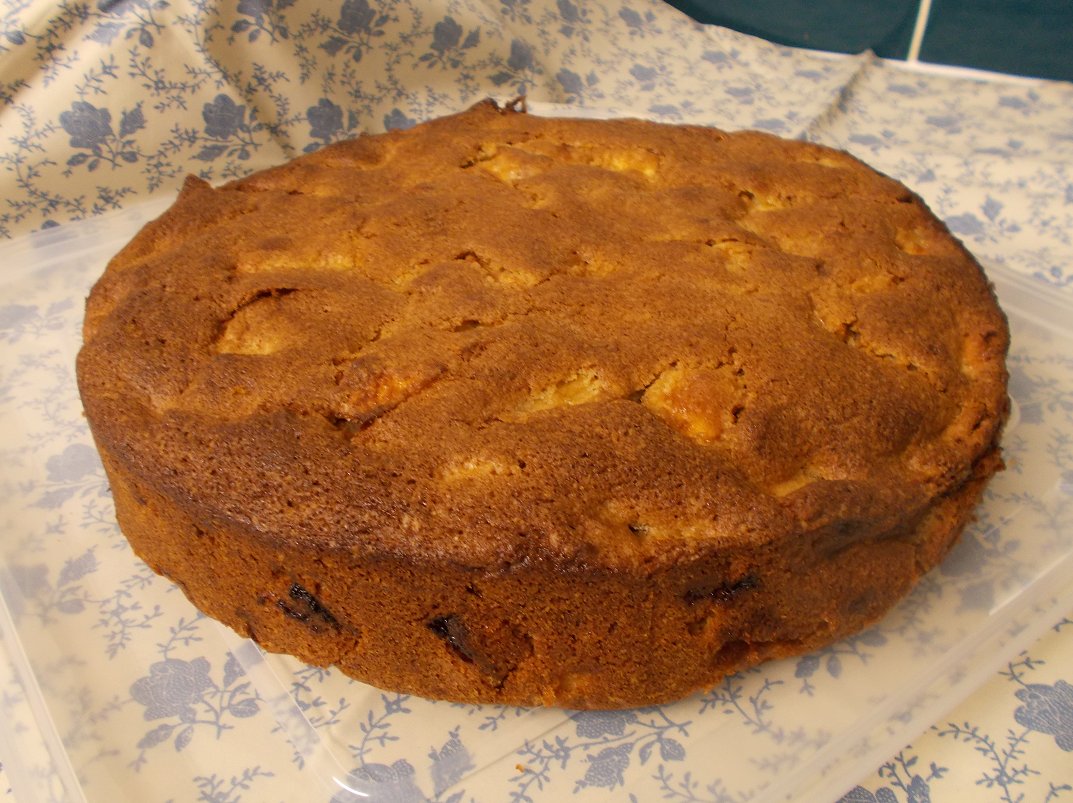
One bowl apple cake - moist, cinnamon rich and fantastic

It's been a while since I made a cake.  Well, the last one was for son & heir's birthday back in October - a zebra cake - which I haven't blogged yet.  (But I will!).  This one is nothing like as adventurous as that one, but you know?  I'd say this one was just as successful, if not more so.

I've said before about how recipes that have me dotting about the kitchen, doing one process after another, are no good these days.  Well that goes for baking too.  So you can imagine the attraction of seeing this recipe - one bowl?  Count me in!

Not only is it one bowl, but there's no messing about with whisks other than a hand whisk to blend the eggs in, there's no "mix this with that in one bowl, then that with this in another, oh and you'll need another smaller one for this and maybe to put that on a plate", thus creating a mountain of washing up.  Nope.  One bowl, a set of measuring cups (ones that microwave - for the butter, you know), a chopping board, knife and/or peeler and you're done.  I like that.
 
Hot out of the oven

I found the original recipe on Facebook and consequently, I have no idea who to attribute it to.  However, thank you - whoever you are - for your cake!  I'm not sure what - other than the simplicity of the preparation - it was that attracted me to this cake recipe.   After all, it's really just apples and cinnamon and I could get an apple/cinnamon fix from making an apple crumble.  It just looked like it would be munchy.  Munchy is good.

With a cup of tea?
Having made the cake, I'm absolutely in love with it.  It has a lovely, slightly crunchy, caramelised top (which you could sprinkle some sugar onto, if you're not already scared by the amount of sugar in it, like I was), the cake itself is as light as a feather, the apple is cooked and juicy but not wet - it's perfect.  Perfect to have with a cup of coffee in the morning, at tea time in the afternoon or as a dessert.  Hubby reckons it'd be great with vanilla ice cream and I see his reasoning, however I like it with creme fraiche as the slight tanginess of the creme fraiche is a lovely partner to the sweetness of the cake.

Who am I kidding?  I'd eat this cake at any time of the day and with or without a drink alongside.  I really think it has taken the crown as my very favourite cake.  Sorry, coffee and walnut cake, you've just been superceded!
 
Cooled and ready to cut

Oh and don't think you need lovely fresh apples to make it work, either.  I used two very old and leathery Russets, one ancient Jazz, one sad and decrepit old Braeburn and two new, fresh and lively Braeburns.  Once they're peeled and in the cake, you can't tell the difference.  So, don't waste those wrinkly, sad apples - give them a splendid job to do and make this cake!

Or maybe with coffee - everything goes!
I have made some adaptions from the original recipe, in that I've reduced the sugar slightly (by a quarter of a cup), swapped the vegetable oil for melted butter, stipulated self raising flour and decreased the baking powder by a half teaspoonful to reflect that.  I shouldn't admit it, but I was amazed that the cake came out as well as it has, considering how much alchemy goes into cake baking.  It doesn't normally do to tinker about with recipes, but I definitely got away with it (and for the better, I am sure) in this instance.

Now, if you'll excuse me, I have a tea plate here and it is embarrassingly empty.  I believe I have some cake somewhere that will do the job nicely ...  

ONE BOWL APPLE CAKE   (serves 8-10)

Ingredients :

2 large eggs
1.5 cups golden caster sugar
2 heaped tsp cinnamon
half a cup of melted salted butter
6 medium crisp apples
2 cups self raising flour

1.5 tsp baking powder.

Directions :

Preheat oven to 180degC/350degF/Gas4.


In a large bowl, mix the eggs, sugar, cinnamon and melted butter.

Peel and slice the apples and add to mixture in bowl (coating as you go to keep apples from turning brown).

Mix together the baking powder and flour and add to the ingredients in the bowl. Mix quickly but well until all of the flour is absorbed by the wet ingredients.

Pour mixture into a lined 9″ round springform pan. Bake for approximately 55 minutes or until a skewer inserted into the middle, comes out clean.

Printable version

1 August 2015

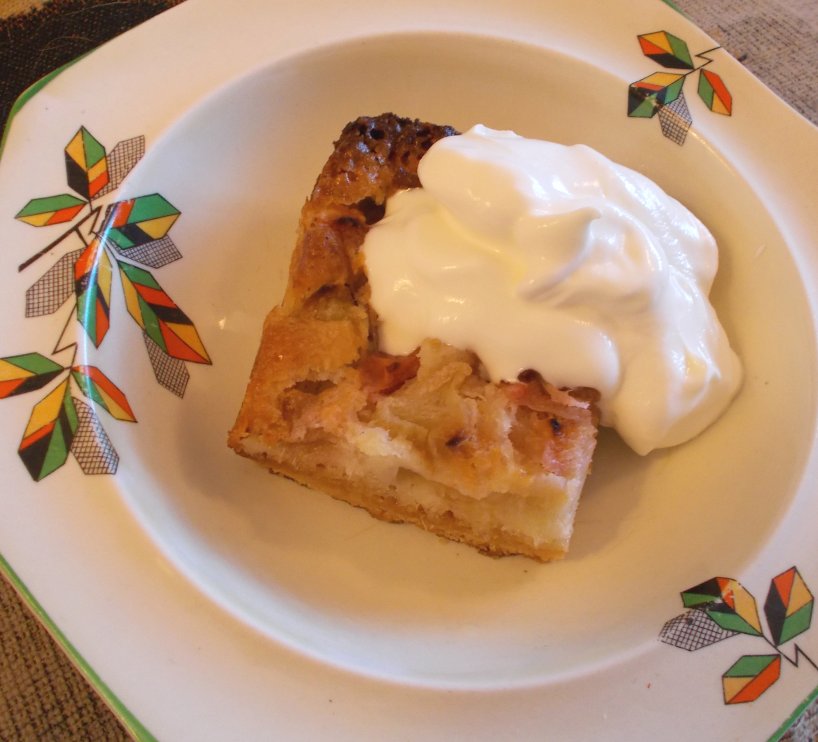
Rhubarb Dream Bars - cakies of much deliciousness!

The good - very good - thing about having a blog called "Rhubarb and Ginger" is that every so often, someone will recommend a rhubarb recipe to me.  Which is what happened with regard to these Rhubarb Dream Bars.  I'd never heard of them before, but it seems that they're well known in the States and Canada.  I suppose it's like the gorgeous Rhubarb & Strawberry Pie, which - even though England grows some of the best strawberries available anywhere - is not a well known combination over here.

I'd had the recipe for these totally scrummy little pieces of deliciousness for a few weeks but either the butter kept being eaten before I could get to it, or we were too busy, or I just ran out of spoons (see the definition of the Spoon Theory here).

I was getting a bit fed up with not making these and was beginning to panic that our rhubarb might have dwindled before I could get the chance to make the most of it.  So as hubby was in charge of dinner and I had spoons to spare, it was the perfect chance.

I'm not sure why, but I was under the impression that it was likely to be a bit of a long process to make the bars.  I'm scratching my head about this, because it really was the simplest thing!  In fact, the hardest bit was doing the maths to halve the recipe.  The original recipe is here, but I've reproduced it below as I've made it a bit less American and this is the halved version.  If you've got two baking tins, then by all means make the full version as for sure they won't stay around for long!  However, know that they don't keep well.  You need to not seal them into whatever container you're planning on keeping them in, as they will soften very quickly.  Hence it is not worth making loads, if you're not going to be able to eat them all.

Just as an aside, I loved the fact that I could step out of the kitchen door and pick two rhubarb stalks from our plants, wash them, chop them and bake them.  Now it doesn't get much fresher than that.


So apart from knowing that the end result was delicious - after all, they'd been recommended - I had no clue as to how they would end up.  Would the base be hard, or soft?  Would the top be crumbly or spongey?  So it was a voyage of discovery that only made sense as I was creating them.  Of course, the base is very similar to a shortbread recipe, so naturally it comes out of the oven crisp and smelling deliciously buttery.  I wasn't sure how the fruit layer would react to meeting the hot base, but baking magic happens and it all does what it should, winding up with a gorgeously soft from the fruit juices and crusty from the oven, sweet and deliciously rhubarby top layer.


Have I sold you on the idea yet?

The mix for the top layer.  Unassuming, isn't it?
As for Cook's Tips, I have a few :

Because the recipe originates across the pond, measurement is in cups.  It really isn't a difficult thing to get hold of a set of cup measures, so I've left it as is and not twisted my poor old melon any further in trying to convert them.

I used salted butter for the base as I think the mixture needs the salt to bring out the best flavour.  By all means use unsalted butter though, if that's your thing.

Make sure to slice each rhubarb stalk thinly (not paper-thin, obviously) as this helps the fruit layer to not become waterlogged with juice.  The smaller pieces cook quickly and a degree of the water is evaporated during the cooking process.

For dessert, with gorgeous Greek yoghurt

RHUBARB DREAM BARS    (makes 12)

Ingredients :

For the base
1 cup plain flour
a scant half cup of icing sugar
half a cup of butter.

For the fruit layer
2 large eggs
three quarters of a cup of caster sugar
one quarter of a cup of self raising flour
half a tsp of salt
2 cups rhubarb, finely sliced.

Method :

1.  Line a 8" square baking tin with parchment paper so that the paper extends beyond the sides of the baking tin (to make it easy to remove the cake) and lightly grease with butter.

2.  Add the flour, icing sugar and butter for the base together in a food processor and whizz until thoroughly mixed and looking like fine breadcrumbs.

3.  Tip the mix into the baking tin and press firmly with the back of a spoon until the base is smoothly covered.

4.  Bake in a pre-heated oven at 180degC/350degF/Gas4 for 10-15 minutes or until golden brown.

5.  While the base is baking, mix up the fruit layer.  Place the eggs, sugar, flour and salt into a bowl and beat until well blended.  Add the rhubarb and mix through.

6.  As soon as the base is baked and removed from the oven - and while it is still hot - pour the fruit layer on top and quickly level it.

7.  Replace into the oven for another 35-40 minutes.

8.  Cool and cut into 12 bars.

Serve with a cup of tea, or with clotted cream, ice cream or custard, for a yummy dessert.
Printable version


22 June 2015

Beautifully healthy banana, oat & chocolate munchy bars

Get this - the recipe contains no eggs, no flour and no fat other than that in the chocolate!  ~confused look~  I know!  How does it work?  Well, beautifully, is the answer - and before we go any further, I can see that this recipe would be a great candidate for those who are after a gluten-free cake recipe.  Just make sure that the oats you choose are gluten free versions.

When this recipe was drawn to my attention by a Facebook friend, I immediately thought "that has to be done".  I just couldn't see how an eggless, flourless, fatless cake bar could possibly taste like anything more than birdseed - and soggy birdseed at that.

Having made it, though, I can see how it works and what's more it takes just a twinkling to put together and I would anticipate could be adapted in many different and delicious ways.


The original recipe - which I followed to the letter .. oh hang on, no I didn't.  ~koff~  It'd be a cold day in hell when I EVER follow a recipe to the letter *chuckle* .. is here, on the Ambitious Kitchen blog.  Now you might have a more capable computer than me, but that blog slows my computer to a confused crawl, so I thought I'd blog my version of the recipe as soon as possible.


These yummy cake bars are just delicious.  We're using them as a treat to go with a cup of coffee at mid-morning or a cup of tea in the afternoon, but as you can eat them both warm and cold, I can quite easily see them with some ice cream or a spoonful of yoghurt as a dessert.  They really are that adaptable.

The flavour is reminiscent of a banana bread (perhaps not surprisingly, as the older the banana the better), but the texture is more of a sticky Brownie kind of affair.  The chocolate chips are scrummy but I can equally see them being luscious with a diced tart apple, or semi-dried apricots, coconut or even dates!  Mix and match - keep the chocolate chips but only add half and make up the rest with apple dice.  I can see there are going to be many and varied versions in our future.


Apart from how moreishly delicious they are, the BIG bonus is how easy they are to make.  All you need is a food processor, a bowl for mixing, a spoon and some cup measures.  Oh and a cake tin, of course.  Not to mention an oven, but then we're probably getting into the blinking obvious, now.  *wink*


Not that you'll have any left, but if (for some strange reason) you do, then these cake bars can be frozen.  You can freeze with or without their drizzle, just put them into a freezer container or a freezer bag - I separated mine with a layer of greaseproof paper, just to be sure - and in the freezer they go.  If you want to, once defrosted, you can give them a quick 30 seconds in the microwave to have hot versions for dessert.

There are no Cook's Tips for this one, as they're so simple to make!  So grab your ailing and old age pensioner bananas and give them a rewarding second life.  It's the decent thing to do.  (And don't forget to get the coffee or tea ready!).


31 July 2016

It's been a while since I made these, as we've been using our old aged bananas in smoothies and suchlike.  However, I wanted to make these again so I bought the bananas and announced they should not be eaten.  LOL  This time, I made the mix with apple sauce as I didn't have any mango puree to hand and included dark chocolate chips in the mix too.  The bars came out slightly lighter in colour (see above), but no less tasty and the chocolate chips were a great addition.

BANANA, OAT AND CHOCOLATE MUNCHY BARS   (makes 8)

Ingredients :

2.25 cups coarse porridge oats
0.5 tsp baking powder
0.5 tsp bicarbonate of soda
0.25 tsp sea salt
1 tsp ground cinnamon
3 very ripe bananas
2 tsp vanilla extract
0.25 cup mango puree (apple sauce is good too)
0.25 cup runny honey
100g dark chocolate chips

For chocolate drizzle:

4-5 squares of dark chocolate.


Method :

1.  Preheat oven to 180degC/350degF/Gas 4.  Oil a 9 x 9 inch square baking tin (I used a silicone version) with a little olive or light vegetable oil.  Add a strip of baking parchment as wide as the base of the tin, that extends higher than the sides, to aid removal of the cake when cooked.

2.  Place oats into a food processor and whizz until the oats resemble a coarse flour.

3.  Pour the oats into a medium bowl and add the baking powder, bicarb., salt and cinnamon.  Mix them through well and set aside.

4.  Break up the bananas into chunks and put them into the food processor.  Add the vanilla, mango puree (or apple sauce) and honey.  Whizz until all the chunks are gone and the mixture is smooth.

5.  Pour the banana mixture into the oaty mixture, add the chocolate chips and stir until just combined.  Don't be tempted to over-stir.

6.  Pour the resulting mixture into your prepared tin and level the surface.

7.  Bake for 15-20 minutes or until a skewer inserted into the centre comes out clean. Cool for 10-15 minutes in the tin, on a wire rack.  Then, using the greaseproof paper, gently remove the cake and set it onto the rack for drizzling.

8.  Prepare the drizzle by placing the chocolate into a bowl over a pan of simmering water.  Make sure the bottom of the bowl does not touch the water.  Leave the chocolate to melt and don't be tempted to over stir, or the chocolate may seize and separate.

9.  Once melted, remove from the pan of water and using a silicone spatula or the back of a large spoon, drizzle the chocolate over the top of bars.

Cut the bars into 8 pieces and enjoy!

Printable version

10 March 2014

When life sends you rhubarb - make Rhubarb & Custard Cake!

Rhubarb and custard cake.  Now there's a duo of loveliness, embodied in a name.  Firstly, rhubarb and custard - who can resist?  Then, cake!  How on earth do you combine rhubarb, custard and cake, without turning it into trifle?  Well, read on, because it is possible, beautifully possible.

I have introduced you to Ruby, our rhubarb plant, on previous occasions.  We now have two of them, as because Ruby was growing so well (and about to take over the garden), we split her into two.  In this way, RubyTwo was born.  In fact, because a bit fell off and got planted into a pot just to see whether it would flourish - which it did - there was  actually a RubyThree as well.  However, RubyThree has now gone to live with the-neighbour-across-the-road-with-the-caravan and is now happily living in their back garden.  Which means, of course, that we now have one less person to donate rhubarb to when Ruby and RubyTwo are in full production mode.

However (I digress), Ruby and RubyTwo only gave themselves a few weeks off over winter and are back with a bang.  All that water seemed to agree with them and here we are at the beginning of March able to harvest rhubarb that hasn't been forced!  Most unusual - and most delicious!


Hiding its light under a bushel of icing sugar!
During the menu planning round at the beginning of the week, I had put a High Tea on the menu for Saturday.  Son and heir loves a High Tea and it is often an excuse to bake in some way, shape or form.  I had planned to make some yummy sausage rolls to go with coleslaw, but these got shot down in flames for various reasons and, in fact, I escaped doing any baking at all.

I had asked hubby - who is evolving as the Senior Cake Baker of the family - whether he would be able to bake us a cake to go with High Tea, so he set to pondering on what type.  In the meantime, the new BBC Good Food magazine dropped through the letterbox.  Hiding in amongst its plump, luscious pages, was a little booklet of bakes where he spotted the Rhubarb & Custard cake.  The recipe is on their website, at http://www.bbcgoodfood.com/recipes/10500/rhubarb-and-custard-cake if you should fancy giving it a go yourself.

Ruby during the height of February's storms - completely unbothered.
Now I had given the recipe a once-over look in the past and registered that it was quite an involved process (by my standards), so hadn't ventured to make it.  Hence, when hubby announced an interest in it, I posed the question whether he was prepared for all the stages involved with it and happy that it wasn't too much "fiddling around".  We both hate recipes that have you doing one process here, then getting out a whole other set of equipment for another process there, then back to the first lot for another process - so dull!  However, he'd read it through and was happy with it - so off we went.

I have to admit, I was still in bed dreaming of fairies and unicorns (a.k.a. snoring my head off) when he ventured forth into the garden and gave Ruby her first haircut of the year.  As I was when he baked his first batch of rhubarb for a bit too long and converted it to rhubarb compote.  He was only following the recipe!  Indeed, I had moved on to dreaming of bacon sandwiches for breakfast (a.k.a. snoring even louder) when he gave Ruby her second haircut of the year and successfully roasted his rhubarb pieces by roasting covered for just 5 minutes, then uncovered for another 5-6 minutes - a change to the original recipe that I have reflected in my version below.

I came to at about the time he was ready to put the cake into the oven, mainly because he brought me one of the whisks to taste the custard infused cake batter.  Mmmmn - it was good!


The process, you see, is to dry out the rhubarb by baking it in the oven, then cooling.  Meanwhile, you make up the cake batter - which has the custard mixed in.  Oooh, interesting!  Then, you layer rhubarb and cake batter into the tin, finally finishing with blobs of custard and pieces of rhubarb on top.

It smelled spectacular as it was baking, but took an awful lot longer than the recipe stated.  Either they got the recipe wrong, or nobody tested it before publishing.  In all, I would say that it took about 30 minutes longer than the recipe states - so be prepared if you decide to make it.

Just baked and smelling sooooo good!
All in all, with the false start, it probably took hubby around 3 hours or so to make the cake.  However, is it worth it?  Oh my goodness yes!

The texture is a very different to that of a sponge-like cake.  Throw those ideas out of the window, as although it has significant substance, its texture is robust rather than heavy.  The custard has given the cakey part that lovely vanilla custard flavour that can't help but go so well with the rhubarb that is shot through the cake like little pink stained glass windows.

This cake is the perfect crossover between a tea time cake and a dessert style cake.  It would be as at home with a cup of tea as it is with a drizzle of additional custard and a spoon, so made an absolutely perfect addition to a High Tea.  However, when you add a spoonful or two of the rhubarb compote to the plate, it transforms into a full-on rhubarb lover's treat.

Cooling ..... is it ready, yet?
Yes, you'll need time in which to make this cake - but if you need rhubarb, you know who to ask!

RHUBARB & CUSTARD CAKE    (serves 10-12)

Ingredients :

400g rhubarb
50g caster sugar
250g butter, softened plus extra for greasing
150g ready made custard (Ambrosia, not home-made)
250g self raising flour
half a tsp baking powder
4 large eggs
1 tsp vanilla extract
250g golden caster sugar
icing sugar, for dusting.

Method :

1.  Heat oven to 200C/fan 180C/gas 6.

2.  Rinse the rhubarb and shake off excess water. Trim the ends, then cut into little-finger-size pieces.

3. Put onto a baking tray, tip over 50g caster sugar, toss together, then shuffle rhubarb so it’s in a single layer. Cover with foil, then roast for 5 mins. Remove foil. Give everything a little shake, roast for 5 mins more or until tender and the juices are syrupy.

4.  Carefully drain off the juices before you let the fruit cool.

5.  Butter and line a 23cm loose-bottomed or springform cake tin and pre-heat your oven to 180C/fan 160C/gas 4.

6.  Reserve 3 tbsp of the custard in a bowl.

7.  To a large bowl, add the butter, flour, baking powder, eggs, vanilla, sugar and remaining custard.  Beat together until creamy and smooth.

8.  Spoon one-third of the mix into the tin, add some of the rhubarb, then dot with one-third more cake mix and spread it out as well as you can - there's no need to be too clinical about this though!

9.  Top with some more rhubarb, then spoon over the remaining cake mix, leaving it in rough mounds and dips rather than being too neat about it. Scatter the rest of the rhubarb over the batter, then dot the remaining custard over.

10. Bake for 50 mins until risen and golden, then cover with foil and bake for 30-40 mins more. It’s ready when a skewer inserted into the middle comes out clean. Cool in the tin, then dredge with icing sugar when cool.

Printable version


9 June 2012

Strawberry & Raspberry Amaretto Gateau for the Jubilee Weekend

For ages, the Jubilee weekend was just something crepuscular and ephemeral that was likely to happen around us, but not really involve us, here at Eatwell Towers.  Right up until little more than a week beforehand, when I found myself being sucked in to the holiday vibe that was playing around the whole event.

It's not that I'm anti-royal (having worked for Historic Royal Palaces Agency for nearly ten years, that's highly unlikely), or have any antipathy towards the Jubilee in a Morrisey kind of way, it's just that it felt rather as though it was all happening in London and so didn't really affect us here in Dorset.

Sponge cakes look promising!
As the weekend got closer, I began to twig on to the fact that there was going to be quite a lot (for "quite a lot", read "huge amounts") of coverage on the t.v. which would probably be worth watching simply from a historical "I saw that" point of view.

I had, of course, known about the activity surrounding the Jubilee that the blogging world was devoting to the cause - but that wasn't anything new.  After all, there only has to be a "Green Pea Day" and out come all the blogs detailing green pea recipes, (mine amongst them, very often!) so it was only to be expected that there would be heaps of baking blogs going bonkers with cupcakes in the shape of corgis, crowns and all things royal.

Yes, very promising. Fingers crossed they cut okay!
My inner resistance towards being a sheep (apologies to everyone who feels they may fall into the sheepy category) was what was stopping me from scheduling in a big old Jubilee High Tea, with Charles & Camilla's favourite scones, Kate & Wills' favourite chocolate biscuit cake et al - and blogging about it.  So because of this inner battle of mine, this is why I wound up making an almost last minute whizz bang spiffingly enormous creamy and alcoholic gateau.  Yes, you'll find me at the back of the flock following on apologetically.

Well, in my own defence, it just didn't seem right to be a) on a Sunday, b) in June, c) in the televisual presence of royalty and d) following on from Roast Beef and Yorkshire Pudding, to have anything else except an enormous confection of cake, summer berries and a dash of alcohol.

Royals to one side for a moment, I was jolly glad I did - as the Gateau was absolutely To.Die.For.

I had said in my meal planning post for that week, that I was musing upon making a fruit sponge of some sort, so the thought was in my head even then.  However, it grew from a simple summer fruit sponge as time went along.  It's probably just as well the Jubilee happened when it did, before I'd had a chance to consider coating the lot in chocolate or something equally damaging to our waistlines.  I think it probably did enough damage as it was!

After adding the syrup - just look at the lovely texture!
The sponge was a simple "bung it all in together, whisk it up, put it in sandwich tins, bake it" sponge cake.  However, it was when hubby mentioned a gateau and I hit upon the idea of cutting each cake into two layers, that the rot set in.

I had a punnet of strawberries and a punnet of raspberries that we'd picked up as having been marked down in price, so I had the fruit there - and I'd bought a carton of double cream just because I anticipated requiring it for the fruit.

Raspberry layer in place
Now fruit and cream would be good - very good - in between each layer, but I wanted to make this gateau more gateau-like - sumptuous, delicious and naughty.  Hubby reminded me that we had a bottle of Amaretto liqueur in the cupboard and so the idea of the Amaretto syrup was born.  It was a simple matter to melt some sugar in water and add 50ml or so of Amaretto to it - then let it cool as the cakes cooled.  Once everything was cool, I brushed the syrup onto each layer of cake and let it soak in.

After that, it was just slather on the cream, add the sliced fruits and layer it up.  Do a simple little decoration on top, add a little icing sugar and ta daaa!  The Jubilee Gateau was born.
Hand me a fork and make it snappy!

Even though I knew the gateau was four layers tall, when hubby brought the slices through for dessert it still surprised me how enormous the whole thing was.  In truth, however, it was no more than a Victoria Sponge cake with extra cream and fruit instead of jam (and a hit of Amaretto, of course).  So simple to produce - but so very effective and so very, very tasty.


STRAWBERRY & RASPBERRY AMARETTO GATEAU   (makes 6-10 slices)

Ingredients :

200g caster sugar
200g softened butter
4 beaten eggs
200g self-raising flour
1 tsp baking powder
2-3 drops vanilla essence
85g caster sugar (for the syrup)
2 tbsp cold water
50ml Amaretto liqueur
300ml double cream
2 tbsp icing sugar
strawberries & raspberries to fill.

Method :

1.  Pre-heat your oven to 190degC/375degF/Gas5.  Prepare two sandwich tins by lining with a circle of baking parchment.  I included the sides of my tins in the lining, but only because they're particularly old tins - nice shiny new ones won't need this.

2.  In a large bowl (I used our Kenwood Chef) place the 200g of caster sugar, the softened butter, the eggs, the flour, baking powder and vanilla essence.  Starting slowly (so as to keep the flour in the bowl), begin to whisk the ingredients together - or beat them together, if you're particularly sprightly and are doing it by hand.  Continue to mix until you have a soft, smooth texture whereupon you can divide the mixture equally between the two tins and smooth off the top surface.

3.  Put the two tins together on the one shelf if possible, and bake for some 20 minutes or until risen, golden and the cake springs back when lightly depressed in the centre.

4.  Remove the cakes from the tins and place onto a cooling rack until perfectly cool.

5.  In the meantime, you can get on and make the Amaretto syrup.  So take a small saucepan and place the 85g of caster sugar, the water and liqueur into it.  Mix them together and heat gently until the sugar has all dissolved.  Leave to cool.

6.  To assemble the gateau, take each cake and very carefully with a sharp bread knife cut through to create two layers from each cake.  Lay each layer out separately.

7.  Taking the syrup, brush onto each cake layer, distributing the syrup equally amongst the layers until it has all gone.

8.  Whip the cream with the icing sugar until it reaches soft peaks - be careful not to take it beyond this stage.

9.  Here on in, it is a simple matter of coating each layer with cream and adding sliced strawberries and the raspberries - remembering to save a few for decoration.  I would recommend that you place the first layer onto the presentation cake plate and build the cake from there, adding cream and fruit, then a layer of cake, then cream and fruit until you reach the last layer.

10.  Simply arrange the saved fruit attractively, sprinkle over a little icing sugar snow - and serve.

Printable version

.   
Related Posts Plugin for WordPress, Blogger...