If you're me, you'd look at that title and have to come and see what it's on about! After all, giant couscous?
It really isn't so long ago that I was bewailing not being able to get enough flavour into normal couscous, without venturing into giant couscous - or Mograbiah, to give it its proper name.
Mograbiah does bear plenty of similarity to ordinary couscous in that both of them are round in shape, made from pasta dough and are vehicles for other flavours. However, where they differ (apart from the obvious size) is that where ordinary couscous is prepared by putting in a bowl and pouring a small amount of boiling water onto it, giant couscous is prepared by putting into a saucepan, pouring a slightly larger amount of water (or stock) on and heating gently or simmering until the majority of the water is absorbed, then you can leave it to soak up the remainder of the liquid.
It has a different texture too, well okay each grain is a lot larger so that would follow, but it also has a slightly slippery texture that can make eating it a bit of a challenge for youngsters who haven't yet learned that they eat with their mouth closed. Son and heir had no problem with it, but then there's little that disappears into his maw that ever sees the light of day again.
As with all couscous, its own flavour is very bland and it is entirely reliant upon what you put with it, for flavour. As such, cooking it in stock is a very good start.
With our Mograbiah, I decided to go for one last mediterranean style dish and roasted some courgette, aubergine, butternut squash, red pepper and red onion and dressed the lot with fresh mint and coriander plus a lemon juice and olive oil dressing.
For a welcome zing, I baked the pork chops in some of the excellent Mic's Chilli El Loco BBQ Sauce. The highly flavoured pork went so well with the calming influence of the roasted vegetables and zesty dressing. A real ying/yang thing was going on there!
Of course, it isn't essential that you put a barbecue pork chop with your giant couscous - you can use it however you fancy and with whatever you fancy. I found my pack of Mograbiah in my local Asda, which has a particularly good World Foods section. However, I'm sure you would be able to find some at your local ethnic food store - for instance, I know that Makkah's on the Ashley Road, Poole, definitely carries it. For me, it makes a nice change from ordinary couscous - and as I often have problems trying to decide upon the carbohydrate element in a meal, anything that extends my options can't be bad!
MEDITERRANEAN STYLE GIANT COUSCOUS (MOGRABIAH) (feeds 3)
Ingredients :
1 tablespoonful of giant couscous pearls per person, plus a little for luck
vegetable or chicken stock (home-made, powder, cube or Knorr stock pot - all are good)
half a butternut squash, cut into half inch dice
a red pepper, seeds removed and cut into one inch sheets
a courgette, cut into half inch dice
half an aubergine, cut into half inch dice
a red onion, peeled and cut into thin wedges
olive oil
sea salt & freshly ground black pepper
1 tbsp extra virgin olive oil
juice of half a lemon
a handful of mint leaves, shredded
a handful of coriander, chopped finely.
Method :
1. Pre-heat your oven to 180degC/350degF/Gas 4.
2. Check the cooking instructions on the side of the packet of Mograbiah and follow them, substituting stock for water.
3. While the couscous (Mograbiah) is cooling, place the vegetables (without the herbs) onto a baking sheet that has been lined with non-stick silver foil. Drizzle the olive oil over and season well. Toss the vegetables in the oil and seasoning, then place them into the oven to bake for 25-30 minutes or until tender.
4. Just before the vegetables are finished cooking, mix together the dressing for the couscous by placing the extra virgin olive oil, lemon juice and some seasoning into a small bowl and whisk together.
5. Shred the mint leaves and chop the coriander.
6. When the vegetables are cooked, tip them from the baking sheet directly onto the couscous. Stir through gently, taking care not to break up the pieces of vegetable.
7. Add the dressing and herbs and gently stir through again and serve before the herbs have a chance to wilt.
Printable version
.
Showing posts with label lemon juice. Show all posts
10 January 2012
Lemony Prawn & Chorizo Rice - a fab quick one pot supper
Just before Christmas I took out a subscription (very nearly put "prescription" - totally different thing!) with the BBC's Good Food Magazine.
Now I know that the majority of the recipes that appear in the magazine also appear online, but I just enjoy having the pictures right there - up close and in front of me - when I am sitting in the living room and there's something dull on the t.v. (or there's nothing on the t.v. - which is more like it, these days!). No, I'm afraid I don't possess a laptop - it's a desktop or nothing, for me. Comes of being a very swift touch typist - I really hate the restriction of a laptop's keyboard. Either that or I'm just plain old fashioned - which could easily be it, I'll admit.
Anyway, back to the magazine. To save having great teetering piles of magazines lurking around the flat, I've taken to cutting out the recipes that attract my attention and keeping them in a concertina file. I'll then consult the file when I'm putting together the week's menu's - and a very good system it has proven to be.
All of which was a fairly long-winded way of saying that this recipe originated in the BBC Good Food magazine for February!
Hubby loves chorizo, all of us love prawns and son & heir particularly enjoys one pot, no side dishes, type meals. Add to those good points the extra positive point that it is relatively low in fat, which is something I'm very keen on, these days and you've got a winner of a dish.
I tweaked the original recipe a little, adding twice the amount of chorizo (which apparently still wasn't enough - hubby could have had lots more!) and using vegetable stock instead of just water for the rice. I also used cooked peeled prawns instead of raw, basically because they're easier to get hold of and cheaper.
I also tweaked it slightly in retrospect, as both chaps found the lemon to be too dominant. Now I like lemon in this context, but it must be a girl thing, as neither of the chaps do. Hence, if your family like lemon then add the zest as well as the juice and maybe increase it back to the one lemon in the original recipe.
I found the dish to be lovely and light, with plenty of interest from the mix of chorizo and prawn. It also contains turmeric - and any dish that does that, is immediately in my good books. Son & heir completely cleared his plate, which was something of a surprise as I'd expected to at least find strips of red pepper left. From that, I'd say that you could class this dish as being "teenager friendly", if nothing else!
Edited to say : time has moved on and it's now 10 April 2013. I've just made this recipe (see photo above) and swapped out the vegetable stock for the beautiful Essential Cuisine fish stock. I also added two chestnut mushrooms, sliced. The end result was really, really good and I recommend it to you.
LEMONY PRAWN & CHORIZO RICE (feeds 3)
Now I know that the majority of the recipes that appear in the magazine also appear online, but I just enjoy having the pictures right there - up close and in front of me - when I am sitting in the living room and there's something dull on the t.v. (or there's nothing on the t.v. - which is more like it, these days!). No, I'm afraid I don't possess a laptop - it's a desktop or nothing, for me. Comes of being a very swift touch typist - I really hate the restriction of a laptop's keyboard. Either that or I'm just plain old fashioned - which could easily be it, I'll admit.
Anyway, back to the magazine. To save having great teetering piles of magazines lurking around the flat, I've taken to cutting out the recipes that attract my attention and keeping them in a concertina file. I'll then consult the file when I'm putting together the week's menu's - and a very good system it has proven to be.
All of which was a fairly long-winded way of saying that this recipe originated in the BBC Good Food magazine for February!
Hubby loves chorizo, all of us love prawns and son & heir particularly enjoys one pot, no side dishes, type meals. Add to those good points the extra positive point that it is relatively low in fat, which is something I'm very keen on, these days and you've got a winner of a dish.
![]() |
| Mmmn, yummy! Who'd have thought it'd be good for you? |
I also tweaked it slightly in retrospect, as both chaps found the lemon to be too dominant. Now I like lemon in this context, but it must be a girl thing, as neither of the chaps do. Hence, if your family like lemon then add the zest as well as the juice and maybe increase it back to the one lemon in the original recipe.
I found the dish to be lovely and light, with plenty of interest from the mix of chorizo and prawn. It also contains turmeric - and any dish that does that, is immediately in my good books. Son & heir completely cleared his plate, which was something of a surprise as I'd expected to at least find strips of red pepper left. From that, I'd say that you could class this dish as being "teenager friendly", if nothing else!
Edited to say : time has moved on and it's now 10 April 2013. I've just made this recipe (see photo above) and swapped out the vegetable stock for the beautiful Essential Cuisine fish stock. I also added two chestnut mushrooms, sliced. The end result was really, really good and I recommend it to you.
LEMONY PRAWN & CHORIZO RICE (feeds 3)
Ingredients :
1 tbsp olive oil
1 onion, sliced
2 small red peppers, deseeded and sliced
100g chorizo, thinly sliced
2 garlic cloves, crushed
1 red chilli, chopped & deseeded if you don’t like it too hot
½ tsp turmeric
250g long grain rice (I used Basmati)
500ml boiling low salt vegetable or fish stock (I use Essential Cuisine stock)
200g cooked peeled prawns, defrosted if frozen
100g frozen peas
juice of ½ lemon.
Method :
1. Heat the oil in a shallow pan (or frying pan) with a lid. Add the onion, peppers, chorizo, garlic and chilli and fry over a high heat for 3 minutes.
2. Reduce the heat to medium, and add the turmeric and rice, stirring to ensure the rice is coated in the cooking juices.
3. Pour in the stock, stir then cover and cook for 12 minutes or until the rice is nicely al dente.
4. Uncover and stir in the prawns and peas. Add a splash more water if the mix is looking a little dry and cook for as long as it takes for the peas to defrost and cook and the prawns to be heated through – around 2 minutes or so.
5. The rice should now be tender, so stir in the lemon juice and serve.
20 November 2011
Smoked Salmon Mousse
The one dish from the Christmas Buffet we produced that took any "cooking", as opposed to simply assembly, was the Smoked Salmon Mousse.
However, it was so simple to make that I hesitate to call it "cooking". More a case of understanding balance of flavours, plus the ability to operate a food processor!
I dithered (for an astonishing length of time) over whether to include cream cheese as well as the double cream - and then wound up using them both, but in smaller quantities. I figured that they both had a part to play in the texture and flavour of the mousse - and I was right.
As for the horseradish, even if you are not a horseradish fan, do include it. It isn't obvious - and adds that little bit of tang that it is apparent isn't lemon juice, but you can't quite work out what it is.
Between the fish itself, the horseradish, the lemon juice and the dill, this is a mousse of extraordinary dimensions - so take care as to what you serve it on. It can cope with being served on something like the rye bread we used, as the bread has a flavour that is very different to that of the mousse. However, served on something like a Blini, I can't help but think that the overpowering flavour would become cream.
I know that the supermarkets are selling small packs of smoked salmon offcuts - Asda do one for 90p - which would be just perfect for this mousse. After all, there's no need to chop up a perfectly lovely piece of smoked salmon!
The recipe below makes double the amount seen in the ramekin above. I only made half because I was just using it for canapés and didn't want any left over, but it just goes to show how easy it is to make the amount that you are going to require - which is incredibly useful if you've spent a lot on a little!
Thank you to Knorr for supplying us with the majority of the ingredients for this dish.
SMOKED SALMON MOUSSE
Ingredients :
120g smoked salmon
2-3 tbsp double cream
1½ tbsp cream cheese
½ a tsp of creamed horseradish
½ a lemon, juiced
fresh Dill, to taste.
Method :
1. In a mini food processor, or a bowl suitable for using a hand blender, place the smoked salmon and whizz to chop into small pieces.
2. Add the cream, cream cheese and horseradish, then slightly less than the stated amounts of lemon juice and dill. Whizz to combine, and taste. Add more cream, lemon juice or dill as required and whizz & taste until it suits your palate and the desired consistency is reached.
3. Decant into a bowl, ready for use.
.
However, it was so simple to make that I hesitate to call it "cooking". More a case of understanding balance of flavours, plus the ability to operate a food processor!
I dithered (for an astonishing length of time) over whether to include cream cheese as well as the double cream - and then wound up using them both, but in smaller quantities. I figured that they both had a part to play in the texture and flavour of the mousse - and I was right.
As for the horseradish, even if you are not a horseradish fan, do include it. It isn't obvious - and adds that little bit of tang that it is apparent isn't lemon juice, but you can't quite work out what it is.
Between the fish itself, the horseradish, the lemon juice and the dill, this is a mousse of extraordinary dimensions - so take care as to what you serve it on. It can cope with being served on something like the rye bread we used, as the bread has a flavour that is very different to that of the mousse. However, served on something like a Blini, I can't help but think that the overpowering flavour would become cream.
I know that the supermarkets are selling small packs of smoked salmon offcuts - Asda do one for 90p - which would be just perfect for this mousse. After all, there's no need to chop up a perfectly lovely piece of smoked salmon!
The recipe below makes double the amount seen in the ramekin above. I only made half because I was just using it for canapés and didn't want any left over, but it just goes to show how easy it is to make the amount that you are going to require - which is incredibly useful if you've spent a lot on a little!
Thank you to Knorr for supplying us with the majority of the ingredients for this dish.
SMOKED SALMON MOUSSE
Ingredients :
120g smoked salmon
2-3 tbsp double cream
1½ tbsp cream cheese
½ a tsp of creamed horseradish
½ a lemon, juiced
fresh Dill, to taste.
Method :
1. In a mini food processor, or a bowl suitable for using a hand blender, place the smoked salmon and whizz to chop into small pieces.
2. Add the cream, cream cheese and horseradish, then slightly less than the stated amounts of lemon juice and dill. Whizz to combine, and taste. Add more cream, lemon juice or dill as required and whizz & taste until it suits your palate and the desired consistency is reached.
3. Decant into a bowl, ready for use.
.
6 June 2011
Strawberry & Rhubarb Pie - why haven't I made this before now?
I'm posting about this marvellous pie now, out of sequence, owing to the clamour that is going on via Twitter, for the recipe. :)
It really was a fabulous pie - and although I've never been to America, nor had an American pie, it seemed to answer the description (and match the photographs) of a good deep-filled American pie.
I've been asked on Facebook (where I am "Jenny Davies" if anyone wants to find me) what motivated the pie. It's a good question, because it's not a combination of fruits that we have really considered using, here in the U.K. All of which gives you a clue about where the inspiration came from. I had done a blog posting involving rhubarb, which set off a chain of reactions from those friends in the USA, who were all saying "Oh, I love rhubarb, but in a strawberry & rhubarb pie" - so, inevitably, I asked what was so special about this pie. The answer was "it's not something that's easy to express, but you'll know once you've had one". So, of course, I promised myself that once strawberries were in season and £1 a punnet (they were £2.50 a punnet at the time), I'd indulge.
That time is now, and the pie has been made. I can confirm that the sweetness of the strawberries offsets the tartness of the rhubarb and the two flavours go so well together (with the aid of a little lemon zest, lemon juice and cinnamon), that the pie is a "mmmnnnn..." and "ooooh.." and "mmhmmnff...." of pleasure, experience. The rhubarb stays in it's pieces and doesn't disintegrate to mush and the strawberries are very definitely strawberries, having resisted the urge to disintegrate to their own class of mush, also. The three tablespoons of sugar was very definitely enough to sweeten the rhubarb and enhance the strawberries.
The interesting thing is, that because you don't part-bake the base of the pie (it's an "under and over" type of crust) and you don't cook the fruit prior to adding it to the pie, the bottom crust has a chance to cook whilst the strawberries & rhubarb are still thinking about releasing their juice. By the time they do release that lovely juice, the bottom crust is cooked. Magic. Nobody likes a pie with a soggy bottom.
A quick word about pastry. Because I don't have a lot of energy in my own personal tank and I was also cooking a shoulder of pork, I opted for shop-bought frozen shortcrust pastry in this instance. However, there's no reason why you should do this if you don't want to. By all means make your own shortcrust pastry - you'll need enough to cover the base of the pie dish and provide a top for your pie.
Oh, and another quick word about quantities. I had five 9 inch long sticks of rhubarb and a punnet of strawberries - and the lot went in. I cut the rhubarb into pieces of around a centimeter or half an inch long and the largest of the strawberries I sliced in half. I piled the fruit into the pie dish until I had a mini-mountain going on - and so long as you've got enough pastry to fit over the top, I see no reason not to. After all, you won't get a deep-filled pie, unless you heap the goodies in!
11.09.13 : Edited to tell you about some changes I've made to the recipe.
The first is that I have been to part-baking the bottom layer of pastry. Yes, it takes a little bit longer, but it does ensure that the bottom of your pie stays crisply baked.
I have also, once part-baked, brushed a light coating of egg yolk (the same egg wash as you use for the top) onto the bottom layer of pastry while it is still hot. This sets and renders the lower pastry juice-proof.
Because of the quantity of juice that this pie delivers, I experimented with various remedies. The one which worked the best - and which I shall adopt henceforth - is to toss the fruit in a spoonful or two of cornflour. As the fruit cooks and releases its juice the juice mixes with the cornflour, which when heated then thickens. This serves to stop your pie from becoming too wet - and ultimately keeps your lovely crisp pastry from becoming all soggy. It works like a charm and you don't notice the cornflour at all. Perfect!
These changes have been reflected in the updated recipe below.
STRAWBERRY & RHUBARB PIE : feeds 4-5
Ingredients :
Pack of frozen shortcrust pastry (I used the ready-rolled rounds)
4-5 sticks of rhubarb (or as much as you can cram in), cut into 1cm pieces
a punnet of strawberries, hulled and any big ones sliced in half
3 tbsp granulated sugar
1-2 tbsp cornflour
half a tsp of cinnamon
half a lemon, zested and juiced
1 egg yolk
a tsp of granulated sugar as decoration.
Method :
1. Pre-heat your oven to 180deg C (fan).
2. Take one of the rounds of ready-made pastry and, if necessary, roll it out to fit the pie dish. Place it in the dish and leave the excess flopping over the edge which will ensure that the pastry won't shrink back from the edges of the pie dish.
3. Place a layer of greaseproof paper or baking parchment on top of the pastry and fill with baking beans. Bake in the centre of the oven for 15 minutes.
4. While the pastry bakes, place the two fruits, sugar (except the tsp for decoration), cornflour, cinnamon, lemon zest and juice into a bowl and mix to combine.
5. As soon as you have removed the pastry from the oven, remove the paper and the baking beans and set them aside somewhere safe to cool. Brush a light coating of the egg yolk onto the pastry while it is still hot.
6. Pile the fruit into the be-pastried pie dish and arrange into a neat mountain.
7. Brush egg yolk around the pastry edge.
8. Take the second round of pastry and roll out (if necessary) to ensure it is big enough to fit over the fruit so that the top and bottom edges meet and cut a small cross into the centre of the round. Place on top of the pie and very gently make sure the edges meet.
9. Using a small sharp knife tease out the cross in the centre, to create a hole for steam to escape. Then press the tip of the knife into the pastry all around the edge, forming a decorative pattern that serves to seal the edges of the pie.
10. Taking a sharp knife, trim the excess pastry away.
11. I always place my pie onto a foil covered baking sheet, just in case the juice decides to overflow whilst cooking. It's easier to throw away some silver foil, than clean your oven!
12. Brush the top of your pie with the remainder of the egg yolk to glaze and add the teaspoon of sugar, sprinkled over, to make it look yummy. Bake for around 25 minutes, then turn to ensure an even bake. Continue baking for another 15 minutes or until the pastry is crisp and evenly golden.
Printable version
It really was a fabulous pie - and although I've never been to America, nor had an American pie, it seemed to answer the description (and match the photographs) of a good deep-filled American pie.
I've been asked on Facebook (where I am "Jenny Davies" if anyone wants to find me) what motivated the pie. It's a good question, because it's not a combination of fruits that we have really considered using, here in the U.K. All of which gives you a clue about where the inspiration came from. I had done a blog posting involving rhubarb, which set off a chain of reactions from those friends in the USA, who were all saying "Oh, I love rhubarb, but in a strawberry & rhubarb pie" - so, inevitably, I asked what was so special about this pie. The answer was "it's not something that's easy to express, but you'll know once you've had one". So, of course, I promised myself that once strawberries were in season and £1 a punnet (they were £2.50 a punnet at the time), I'd indulge.
![]() |
| All done and ready for baking |
![]() |
| Just out of the oven - see the juice escaping from the top? |
A quick word about pastry. Because I don't have a lot of energy in my own personal tank and I was also cooking a shoulder of pork, I opted for shop-bought frozen shortcrust pastry in this instance. However, there's no reason why you should do this if you don't want to. By all means make your own shortcrust pastry - you'll need enough to cover the base of the pie dish and provide a top for your pie.
![]() |
| You want a spoon, don't you - go on, admit it. |
11.09.13 : Edited to tell you about some changes I've made to the recipe.
The first is that I have been to part-baking the bottom layer of pastry. Yes, it takes a little bit longer, but it does ensure that the bottom of your pie stays crisply baked.
I have also, once part-baked, brushed a light coating of egg yolk (the same egg wash as you use for the top) onto the bottom layer of pastry while it is still hot. This sets and renders the lower pastry juice-proof.
Because of the quantity of juice that this pie delivers, I experimented with various remedies. The one which worked the best - and which I shall adopt henceforth - is to toss the fruit in a spoonful or two of cornflour. As the fruit cooks and releases its juice the juice mixes with the cornflour, which when heated then thickens. This serves to stop your pie from becoming too wet - and ultimately keeps your lovely crisp pastry from becoming all soggy. It works like a charm and you don't notice the cornflour at all. Perfect!
These changes have been reflected in the updated recipe below.
STRAWBERRY & RHUBARB PIE : feeds 4-5
Ingredients :
Pack of frozen shortcrust pastry (I used the ready-rolled rounds)
4-5 sticks of rhubarb (or as much as you can cram in), cut into 1cm pieces
a punnet of strawberries, hulled and any big ones sliced in half
3 tbsp granulated sugar
1-2 tbsp cornflour
half a tsp of cinnamon
half a lemon, zested and juiced
1 egg yolk
a tsp of granulated sugar as decoration.
Method :
1. Pre-heat your oven to 180deg C (fan).
2. Take one of the rounds of ready-made pastry and, if necessary, roll it out to fit the pie dish. Place it in the dish and leave the excess flopping over the edge which will ensure that the pastry won't shrink back from the edges of the pie dish.
3. Place a layer of greaseproof paper or baking parchment on top of the pastry and fill with baking beans. Bake in the centre of the oven for 15 minutes.
4. While the pastry bakes, place the two fruits, sugar (except the tsp for decoration), cornflour, cinnamon, lemon zest and juice into a bowl and mix to combine.
5. As soon as you have removed the pastry from the oven, remove the paper and the baking beans and set them aside somewhere safe to cool. Brush a light coating of the egg yolk onto the pastry while it is still hot.
6. Pile the fruit into the be-pastried pie dish and arrange into a neat mountain.
7. Brush egg yolk around the pastry edge.
8. Take the second round of pastry and roll out (if necessary) to ensure it is big enough to fit over the fruit so that the top and bottom edges meet and cut a small cross into the centre of the round. Place on top of the pie and very gently make sure the edges meet.
9. Using a small sharp knife tease out the cross in the centre, to create a hole for steam to escape. Then press the tip of the knife into the pastry all around the edge, forming a decorative pattern that serves to seal the edges of the pie.
10. Taking a sharp knife, trim the excess pastry away.
11. I always place my pie onto a foil covered baking sheet, just in case the juice decides to overflow whilst cooking. It's easier to throw away some silver foil, than clean your oven!
12. Brush the top of your pie with the remainder of the egg yolk to glaze and add the teaspoon of sugar, sprinkled over, to make it look yummy. Bake for around 25 minutes, then turn to ensure an even bake. Continue baking for another 15 minutes or until the pastry is crisp and evenly golden.
Printable version
1 June 2011
The hummus muse hath struck!
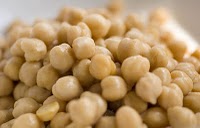
Since forever, my hubby has been saying to me “you should make your own hummus, you know” (much in the same way as he’s now saying “you should make your own gnocchi”). So while the gnocchi still waits, I overcame my reluctance and bought some Tahini paste (which is made from sesame seeds), dried chickpeas – and waited for the muse to strike.
Well, the muse took her time – as 6 months down the line, I’ve just made my first batch of hummus. I found that the first problem was remembering to put the chickpeas (also known as "little bums" - well, have you looked closely at one?) on to soak the night before. Yes, I know you can use tinned chickpeas, but if reports were to be believed, the best hummus comes from dried, soaked and boiled chickpeas rather than tinned. I am also controlled by the “I’ve got to do it RIGHT” muse, by the way.
So, having managed to remember to soak the chickpeas, I was then committed to doing something with them the next day. The cooking of the chickpeas was easy enough – into a pan with a teensy amount of salt and a whole heap of water, boil for an hour. Sorted. Tasting them thereafter, I realise now why hummus purists prefer the dried version. The flavour is far superior. So anyway, I procrastinated as long as was possible over the next stage, then got on with it.
Chuck the chickpeas into a food processor, add olive oil, Tahini (I suggest you start with just a little and work your way upwards – basically because you can’t take it out once it’s gone in and it is a very strong flavour), a good quantity of lemon juice, a squashed garlic clove and some salt & pepper. Blitz until the mixture runs smoothly, adding olive oil as you go, to get the right texture.
I found it was a trial and error thing with the quantities of olive oil, lemon juice and salt. Very much a personal taste issue.
However, it really wasn’t as big a deal as I was thinking it might be. It was really quite easy – and the hummus is a very forgiving substance, which you can blitz and taste, blitz and taste, without it getting all huffy and going wrong like egg whites will, in similar circumstances.
Of course, I got the quantities wrong and made an industrial sized quantity – so I’ll be scaling that down for future hummus makes – but it was really very nice indeed. I ate it with a drizzle of olive oil and some cayenne pepper sprinkled on, with mini carrots and some little salty biscuits and it made a very yummy mid-film snack.
20 May 2011
Bonus dish : Mouttabal or Baba Ghanoush - you tell me!
If you've read about the Char-grilled Vegetable Couscous I made earlier this week, you will know that the Aubergine I was sent in this week's supermarket order, was E-NOR-MOUS. It only required half (and the smaller "half", at that) for the couscous, which left me with a huge great lump with no home to go to.
I was mentally half prepared for this eventuality, however, as I had already flagged up (just in my mind - although how I can remember these things, when I can't remember names or words I've known for donkey's years, is beyond me) the roasted aubergine dip (whose name is a matter of contention, as you'll see) for occasions such as this.
So, I char-grilled the remainder of the aubergine at the same time as doing the vegetables for the couscous, and put it in the fridge to await a proper recipe.
It seems as though finding a "proper" recipe for Baba Ghanoush is about as easy as finding a "proper" recipe for Cottage Pie. Everybody agrees on three ingredients, which are aubergine, olive oil and lemon juice. After that, it seems like it's open season on ingredients, which is all very confusing. However, having read what felt like a whole bookload of recipes, I settled on one which seemed to show the most promise where flavour is concerned, without being terribly complicated.
However, having read Oliver Thring's treatise on the humble aubergine this morning, I am now wondering whether I made Baba Ghanoush, or its very similar cousin, Mouttabal! It would seem as though the only difference between the two is down to the addition (or not) of Tahini paste. Well, my recipe definitely included Tahini paste, from which I detect that I may very well have made Mouttabal.
Either way, it's really rather delicious. I won't claim to have made the best ever and I am sure that if I made it again, I'd change the quantities to those set out below, which I am convinced would result in a more balanced flavour - but it's definitely a "do again".
BABA GHANOUSH or MOUTTABAL (Smoked aubergine dip)
Ingredients :
1 aubergine, sliced and char-grilled, then removed from its skin.
half a garlic clove, grated (add more, if you like more garlic)
2 tsp Tahini paste
extra virgin olive oil, as necessary
sea salt
lemon juice to taste.
Method :
1. Take the aubergine flesh and pop it into a food processor capable of reducing it to a paste.
2. Add the garlic, Tahini paste and as much olive oil as is necessary. Blitz to a paste - you might want to add some more oil if it isn't loose enough, but remember you are adding lemon juice next, so don't overdo the oil at this stage.
3. Add a pinch of sea salt and the juice of half a lemon and blitz again.
4. Taste and add more salt, oil or lemon juice, if necessary.
5. The end result should be a light, mousse-like consistency that can be used as a dip or spread onto flatbreads.
.
I was mentally half prepared for this eventuality, however, as I had already flagged up (just in my mind - although how I can remember these things, when I can't remember names or words I've known for donkey's years, is beyond me) the roasted aubergine dip (whose name is a matter of contention, as you'll see) for occasions such as this.
So, I char-grilled the remainder of the aubergine at the same time as doing the vegetables for the couscous, and put it in the fridge to await a proper recipe.
It seems as though finding a "proper" recipe for Baba Ghanoush is about as easy as finding a "proper" recipe for Cottage Pie. Everybody agrees on three ingredients, which are aubergine, olive oil and lemon juice. After that, it seems like it's open season on ingredients, which is all very confusing. However, having read what felt like a whole bookload of recipes, I settled on one which seemed to show the most promise where flavour is concerned, without being terribly complicated.
However, having read Oliver Thring's treatise on the humble aubergine this morning, I am now wondering whether I made Baba Ghanoush, or its very similar cousin, Mouttabal! It would seem as though the only difference between the two is down to the addition (or not) of Tahini paste. Well, my recipe definitely included Tahini paste, from which I detect that I may very well have made Mouttabal.
Either way, it's really rather delicious. I won't claim to have made the best ever and I am sure that if I made it again, I'd change the quantities to those set out below, which I am convinced would result in a more balanced flavour - but it's definitely a "do again".
BABA GHANOUSH or MOUTTABAL (Smoked aubergine dip)
Ingredients :
1 aubergine, sliced and char-grilled, then removed from its skin.
half a garlic clove, grated (add more, if you like more garlic)
2 tsp Tahini paste
extra virgin olive oil, as necessary
sea salt
lemon juice to taste.
Method :
1. Take the aubergine flesh and pop it into a food processor capable of reducing it to a paste.
2. Add the garlic, Tahini paste and as much olive oil as is necessary. Blitz to a paste - you might want to add some more oil if it isn't loose enough, but remember you are adding lemon juice next, so don't overdo the oil at this stage.
3. Add a pinch of sea salt and the juice of half a lemon and blitz again.
4. Taste and add more salt, oil or lemon juice, if necessary.
5. The end result should be a light, mousse-like consistency that can be used as a dip or spread onto flatbreads.
.
16 May 2011
A semi-successful venture into Polenta
With that curious sensation in one's stomach that only a true foodie would recognise, (being excitement at using a new ingredient, nerves in case it all goes wrong, more nerves in case nobody likes it and even more nerves, well, just because), I got cracking with trying the family out on wet polenta.
I made sure that I would have time and attention span to deal with the polenta, by pairing it with a dead easy chicken dish - Parmesan chicken. This is basically nothing more than a chicken breast dunked in egg white, then into grated parmesan with freshly ground black pepper - and popped into the oven to roast. For something so simple, it really is lovely.
So! On to the polenta problem. I had heeded the accumulated wisdom of various Italian cooks and as such, opted for the "polenta with blue cheese & small amounts of green stuff" version.
The first quandary was what stock to use. Home-made chicken stock, or vegetable stock from a cube? Home-made chicken is my favourite, but I was nervous of it becoming too chickeny, when it was going to have a huge hunk of blue cheese melted through it later on. So, in view of this, I opted for the vegetable. In retrospect, I think perhaps the chicken would have been good, as it wouldn't have contained half as much salt as the stock cube did!
The recipe said to add a crushed clove of garlic to the stock and allow it to infuse for 2-3 minutes and then remove it. We must have super-duper garlic, or something, because even on 2 minutes, there was too much garlic! (I know, there will be several of you throwing your hands in the air and exclaiming "too much garlic? There's no such thing!" - but for us, there can be). So if you're garlic-sensitive, I'd skip this bit - and will do in future.
I'd also had a bit of a quandary over the blue cheese, in relation to the overall price of the thing. The chicken had cost £3, add to that the cost of the parmesan, then £2 for Gorgonzola ... the overall price seemed to be creeping into the expensive bracket. So, I opted for a £1 piece of French blue cheese of unknown origin. It was soft, and vaguely sweet, with a lovely salty tang - so I figured it would do. It did, indeed, do. Very nicely!
I was lucky with the polenta itself, as I'd had some for ages - since we started cooking Cornbread (which I love). However, having looked on the packet the best before date was some time in 2010. ~cough~ Oh well, it was too late to get any more by then - and I'd used it quite recently to put on roast potatoes, so I figured we wouldn't die.
I also had some baby spinach in the fridge that needed using up, so substituted that for the rocket that the recipe demanded. Personally, I think it was even nicer with the little crunch that the spinach gave.
A couple of things struck me when I was cooking the polenta dish, which were - firstly, my goodness but doesn't it thicken quickly! I had to use twice the amount of liquid that was stated in the recipe, before it would become anywhere close to the right consistency. Another thing, is that it is quite impossible for me to pour in a steady stream, while whisking like mad. I can pour in a whisk-like circle whilst whisking like mad if you like - but then, I've never been able to pat my head and rub my tummy at the same time, either.
Lastly, I was surprised at the difference the lemon juice made to the dish. Before adding the juice, the polenta was creamy and quite tasty. You could taste the individual flavours of the polenta, the stock, the blue cheese and the spinach. After the inclusion of the lemon juice - bingo! It all came together as a cohesive whole. Who'd have thought it!
Hubby’s initial opinion was *gasp!* and *gag!*, followed by “euk!” and “hmmmn”. Which didn’t bode well at all.
Son & heir’s initial reaction was “have you tried this stuff, Mum?”, whilst looking extremely doubtful.
Well, of course I’d tried it – after all, I’d cooked it so I was bound to have tried it one way or another! I quite liked it. It was too salty, as between the stock cube and the cheese, they had delivered quite an accumulated load. I really liked the cheese and I had no objections to the texture. I did agree with hubby though, that the garlic was way too much.
Once hubby could speak, he voiced his objections to the polenta as being mainly rooted in the over-saltiness and the garlic excess that didn’t really sit well with the blue cheese. He didn’t have any objections to the texture, which I was surprised about, and would countenance another go with maybe some polenta that was at least in date, this time.
I don’t know – some people just want the moon on a stick. *chuckle*
POLENTA WITH GORGONZOLA (serves 3-4)
Based on a recipe by Paul Merrett.
Ingredients :
570ml vegetable or chicken stock (I used around 900ml, so have some extra just in case!)
1 garlic clove, peeled and crushed (optional - see above!)
half a tsp of dried thyme
sea salt & freshly ground black pepper
150g quick-cook polenta
50g unsalted butter (note the UNsalted)
handful of fresh rocket or spinach leaves
200g Gorgonzola or other melting blue cheese, cut into cubes
1 lemon, juice only.
Method :
1. Bring the stock to the boil in a large heavy based pan over a medium heat.
2. If you're using it, add the crushed garlic to the stock and allow to infuse for 2-3 minutes before removing it and discarding. Add the thyme. Season to taste.
3. Add the polenta to the hot stock in a thin, steady stream. Whisk immediately and continue whisking as it cooks for 2-3 minutes to avoid any lumps. The texture will be of mashed potato when cooked.
4. Add the butter and stir to combine.
5. Add the cubed cheese and stir to combine until it has melted through the polenta.
6. Add the rocket or spinach and allow to wilt, then add the lemon juice and give everything a last stir.
Serve.
.
A
I made sure that I would have time and attention span to deal with the polenta, by pairing it with a dead easy chicken dish - Parmesan chicken. This is basically nothing more than a chicken breast dunked in egg white, then into grated parmesan with freshly ground black pepper - and popped into the oven to roast. For something so simple, it really is lovely.
So! On to the polenta problem. I had heeded the accumulated wisdom of various Italian cooks and as such, opted for the "polenta with blue cheese & small amounts of green stuff" version.
The first quandary was what stock to use. Home-made chicken stock, or vegetable stock from a cube? Home-made chicken is my favourite, but I was nervous of it becoming too chickeny, when it was going to have a huge hunk of blue cheese melted through it later on. So, in view of this, I opted for the vegetable. In retrospect, I think perhaps the chicken would have been good, as it wouldn't have contained half as much salt as the stock cube did!
The recipe said to add a crushed clove of garlic to the stock and allow it to infuse for 2-3 minutes and then remove it. We must have super-duper garlic, or something, because even on 2 minutes, there was too much garlic! (I know, there will be several of you throwing your hands in the air and exclaiming "too much garlic? There's no such thing!" - but for us, there can be). So if you're garlic-sensitive, I'd skip this bit - and will do in future.
I'd also had a bit of a quandary over the blue cheese, in relation to the overall price of the thing. The chicken had cost £3, add to that the cost of the parmesan, then £2 for Gorgonzola ... the overall price seemed to be creeping into the expensive bracket. So, I opted for a £1 piece of French blue cheese of unknown origin. It was soft, and vaguely sweet, with a lovely salty tang - so I figured it would do. It did, indeed, do. Very nicely!
I was lucky with the polenta itself, as I'd had some for ages - since we started cooking Cornbread (which I love). However, having looked on the packet the best before date was some time in 2010. ~cough~ Oh well, it was too late to get any more by then - and I'd used it quite recently to put on roast potatoes, so I figured we wouldn't die.
I also had some baby spinach in the fridge that needed using up, so substituted that for the rocket that the recipe demanded. Personally, I think it was even nicer with the little crunch that the spinach gave.
A couple of things struck me when I was cooking the polenta dish, which were - firstly, my goodness but doesn't it thicken quickly! I had to use twice the amount of liquid that was stated in the recipe, before it would become anywhere close to the right consistency. Another thing, is that it is quite impossible for me to pour in a steady stream, while whisking like mad. I can pour in a whisk-like circle whilst whisking like mad if you like - but then, I've never been able to pat my head and rub my tummy at the same time, either.
Lastly, I was surprised at the difference the lemon juice made to the dish. Before adding the juice, the polenta was creamy and quite tasty. You could taste the individual flavours of the polenta, the stock, the blue cheese and the spinach. After the inclusion of the lemon juice - bingo! It all came together as a cohesive whole. Who'd have thought it!
Hubby’s initial opinion was *gasp!* and *gag!*, followed by “euk!” and “hmmmn”. Which didn’t bode well at all.
Son & heir’s initial reaction was “have you tried this stuff, Mum?”, whilst looking extremely doubtful.
Well, of course I’d tried it – after all, I’d cooked it so I was bound to have tried it one way or another! I quite liked it. It was too salty, as between the stock cube and the cheese, they had delivered quite an accumulated load. I really liked the cheese and I had no objections to the texture. I did agree with hubby though, that the garlic was way too much.
Once hubby could speak, he voiced his objections to the polenta as being mainly rooted in the over-saltiness and the garlic excess that didn’t really sit well with the blue cheese. He didn’t have any objections to the texture, which I was surprised about, and would countenance another go with maybe some polenta that was at least in date, this time.
I don’t know – some people just want the moon on a stick. *chuckle*
POLENTA WITH GORGONZOLA (serves 3-4)
Based on a recipe by Paul Merrett.
Ingredients :
570ml vegetable or chicken stock (I used around 900ml, so have some extra just in case!)
1 garlic clove, peeled and crushed (optional - see above!)
half a tsp of dried thyme
sea salt & freshly ground black pepper
150g quick-cook polenta
50g unsalted butter (note the UNsalted)
handful of fresh rocket or spinach leaves
200g Gorgonzola or other melting blue cheese, cut into cubes
1 lemon, juice only.
Method :
1. Bring the stock to the boil in a large heavy based pan over a medium heat.
2. If you're using it, add the crushed garlic to the stock and allow to infuse for 2-3 minutes before removing it and discarding. Add the thyme. Season to taste.
3. Add the polenta to the hot stock in a thin, steady stream. Whisk immediately and continue whisking as it cooks for 2-3 minutes to avoid any lumps. The texture will be of mashed potato when cooked.
4. Add the butter and stir to combine.
5. Add the cubed cheese and stir to combine until it has melted through the polenta.
6. Add the rocket or spinach and allow to wilt, then add the lemon juice and give everything a last stir.
Serve.
.
A
4 March 2011
Kielbasa Polish Sausage with Red Cabbage
I don't really know what it is about the Polish cuisine, but I really, really enjoy making Polish - even Polish-sounding - dishes. I've never met a Polish person that I didn't like, (hiya Rad!) and if anyone suggested going there for a holiday, I'd seriously consider it.
We had already discovered Kielbasa sausage (available from Asda in Bournemouth) and are confirmed Kielbasa fans. Hence, when I spotted a recipe involving "Polish sausage", I knew what we were talking about.
I was looking for a dish that would be relatively easy to make. One that either I could make earlier in the day and just pop in the oven to get on with cooking, or one which didn't require me to chivvy it along. The reason for this is that I knew that today was going to be a fairly busy day - as indeed, it turned out to be - and that I also wanted to cook some chicken liver pate for us to have on Saturday for supper.
My disability is one of those conditions that results in your having the best of your energy supplies available in the morning (usually), which is why we do the shopping etc. then. Some evenings, it really is more than I can do to cook a meal - which is why you'll find items being bumped from the menu list. However, because I meal plan, I was able to find an easy recipe that would mean I had "enough left in the tank" to tackle the pate later on. Oh how I envy those people who can spend the evening baking! At one time I would have been able to do that, but then I was far too busy gallivanting around with my horses!
The recipe begins with the requirement to pour a kettle of boiling water over your sliced cabbage. Now I've absolutely no idea why you're required to do that - except for the fact that I noticed it changed the flavour slightly, bringing out the sweetness of the cabbage. It also lost that "rawness" that features in dishes like coleslaw and ran colour all over the sink. Well, that was fine, because my chopping board was already purple, my hands were an interesting blue colour and the colander was all the colours of the rainbow! As for my t-shirt, well, all I can say is I forgot to put my pinny on again. *sigh*
However, the most entertaining part of the whole recipe (apart from eating it, of course!) was the chemical reaction involved when you pour the five tablespoons of lemon juice over the purple cabbage and watch it turn hot Chinese pink. Who knew you could use purple cabbage leaves as litmus paper? Not me.
A point of note is the involvement of the sugar/cornflour mixture. I was a tad dubious about this, as my cabbage wasn't producing much in the way of juice. The lemon juice and the wine hadn't really helped much either, so I was cautious when adding the cornflour mixture. Just as well, as everything dried up and I was required to add around 100ml of water with each half of the cornflour mixture. The end result was a lovely glossy sauce which, coupled with the sour cream on the potatoes, was more than enough to moisten what would otherwise have been a dry dish.
I absolutely adore the juxtaposition of the colours. The dark purple-pink of the cabbage against the white of the sour cream, with the lurid green of the chives lifting everything and providing that splash of green that makes a dish look so tempting. The flavours went so well together, too. The cabbage took on the flavour of the Kielbasa almost instantly and both flavours went so well with the lemon, butter and wine. To quote Masterchef - it worked. It worked all the better for the rich nuttiness of the oven-baked potatoes, together with the sour cream bringing its lovely creaminess to the table, with the chives adding that alternative level of flavour.
Would I make this one again? You bet I would - even though son and heir didn't like the cabbage overly much. ~shrug~ He's got the jacket potato and the sausage, he won't starve!
KIELBASA SAUSAGE WITH RED CABBAGE (serves 4)
Ingredients :
1 large red cabbage, sliced
2 litres boiling water
2 tablespoons butter
2 shallots, finely chopped
5 tbsp lemon juice
125ml red wine
half a tsp salt
quarter of a tsp ground black pepper
2 tsp dark brown soft sugar
1 tbsp cornflour
400g Kielbasa sausage, sliced
3 large potatoes, suitable for cooking in their jackets
1 tbsp olive oil
sea salt
black pepper
1 small tub sour cream
handful of chives, chopped fine.
Method :
1. Place the cabbage in a colander and pour the boiling water over the cabbage. Allow it to drain well. Pre-heat your oven to 180deg.
2. Melt the butter in a large heavy-bottomed saucepan. Add the shallots and cook for around 5 minutes or until golden, transparent and sweet.
3. Add the cabbage and stir in the lemon juice. Cook and stir for around 5 minutes, until the cabbage is pink. Marvel at the magic that created that colour!
4. Add the wine, salt and pepper, then cover and simmer on a low heat for 45 minutes.
5. Prepare the potatoes ready to be baked in their jackets. Check them over thoroughly, removing any blemishes and wash them carefully. Prick each potato with a sharp knife three or four times each side.
6. Place a tablespoon of olive oil on the centre of a baking dish and dip each potato into the oil. Rub the oil over each potato, making sure it is completely covered, then place each around the baking dish, with enough room between the potatoes to allow a through flow of air.
7. Season each potato well, especially with salt. There's nothing nicer than a lovely salty potato skin. Place them in the oven to bake for around 1 hour, turning them over half way through the baking time.
8. Mix together the sugar and cornflour with a little water and add - half at a time - to the cabbage. You may well need to add 100ml of water with each addition of the cornflour mixture, if you're not seeing a sauce appearing. Stir well, to avoid the cornflour setting into lumps.
9. Add the sausage pieces, stir well to combine, then cover and resume simmering for 30 minutes more. You'll need to stir the pot every 10 minutes or so and watch the liquid levels, adding a little more water if needs be.
10. Once the potatoes are done (when a vegetable knife inserted into them runs through without restriction), cut a cross into the top of each one, press the sides (through a tea-towel if they're too hot to touch) to bring some of the flesh to the surface and top with a dollop of sour cream and a sprinkle of chives.
Serve.
.
We had already discovered Kielbasa sausage (available from Asda in Bournemouth) and are confirmed Kielbasa fans. Hence, when I spotted a recipe involving "Polish sausage", I knew what we were talking about.
I was looking for a dish that would be relatively easy to make. One that either I could make earlier in the day and just pop in the oven to get on with cooking, or one which didn't require me to chivvy it along. The reason for this is that I knew that today was going to be a fairly busy day - as indeed, it turned out to be - and that I also wanted to cook some chicken liver pate for us to have on Saturday for supper.
My disability is one of those conditions that results in your having the best of your energy supplies available in the morning (usually), which is why we do the shopping etc. then. Some evenings, it really is more than I can do to cook a meal - which is why you'll find items being bumped from the menu list. However, because I meal plan, I was able to find an easy recipe that would mean I had "enough left in the tank" to tackle the pate later on. Oh how I envy those people who can spend the evening baking! At one time I would have been able to do that, but then I was far too busy gallivanting around with my horses!
The recipe begins with the requirement to pour a kettle of boiling water over your sliced cabbage. Now I've absolutely no idea why you're required to do that - except for the fact that I noticed it changed the flavour slightly, bringing out the sweetness of the cabbage. It also lost that "rawness" that features in dishes like coleslaw and ran colour all over the sink. Well, that was fine, because my chopping board was already purple, my hands were an interesting blue colour and the colander was all the colours of the rainbow! As for my t-shirt, well, all I can say is I forgot to put my pinny on again. *sigh*
However, the most entertaining part of the whole recipe (apart from eating it, of course!) was the chemical reaction involved when you pour the five tablespoons of lemon juice over the purple cabbage and watch it turn hot Chinese pink. Who knew you could use purple cabbage leaves as litmus paper? Not me.
A point of note is the involvement of the sugar/cornflour mixture. I was a tad dubious about this, as my cabbage wasn't producing much in the way of juice. The lemon juice and the wine hadn't really helped much either, so I was cautious when adding the cornflour mixture. Just as well, as everything dried up and I was required to add around 100ml of water with each half of the cornflour mixture. The end result was a lovely glossy sauce which, coupled with the sour cream on the potatoes, was more than enough to moisten what would otherwise have been a dry dish.
I absolutely adore the juxtaposition of the colours. The dark purple-pink of the cabbage against the white of the sour cream, with the lurid green of the chives lifting everything and providing that splash of green that makes a dish look so tempting. The flavours went so well together, too. The cabbage took on the flavour of the Kielbasa almost instantly and both flavours went so well with the lemon, butter and wine. To quote Masterchef - it worked. It worked all the better for the rich nuttiness of the oven-baked potatoes, together with the sour cream bringing its lovely creaminess to the table, with the chives adding that alternative level of flavour.
Would I make this one again? You bet I would - even though son and heir didn't like the cabbage overly much. ~shrug~ He's got the jacket potato and the sausage, he won't starve!
![]() |
| Look at those colours! |
Ingredients :
1 large red cabbage, sliced
2 litres boiling water
2 tablespoons butter
2 shallots, finely chopped
5 tbsp lemon juice
125ml red wine
half a tsp salt
quarter of a tsp ground black pepper
2 tsp dark brown soft sugar
1 tbsp cornflour
400g Kielbasa sausage, sliced
3 large potatoes, suitable for cooking in their jackets
1 tbsp olive oil
sea salt
black pepper
1 small tub sour cream
handful of chives, chopped fine.
Method :
1. Place the cabbage in a colander and pour the boiling water over the cabbage. Allow it to drain well. Pre-heat your oven to 180deg.
2. Melt the butter in a large heavy-bottomed saucepan. Add the shallots and cook for around 5 minutes or until golden, transparent and sweet.
3. Add the cabbage and stir in the lemon juice. Cook and stir for around 5 minutes, until the cabbage is pink. Marvel at the magic that created that colour!
4. Add the wine, salt and pepper, then cover and simmer on a low heat for 45 minutes.
5. Prepare the potatoes ready to be baked in their jackets. Check them over thoroughly, removing any blemishes and wash them carefully. Prick each potato with a sharp knife three or four times each side.
6. Place a tablespoon of olive oil on the centre of a baking dish and dip each potato into the oil. Rub the oil over each potato, making sure it is completely covered, then place each around the baking dish, with enough room between the potatoes to allow a through flow of air.
7. Season each potato well, especially with salt. There's nothing nicer than a lovely salty potato skin. Place them in the oven to bake for around 1 hour, turning them over half way through the baking time.
8. Mix together the sugar and cornflour with a little water and add - half at a time - to the cabbage. You may well need to add 100ml of water with each addition of the cornflour mixture, if you're not seeing a sauce appearing. Stir well, to avoid the cornflour setting into lumps.
9. Add the sausage pieces, stir well to combine, then cover and resume simmering for 30 minutes more. You'll need to stir the pot every 10 minutes or so and watch the liquid levels, adding a little more water if needs be.
10. Once the potatoes are done (when a vegetable knife inserted into them runs through without restriction), cut a cross into the top of each one, press the sides (through a tea-towel if they're too hot to touch) to bring some of the flesh to the surface and top with a dollop of sour cream and a sprinkle of chives.
Serve.
.
1 February 2011
Mustard & Lemon Sausages
The fact that I got hold of this recipe is entirely down to the power of Twitter.
There I was, quietly reading everyone's input to my timeline, when up came a comment from the lovely @madamding about how she was intending on having a Nigel Slater recipe that evening, for "Mustard & Lemon Sausages". Well, that intrigued me as I'm always in the market for a new sausage recipe.
Very graciously, she provided me with a link to where the original recipe was to be found so that I could decide whether to give it a go. Having read through the incredibly simple ingredients list and method, it became one of those "just has to be done" recipes. This is mainly because I have a quite similar and delicious recipe for Gammon steaks, which involves Whole Grain Mustard and Orange zest and juice. (Which can be found here). This recipe involves the same Whole Grain Mustard, but with honey, Dijon mustard and lemon juice.
Regrettably, because of personal commitments, Mrs M (@madamding) couldn't do the recipe when she was intending to, so I'm hoping very much that I've not beaten her to it where blogging it is concerned!
Anyway, fingers crossed and here goes. "Mustard and Lemon Sausages" is a wonderful dish on all sorts of levels. The sauce/glaze begins life being incredibly acidic, but undergoes some magical transformation as the sausages cook and the mixture reduces. Out goes the acidity and in comes a lovely soft richness, with a rounded sweetness that isn't too much. It may sound a tiny bit odd, but I found the sauce/glaze goes extremely well with mashed potato - so a forkful that comprised of a piece of sausage, a dollop of mashed potato and a swoop of sauce is just delightful.
However, one of its very great attractions is that it will be able to join my battalion of "quick and easy" dishes, which as a disabled cook, are always good to have up your sleeve for those not-so-good days.
Needless to say, I've tweaked the recipe a tiny bit. However, it's just the quantities of the mustard that I've changed, in order to render it a bit more affordable when you've just spent an arm and a leg on two jars of (fairly) expensive Maille mustards, instead of your usual fare of Supermarket own brand and the quantity of honey, with a view towards the mildly diabetic in the family!
Oh yes, and I'd recommend using just a plain pork sausage, as I think you'd find some of the fancier flavours would clash.
8 plump pork sausages
2 heaped tsp grain mustard
1 heaped tsp smooth Dijon mustard
3 heaped tsp runny honey1 lemon, juiced
Method
1. Pre-heat the oven at 200C/400F/Gas 6.
2. Put the sausages in a roasting tin large enough to take them in a single layer. If they overlap, they won’t cook properly.
3. In a bowl mix the mustards, honey and lemon juice. Stir well and pour over all the sausages.
4. Bake for 25-30 minutes, rolling the sausages over in the honey and mustard mixture once or twice during cooking, so that they eventually take on a sticky, glossy coat.
Serve with mashed potato, sugar snap peas and carrots.
.
There I was, quietly reading everyone's input to my timeline, when up came a comment from the lovely @madamding about how she was intending on having a Nigel Slater recipe that evening, for "Mustard & Lemon Sausages". Well, that intrigued me as I'm always in the market for a new sausage recipe.
Very graciously, she provided me with a link to where the original recipe was to be found so that I could decide whether to give it a go. Having read through the incredibly simple ingredients list and method, it became one of those "just has to be done" recipes. This is mainly because I have a quite similar and delicious recipe for Gammon steaks, which involves Whole Grain Mustard and Orange zest and juice. (Which can be found here). This recipe involves the same Whole Grain Mustard, but with honey, Dijon mustard and lemon juice.
Regrettably, because of personal commitments, Mrs M (@madamding) couldn't do the recipe when she was intending to, so I'm hoping very much that I've not beaten her to it where blogging it is concerned!
Anyway, fingers crossed and here goes. "Mustard and Lemon Sausages" is a wonderful dish on all sorts of levels. The sauce/glaze begins life being incredibly acidic, but undergoes some magical transformation as the sausages cook and the mixture reduces. Out goes the acidity and in comes a lovely soft richness, with a rounded sweetness that isn't too much. It may sound a tiny bit odd, but I found the sauce/glaze goes extremely well with mashed potato - so a forkful that comprised of a piece of sausage, a dollop of mashed potato and a swoop of sauce is just delightful.
However, one of its very great attractions is that it will be able to join my battalion of "quick and easy" dishes, which as a disabled cook, are always good to have up your sleeve for those not-so-good days.
Needless to say, I've tweaked the recipe a tiny bit. However, it's just the quantities of the mustard that I've changed, in order to render it a bit more affordable when you've just spent an arm and a leg on two jars of (fairly) expensive Maille mustards, instead of your usual fare of Supermarket own brand and the quantity of honey, with a view towards the mildly diabetic in the family!
Oh yes, and I'd recommend using just a plain pork sausage, as I think you'd find some of the fancier flavours would clash.
MUSTARD & LEMON SAUSAGES (Original recipe by Nigel Slater : feeds 3)
Ingredients
8 plump pork sausages
2 heaped tsp grain mustard
1 heaped tsp smooth Dijon mustard
3 heaped tsp runny honey1 lemon, juiced
Method
1. Pre-heat the oven at 200C/400F/Gas 6.
2. Put the sausages in a roasting tin large enough to take them in a single layer. If they overlap, they won’t cook properly.
3. In a bowl mix the mustards, honey and lemon juice. Stir well and pour over all the sausages.
4. Bake for 25-30 minutes, rolling the sausages over in the honey and mustard mixture once or twice during cooking, so that they eventually take on a sticky, glossy coat.
Serve with mashed potato, sugar snap peas and carrots.
.
Subscribe to:
Posts (Atom)