1 March 2014

Ham and cheese cornbread - oh my word!

I was looking for some sort of carbohydrate to go with the BBQ Meat Loaf (see previous blog post), that didn't involve potato when I hit upon this little beauty.

I knew that all the family like cornbread, so there was no problem there.  We all love cheese and ham - and the spring onions that were used in it would be well cooked, so no problem there either.  All that was left to do was to include it on the menu plan on a day when I could split the cooking, as trying to do cornbread and a meatloaf at the same time would not only pickle my brains, but pretty much leave me good for nothing thereafter.

So - Saturday it was!  A perfect day, being between the healthy fish dish and our roast chicken that's planned for tomorrow.  Lots of time to split the cooking, too.

Now I have a cornbread recipe on the blog already, however, I just had a little scan around the interwebs for alternatives more as a control to make sure my recipe was as good as it could get.  What did I find?  Well, this recipe here - Iron Skillet Ham & Cheddar Cornbread.  Do click on the link, as the Melissa's Southern Style Kitchen blog it came from, is filled with luscious things that are well worth investigating further!

Needless to say, I don't have an iron skillet.  However, a cornbread recipe is a cornbread recipe and I reckoned it wouldn't hurt it to be cooked in the usual tin that I cook my cornbread in, in the oven.  I also skipped on things like onion powder and garlic powder, neither of which I particularly like - and decided not to include the sweetcorn.  Everything else, I went with (I think!).

Just look at that - all beautiful and fluffy!
The measurements are in cups as they often are with American recipes, which gave me the opportunity of using my ceramic measuring cups that my parents had given to me for Christmas.  They're a lovely shape and have a great handle that is easy to hold - very useful when your gripping function isn't as great as it could be and you're carrying a cup full of flour!

As with all cornbread recipes, it's a simple matter of combining the dry ingredients in one bowl and the wet ingredients in another bowl, then adding one to the other and including your flavourings.

I found that I didn't have quite enough buttermilk, so included a couple of tablespoonfuls of Greek Yoghurt.  They're pretty interchangeable for a recipe like this and it certainly didn't appear to do any damage!

I also reduced the sugar from 3 tablespoonfuls (yikes!) to 2 when I was copying out the recipe.  However, by the time it came to putting the sugar into the mix, I decided to decrease it even further by a half a tablespoonful - and I reckon I could have just gone with the one!  I'll be doing that in future and have reflected it in the recipe below.  By all means add more if you like your cornbread sweeter.

Served with BBQ meat loaf and baked beans
I spent a moment or two dithering as to whether to use sunflower oil or rapeseed oil in the mix.  The rapeseed won, entirely due to its increased health benefits of being low in saturated fats (50% less than olive oil!) and high in Omega 3, 6 and 9.  Although as I reflected when pouring it into the mix, it tastes better too!

Do remember to invest a little time in buttering your tin (I covered mine with silver foil to help with the washing up later on) as it makes the cornbread so much easier to get out of the tin - and makes the crust taste amazing!

Again, do be careful of the amount of salt you include - cornbread can take a good deal of salt as the corn meal needs a decent amount to help the corny flavour along.  Do remember, however, that you're including mature cheddar cheese which can be inherently salty, along with the ham which also has a degree of saltiness.  However, having said that, it didn't stop me from sprinkling just a teensy bit of sea salt on the surface for that lovely salty hit every so often.

Just 25-30 minutes in the oven and your tastebuds are tingling from both the look and the smell of this gorgeous cornbread.  Too bad we all had to wait until dinner time to get lashed into it!

HAM AND CHEESE CORNBREAD   (makes 16 pieces approx)

Ingredients :

3-4 slices dry cured ham, diced
100g mature cheddar cheese, grated
4-5 spring onions, chopped
1 cup plain flour
1 cup cornmeal
1 tbsp sugar
1 tbsp baking powder
1 tsp sea salt (plus a tiny pinch to sprinkle on top)
one and three quarters cups of buttermilk (or plain yoghurt)
a quarter of a cup of rapeseed oil
2 large eggs, beaten
a knob of softened butter.

Method :

1.  Use the knob of butter to grease a medium sized oblong roasting tin.

2.  Combine all the dry ingredients into a large bowl.

3.  Combine all the wet ingredients into a smaller bowl.

4.  Add the wet ingredients to the dry ingredients and stir quickly until almost combined.

5.  Add the cheese, ham and onions and stir through quickly.

6.  Pour the batter into the roasting tin and level the surface.  Dot with a little extra butter if you're feeling naughty.

7.  Bake in a pre-heated oven at 200degC/400degF/Gas 6 for 25-30 minutes or until a cocktail stick inserted into the middle, comes out clean.

8.  Remove from the tin onto a baking tray and leave somewhere away from overkeen family members, to cool.

Printable version

BBQ meatloaf - man pleasing food!

This meal was born from a desire to create a "man pleasing dinner".  The notion was that having had a healthy, vegetable inclusive fish dinner the night before - and another vegetable inclusive meal to come on Sunday (tomorrow) - the menfolk might like a man pleasing dinner to keep them interested.

In fact, this meal contained the subject of this blog entry - the meatloaf - together with a fantastic cornbread (which is dealt with in the next blog post) and baked beans.

Now I don't know about your menfolk, but my menfolk like meat.  No, in fact, they like MEAT.  *chuckle*  I can understand this, as I'm a bit of a carnivore myself and do sometimes get a terrible hankering for a big lump of roast beef in which to sink my gnashers.

Quite a long way up on their "man pleasing foodstuffs" list, but below meat, is a good barbecue sauce.   We've discovered Kraft's Bulls Eye BBQ sauce, which is currently doing a pretty good job in that connection.  If anything, I find it a tiny bit sweet - but the menfolk love it and that's the main thing.

I can't claim to have invented this form of meatloaf, as like with a lot of things, I spotted a photograph on the internet that piqued my interest.  That of a meatloaf with a coating of barbecue sauce - and it looked good.


Now I have written previously about my attempts to make a firm meatloaf that doesn't require a spoon with which to serve it.  Hubby has a term for these soggy meat loaves - that of "meat porridge".  It describes the texture quite succinctly.

Fortunately for us, I discussed the problem of meat porridge with my pal Melanie (a Brit who has been in Canada for the last mumblymumble years) and who claimed to have solved the conundrum.  She decreed her meat loaves to be firm and positively perky.  Hence, I have paid attention to Mel's tutelage and gone down my own road with the flavourings - but followed the basic recipe quite closely.

Lo and behold - what do we have here?  Only a firm, sliceable, serve with a spatula and no spoon in sight, delicious meat loaf!  Thanks, Mel!

If you also have problems with meat porridge, it is well worthwhile having a read of her treatise on the subject at her blog, Rutabaga Dreams.

I had been pondering on what to use as flavourings and couldn't really come to any firm conclusions.  I knew I had to be aware of how much salt was being included - as additional sauces can often bring quite a slug of salt with them.  So salt wasn't a problem unless I overdid it.  The basic meats were two thirds beef, one third pork and a lone rasher of bacon (that had no other home to go to).  Now onion was a given - but in fact, I used two shallots for their sweetness.  The breadcrumbs were made from a combination of white and brown Polish Bakery bread - which can only be surpassed by home made bread, in my view.  I also added a little tomato ketchup, some Worcestershire sauce, some Mic's Chilli Inferno hot sauce, a teaspoonful or so of freshly ground black pepper, some dried parsley and something that you may not have at home - a teaspoonful of Essential Cuisine's mushroom stock powder.  Add an egg, mush it all together and into a loaf tin it goes!


Baking the meat loaf (at 180degC) is a simple matter of making sure it is inside another roasting tin, to catch any drips that may escape the loaf tin, then fishing it back out after 30 minutes.  Very carefully, tip the liquid away then coat the top of the meat loaf generously with your favourite barbecue sauce.  Back into the oven it goes for another 30 minutes and you're done.

The flavourings really are up to you.  You can go Italian with sun dried tomatoes, oregano and garlic, or Mexican with chillies and beans, Indian with curry spices - really, so long as you follow the "no ingredients that will leach liquid" (like tomatoes, mushrooms, courgette etc.) and include the breadcrumbs and an egg, I see no reason why your meat loaf shouldn't be as sliceable as mine turned out to be!

The menfolk both gave the meat loaf - in fact, the whole dinner - a big thumbs up, so I'd say that's job done!

BBQ MEAT LOAF   (serves 3-4)

Ingredients :

3-4 slices of dry bread, blitzed into crumbs
pinch of sea salt
half a tsp of freshly ground black pepper
half a tsp of dried parsley
500g minced lean beef
250g minced lean pork
1-2 rashers of bacon, chopped fine
1 dessertspoonful of tomato ketchup
1 tsp of hot sauce (to taste - use more if you like more)
2 tsp of Worcestershire sauce
1 tsp of stock powder of your choice (most, but not all, of a stock cube will do)
1 egg
3-4 tbsp BBQ sauce.

Method :

1.  Place all the ingredients barring the BBQ sauce into a large bowl.  Using your hand, scrunch and mix the ingredients until they are all evenly spread throughout the mix.

2.  Take a one pound loaf tin and line it with silver foil (non-stick silver foil, if you can get it, is wonderful for this!).

3.  Pack the meat mixture into the loaf tin, pressing it down firmly.

4.  Place the loaf tin inside a bigger roasting tin and into a pre-heated 180degC/350degF/Gas 4 oven for 30 minutes.

5.  At the end of the time, remove the meat loaf from the oven and carefully drain the liquid away.  (Be very careful not to let your meat loaf fall into the sink, as happened to me on one stellar occasion).

6.  Coat the surface of the meat loaf in BBQ sauce and replace into the oven for another 30 minutes.

7.  When the time is up, remove from the oven and from the loaf tin.  Carefully peel the silver foil back all around the meat loaf, but be careful of the hot liquid that will be contained therein.  Let the loaf rest for a couple of minutes - no longer than 3-4 - then slice and serve.

Printable version

28 February 2014

Zesty glazed salmon on butter bean mash - the week's unexpected hit!

I love butter beans and I don't mind who knows it.

Now I do know that there are folk out there for whom a butter bean is the epitome of disgusting - strange folk who need to have their eyes opened to the beauty of the butter bean when engaged in the most delicious of things - butter bean mash.

However, I am getting a bit ahead of myself, so let's back up a bit and do a bit of explaining.

I have been looking for carbohydrate alternatives.  It is just too easy to say "hmmn, pork chop.  What shall we have with it?  Oh, new/roast/mashed/dauphinoise/boiled/chipped/Hasselback (and ever onwards) potatoes".  There are so many different types of potato dish that you can choose from!  However, I think I might have exhausted my range of all known potato types and have probably cycled through them all a number of times.

So it was time to try some creative alternatives.

With that in the back of my mind, I was doing my usual thing of browsing the foodie internet for possible dinner ideas.  One dinner ingredient that we all enjoy but we just don't eat enough of, is fish.  Having discovered that Asda's range of frozen fish is compatible with several different methods of cooking, I was particularly after a fish recipe when all of a sudden there appeared a recipe that solved the two requirements in one.  Sara Buenfeld's Sizzling Salmon with Bean Mash, on BBC Good Food.

Mmmmn ... butter (or Lima) beans
Salmon - tick!  Butter beans - tick!

Even better, from a balanced meal point of view, it included wilted Rocket in the mash and the fish was grilled (albeit with a sweet mustard glaze).  Add a couple of likely looking veggies and that is dinner sorted - completely without recourse to a potato.

However, I had temporarily forgotten - in my butter beany enthusiasm - that hubby "isn't keen" on the beautiful creamy giants of the bean world.  For that, read "have yet to sample them in anything that makes them even palatable, never mind edible".  Humm.

I knew that I'd never sampled butter bean mash and I knew that I'd had it recommended to me by more than one person - and more than one of those more than one people were like hubby in their dislike for the ordinary butter bean.  However, they reported that butter bean mash was a definite thumbs up.  My caution went for a fly around in the wind and I put the dish on the menu plan.  *gulp*

Now the naughty boy has been teasing me all day with various comments about the three (THREE!) tins of organic butter beans I'd had him buy in the shopping this morning, but I held out, stood firm and went for it.


Do you know, he likes it!  No, in fact, I'd say he really rather liked it (which is a bit more than your average "like" - in case you were wondering).  We've just finished dinner and having gone from a plaintive "Well if I don't like it, what am I going to eat?" to "This is delicious!  ~suspicious look from me~  No, seriously delicious!", I call that a very definite win.

Son and heir left a little of his mash, but then I did give him rather more - hollow legs and all that.

The salmon was lovely with the lime/honey/mustard glaze and took minutes to cook under the grill.  The butter bean mash was simplicity itself, even with my changing the order of cooking around a little bit to include sauteing the garlic in the butter for a minute or two, so that I didn't get a reaction to it.  They are right in the original recipe when they say that the mash requires a good wallop of seasoning to bring out the flavours - I seemed to be endlessly adding pepper, but once you reached sufficient, you realised why.  The creme fraiche is a master stroke, as it loosens the flouriness of the beans and combines with the butter to make an overall creaminess.  Just so tasty!


I served the fish and mash with some broccoli and carrots that I drizzled with the cooking juices.  Everyone was happy with the quantity of food on the plate and I am quietly cock-a-hoop that it was as much of a success as it turned out to be.

I most definitely recommend this one.  It's a keeper!

ZESTY GLAZED SALMON on BUTTER BEAN MASH   (serves 3)

Ingredients :

3 salmon fillets, skin removed
zest and juice of 1 lime
2 tbsp runny honey
1 heaped tbsp wholegrain mustard
3 x 400g tins of butter beans, rinsed
25g butter
1 garlic clove, crushed and chopped finely
4-5 tbsp creme fraiche
50g rocket
sea salt and freshly ground black pepper.

Method :

1.   Place the salmon fillets face upwards on a heatproof flat tray.

2.  Into a bowl, combine the lime zest, lime juice, honey, mustard and a good pinch of salt.

3.  Spoon a little of the mixture onto the face of each salmon fillet, then turn each upside down and leave to marinate for a few minutes while you prepare the mash.

4.  Drain the beans and place into a flat bottomed bowl.  Using a potato masher, mash until the beans are quite broken up, but still retain some texture.

5.  Place the butter into a saucepan large enough to take all the butter beans and put it on a low heat to melt.  Add the garlic and cook very gently - do not allow it to brown - for a few minutes.

6.  Once the raw garlic smell has dissipated add the crushed butter beans, a large pinch of sea salt, a whole heap (to taste) of freshly ground black pepper and the creme fraiche.  Vigorously mix the combination together - a wooden spoon is good for this as you can crush any randomly whole butter beans as you go.  Heat the contents of the pan until bubbling.

7.  Spoon a little more glaze over the fish fillets and place under a hot grill for 2-3 minutes.

8.  Turn the fillets and spoon the remaining glaze over them, then return them to the grill until done.  The cooking juices should be bubbling and hot.

7.  Just before you are due to serve, add the rocket to the butter bean mash pan and stir through.  You are wanting the rocket to have just wilted and not be cooked.

8.  Serve with steamed broccoli and carrots, with the cooking juices from the fish drizzled over.

Printable version

26 February 2014

Prawn noodle stir fry - it's a stir fry, with prawns and noodles!

It really is that simple - a noodle stir fry that involves lovely veggies and juicy prawns - and the prawns don't even need to be raw.  That gets a big thumbs up from me.

Now oddly, this recipe contains very similar veggies to yesterday's gnocchi dish - which makes the shopping both simple and relatively economic.  After all, how many times have you bought a pack of three peppers because you needed two and the three were cheaper?  You always wind up with one pepper that has no home to go to - so using them across two recipes is really useful!  Still, it's not often that you can travel from an Italian inspired recipe to a Chinese inspired recipe and use some of the same ingredients!

The original recipe - and I really haven't tweaked this one much at all - came from the allrecipes.co.uk site again.  You can see the original here, if you're curious.

The sheer bliss of this recipe is that it takes under an hour from sighing heavily and getting onto your feet to make dinner, to settling down with your fork in your hand.  Not many really tasty dishes have that claim to fame!  Such is the joy of stir fries - really speedy cooking as a matter of necessity.

So what did I change in this recipe?  Well, for starters, I chargrilled the two red peppers that I used in it - and yes, the use of a second pepper isn't in the original recipe either.  If you're not bothered by the skins of peppers then don't worry about following suit - but chargrilling (putting the whole pepper under the grill until the skin burns and blisters) not only removes the skin but gives the pepper a lovely sweet intensity.  It also speeds up the cooking, (provided you chargrilled your peppers earlier in the day, as I did) as you don't need to wait for the peppers to soften in the pan!

So aside from that, I also added some sliced mushrooms because I had them to hand with no job waiting for them - and a stir fry just isn't right without a mushroom or two.


I also changed the order of cooking for a few of the ingredients, as the mange tout required longer cooking than most people would give them.  My menfolk aren't keen on their mange tout being too crunchy, you see.  If you like crunchy mange tout, then by all means put them in after the onions go in.

Ah yes, the onions - they received more cooking than they would normally get as well.  I have to be very careful with green (or Spring) onions, not to kick off my raw onion reaction - which is never a comfortable experience.  Again, if you're safe as houses with uncooked onion, feel free to leave them crunchy.

I felt that the ingredients could cope with a decent hit of chilli - and was doubtful that the Sweet Chilli sauce would have enough, on its own.  I tasted the sauce once it had been in the pan for a minute or two and sure enough, it could handle more chilli.  I have a huge pack of dried red chilli flakes just for this sort of job - and a pinch of those made all the difference.  By all means leave them out if you're cooking for children, or folk who like a little chilli tingle and nothing more.

I also used a small amount of sesame oil to coat the cooked noodles, which both adds to the flavour and also stops them from congealing whilst they wait.  However, make sure not to add too much - it is powerful stuff!

My last change was to use tomato ketchup instead of tomato puree.  I find that tomato puree has to be cooked out for a decent length of time in order to lose its rawness and acidity.  The sheer nature of a stir fry doesn't give tomato puree long enough in which to do that - so tomato ketchup is a good replacement.  It also has that touch of spiciness that is great in this stir fry - but do remember to cut down the amount of honey that you add, in order to prevent everything becoming too sweet!

Hmmmn ... maybe I did tweak it quite a bit, come to think about it!

I served the stir fry with some yummy prawn crackers alongside, which went very well and provided a nice crunch for when you were tired of sucking up noodles!
 
It is a really forgiving recipe - you can add any additional vegetables to it, just be careful not to clash the flavours with the sauce.  The end result was tasty, spicy, satisfying and healthy to boot.  Can't ask for more than that!  Son and heir wasn't impressed, unfortunately, as he's generally unimpressed by stir fries.  Hubby really liked it and would have it again - and so would I.  We'll just have to remember to feed son & heir pizza that night!


PRAWN NOODLE STIR FRY   (serves 3)

Ingredients : 

1 tbsp tomato ketchup or puree
2 tbsp light soy sauce
2 tbsp sweet chilli sauce
1 tbsp runny honey
a pinch of red chilli flakes
1 tbsp rapeseed oil
100g mange tout peas - each sliced into three strips
4 or 5 chestnut mushrooms, sliced
250g Chinese egg noodles
1 tsp sesame oil
a bunch of spring onions, sliced into 2cm pieces
2 red peppers, sliced (chargrilled if you prefer them that way)
250g cooked, peeled large prawns.

Method :

1.  Put a large saucepan of salted water on to boil for the noodles.

2.  In a small bowl, combine the tomato ketchup (or puree), soy sauce, sweet chilli sauce, runny honey and chilli flakes and set aside.

3.  Heat the oil in a wok over a high heat.

4.  Add the mange tout and mushrooms and stir fry until softened.

5.  Put the dry noodles into the boiling water for 4 minutes - or follow the pack instructions.  Stir gently regularly to separate the strands.  Once cooked and tender, drain and return to the saucepan.  Add the sesame oil and toss until coated.  Replace the lid while you finish cooking the veggies and prawns.

5.  Add the spring onions to the wok and cook until softening, then add the peppers to heat through.  Keep on stirring and moving the contents of the wok around to prevent anything from burning.

6.  Add the sauce and the prawns and toss for 2-3 minutes to heat everything through and get the sauce bubbling.

7.  Add the noodles and toss again, to coat them with the sauce.

Serve with prawn crackers and napkins to clean saucy chins.

Printable version
 

25 February 2014

Bacon & Pesto Gnocchi - suspending disbelief

I've been going through a bit of a purple patch with my cooking lately again, in that I had lost my way a bit - well, a lot in fact.  It happens that way sometimes.  Eating is something that we HAVE to do, to keep operating and to stay as well as possible - but sometimes it can be just the most dull, time consuming and tedious thing imaginable.  Add to that it being more than a little bit painful to complete and you have all the ingredients for a purple patch.

However, I hadn't lost my interest in all things culinary or my curiosity for new ingredients - so I knew I'd be back to it, if I just wound things back a bit and swung with the tide for a while.  So here I am, quietly getting back into the swing of things.  I didn't stop cooking, either - we just went through a few weeks of some fairly dull meals, incredibly unhealthy meals and some stellar and spectacularly gorgeous Sunday roasts.  Well, it had to come out in some way or another - and I saved it all for Sundays.  LOL

I will do a couple of posts detailing some of the Sunday meals we've had - as they deserve to spend some time in the spotlight.

Now don't go thinking that I'm back with dishes of Lark's tongue in aspic, or a new take on Lobster thermidor, far from it.  For this week's menu plan (yes, I'm still doing those!) I've tried to come out of my default "meat and two veg" and venture into things - like today's Gnocchi - that I haven't cooked for ages because of lack of inspiration and enthusiasm.

So, all that aside, this evening's meal of Bacon & Pesto Gnocchi was a great start.  We all love gnocchi and I had simply forgotten about it.  After all, there are so many different ingredients out there, it is impossible to remember them all.  Well, that's my excuse and I'm sticking to it.  Like a hot gnocchi to an aluminium pan.  *wink*


I can't claim this recipe as all my own work, the inspiration and basic idea came from a recipe on the U.K. & Ireland All Recipes site - which you can see here if you fancy having a look.  I simply added a couple of extra ingredients - mushrooms and onion - to the recipe, to pad it out a little further and to increase the veggie quota.

I'm currently trying to eat mushrooms whenever I can, having read that folk who eat mushrooms and drink green tea (not necessarily together at the same time, but whatever floats your boat) stand considerably less chance of contracting cancer - of all sorts of types.  Now it's not hard work to eat mushrooms and fairly easy to add a cup of green tea to my day, so that's what I've been doing.

This recipe really is simplicity itself.  Now I approve of that, because not every recipe needs to take an aeon, involve every pan you possess and take you an hour to get over cooking.  Far from it.  It sounded easy - it's one of those "put stuff in the pan in order and cook on various heats, boil other stuff, combine the two" recipes.  They get a big thumbs up from me.

The peppers do need chargrilling earlier in the day, but if you don't have the time or inclination to do this (it is well worth it though, as the flavour is so much better), you can use them ready done, out of a jar.

There are two odd things about the recipe, however.  One is that it involves Philadelphia cream cheese - which isn't odd on its own, it's just that it uses Sweet Chilli Philadelphia.  In a dish which is ostensibly Italian.  ~scratches head~  Demands the suspension of disbelief to do it, but it's worth it!  If it is any consolation, the Sweet Chilli version is one of the low fat types of Philadelphia, so it could be worse!

The second odd thing is the end colour - which, thanks to the green Pesto, is eccentric at best.  Don't panic when you see it all combined in the pan before you add it to the gnocchi - the addition of the gnocchi helps to lighten the colour and if served with a green salad alongside, it kind of makes sense.

My menfolk liked it a lot - well, cheese and bacon?  It'd have to go a long way to shake off a man's love for bacon.  I was a little bit concerned that there wouldn't be enough for everyone, whereas the reality was that it was absolutely perfect.  No leftovers and everyone was satisfied.  Works for me!

So, having said all that, let's get on and make it shall we?

BACON & PESTO GNOCCHI   (serves 3)

Ingredients :

1 red and 1 green pepper
1 onion, chopped finely
1 tbsp rapeseed or olive oil
300g smoked back bacon, chunkily chopped
4-5 chestnut mushrooms, sliced
500g potato gnocchi
3 heaped tsp green pesto (to taste)
3 dessertspoonfuls sweet chilli Philadelphia
1 generous handful of grated cheddar cheese.

Method :

1.  If you are using your own home chargrilled peppers, some hours before you begin to make the dish, heat your grill to high and place the whole peppers under the grill.  Leave them there for their skins to turn black and blister, turning them until they are completely charred.  Cool for a moment, then pop into a freezer bag and seal the top.  Condensation will form, which will enable their skins to be removed really easily - and they have such a gorgeous smokey taste.

2.  So, place a large pan of salted water on to boil for the gnocchi.

3.  While the water is heating, add the oil and the onion to a frying pan and cook gently until softened and just beginning to caramelise.

4.  Add the bacon, which will cool the pan - so increase the temperature to cook the bacon until all the water has dispersed, then add the mushrooms and cook on until they have softened.

5.  Add the peppers and heat them through - by which time the water should have boiled for the gnocchi, so in they go for their three minutes, or whatever the pack demands.

6.  Add the pesto, Philadelphia and grated cheese to the frying pan and stir through until the cheddar has melted and the whole lot has combined.  This is where you'll start getting a little bit worried about the colour.  Do not despair!

7.  As the gnocchi cook, lift them out with a slotted spoon, directly into the bacon mixture.  Once they are all done, fold them through until everything is combined, check for seasoning and adjust if necessary - and serve.

I thoroughly recommend serving the gnocchi with a green side salad, which provides a lovely freshness to counteract the richness of the pesto and cheese.  Perfect!

Printable version

21 February 2014

Watercress and Leek Soup - fantastic green gorgeousness

Just look at the colour of that soup!
At the bottom of the Le Blender review, I said that I would detail the recipes used if anyone was interested.  Well, there seems to be a fair amount of interest in the Watercress & Leek soup, so here we are - one recipe.

Now I will hasten to add that I borrowed one of Saint Delia Smith's recipes for the soup, however as is always my way, I tweaked it about a little.  It would seem that you folk out there trust my tweaks and want to have the tweaked version - which makes me very humble.  Saint Delia, I apologise for usurping your recipe!
 
It looks so good for you, with such beautiful colours

Because I was testing Le Blender for the review, I was naturally particularly interested in a soup which required blending - and so I wanted something that I knew would resist the blender a little.  Now I have made watercress soup in the past and had terrible trouble getting it smooth - but only because I had a weedy blender.  However, do bear in mind that if you have an especially low powered blender, you won't be able to get the soup to a completely smooth texture.  It won't change the flavour, but just be aware so that you're not all disappointed that you can't get it as smooth as you might like it to be.
 
You see how it loses some of the vibrancy of colour in being cooked

Making the soup is easy peasy double squeezy, as they say.  It is easily tweaked to your own palate's preference, if you like more watercress to leek, then up the quantity of watercress and drop the quantity of leek.  Equally, if you prefer the leek to the watercress, reverse that process!  The one big difference between the two recipes is that I opted to retain some of the watercress and include it uncooked.  This not only brightens the colour of the soup, but also helps the watercress flavour along and is very well worth doing.
Ready for the raw watercress and then to be blended

Now, one thing that is also worth mentioning, is about the butter.  Owing to my having developed a sensitivity to cow's milk, I have taken to using goat's butter - which is just gorgeous.  Yes, it does carry that slight "goaty" flavour that a creamy goat's cheese has - but in this soup goat's butter is a match made in heaven and better for your digestion too.  By all means use cow's butter, but if you like goat's cheese, I'd give it a go.

Mmmn.  Smooth as silk and tasty as they come!
My last cook's tip, is about the quantity.  The following quantity makes either enough for three people for a main course, or sufficient for four or five for a starter.  The soup would make a fantastic starter, being that lovely combination of creamy and light.

So let's stop blathering about it and get on and make it!

WATERCRESS AND LEEK SOUP   (feeds 3 for a main course or 4-5 for a starter)

Ingredients :

150g watercress
75g butter
2-3 leeks, washed and chopped
3 medium potatoes, peeled and diced finely
1 litre approx of a good vegetable stock
half a tsp of white pepper
half a tsp of freshly ground black pepper (or to taste)
a pinch of sea salt
2 dessertspoonfuls of creme fraiche.

Method :

1.  Separate out two big handfuls of watercress and retain in a bowl.

2.  Heat the butter in the bottom of a deep saucepan with a lid.  Once melted, add the remainder of the watercress, the chopped leek and diced potato.  Stir everything until it is covered with the melted butter, then add a tablespoonful or two of water and cover with the lid.

3.  Allow the vegetables to sweat over a low heat until softened, stirring occasionally to make sure that the potato doesn't stick to the bottom of the pan, for around 15-20 mins.

4.  Add the stock and white pepper and stir well.  Bring up to simmering point and allow to simmer until the potato is tender and will fall off the point of a knife.

5.  Remove from the heat and add the retained watercress.  Allow the soup to cool slightly and the watercress to wilt, before blending to your preferred texture.  Season to taste with a little extra sea salt and some of the black pepper.

6.  Return to the pan and reheat gently - do not allow the soup to boil - while you add the creme fraiche.  Stir through until it has dissolved into the soup.

7.  Serve in warmed bowls, with a little black pepper and some watercress leaves (there are always some left clinging to the bowl) as garnish.

Luscious!

Printable version
 

20 February 2014

Pulverisation fun with Magimix's Le Blender

Olive oil added for perspective on size!
Feast your eyes on this little beauty.  Doesn't it just look business-like?  Don't you just love its satiny lines and voluptuous air of "Blend? Pah! Come on then, challenge me!".

Let me introduce you to Le Blender, by Magimix.  Don't ask me why it's called "Le Blender", I've no idea other than the fact that Magimix are French.  It's a mean beastie of a blender though.  Oh yes.  It has a power output of 1200 watts, which is strong enough to crush ice.  Impressive, eh?  It also has a 1.8 litre heat resistant jug, so soup for 3 people is a doddle with no need to blend in batches.  However, the best part of all, is that a) it has 4 variable speed functions, b) four pre-set programmes (dessert, ice, soup and smoothie) and the nattiest function where it can self-clean.  Oh and I mustn't forget - it comes with a three year guarantee!

It arrived neatly wrapped in a cardboard outer box that required two people to remove it - one to hold the outer box, one to pull the inner box.  If you haven't got a second person, I'd advise a Stanley knife might be a good idea, wielded carefully!

Box contents - complete with instruction/recipe book.
The blender does weigh a ton - which is one of its negative features.  For someone like me who has a reduced mobility and gripping function, it can be something of a challenge to hang onto whilst you pour out the contents from the removable glass jug.  However, that weight is a lot of its strength, so I really wouldn't want it to be any lighter.  I'd just rather I was a little stronger!


Having washed and assembled Le Blender, we sat back and admired it for a while.  Well, it is a thing of beauty, let's face it.  Unlike when we got the Combi Oven, we didn't need to re-arrange the entire kitchen, as it fitted onto a piece of spare worktop which was a repository for tea towels and cake plates, prior to the blender's arrival.

Not surprisingly, we immediately started planning "things we could make".  These included frozen yoghurt, soups, sauces, desserts .. we were in full on creativity mode.

However, the first thing we did was to test the ice crushing facility.  Well, it worked - a little too well - as we discovered that putting part of one ice cube tray in a room temperature jug just wasn't enough.  The blades whizz the cubes down in no time at all, but they do heat up a little and the ice had melted quite a bit by the time it was done.  What it needed was to have a little forethought, the jug chilled and quantity!  Since then, we've been collecting ice cubes in a freezer bag and will have another go when we've got enough to fill the jug.

The next thing on the list was - not altogether surprisingly, as we've taken to having them for breakfast two or three times a week - a smoothie.

This one though, was a muesli smoothie as opposed to a completely fruit version.

So take a handful of muesli, a banana, an apple (we peeled ours because it was a bit the worse for wear) and a glass of milk (in our case, we use goat's milk for its ease of digestion) and whizz.

We used the smoothie programme and within less time than you could have imagined, we were drinking a lovely nutty, smooth and silky smoothie through a straw.  That got a big thumbs up!


Next on the list was a frozen yoghurt.  Ours included frozen bananas, frozen raspberries, goat's yoghurt (very similar to Greek yoghurt) and a teaspoonful or so of icing sugar, just to take the edge off of the tartness of the raspberries.  We also took care to chill the jug right down by putting it into the freezer for a while.
Frozen jug - won't be hugging this one!

We had a bit more trouble with this, but largely through inexperience as to what to put in first, etc.  We put everything in the jug and turned it on via the "Dessert" function - and the blades went around, but the contents of the jug just sat there unmoving.  After quite a bit of strong arm tactics from hubby, using the paddle provided with the blender, he got it all moving and it blended up beautifully smoothly.

In retrospect, what we should have done was to have blended the frozen bananas first, then added the raspberries and yoghurt.  As it was, everything just kind of froze into place and stayed there!  Well, we know better for the future.

The end result of the Raspberry Frozen Yoghurt was exceptional.  So smooth, with the zippy fresh taste of raspberries and mildly acidic goat's yoghurt, all tempered by the sweet banana.  Just gorgeous!

So how good does that look?  Mmmmn.  I think so!
Chicken curry was on the list for dinner that night and for all that it doesn't require the blender, some of its ingredients did and for that I would normally use the hand blender.  Well, Le Blender was just sitting there, asking to become involved in the cooking and I just couldn't use the hand blender - Le Blender would have been mortified with shame.

Blended onion, garlic and tomato - a great start to the curry sauce.
So, like a parent succumbing to a naughty, nagging child, I blended the onion with the garlic, and then separately, the tomatoes to go into the curry sauce.  Thumbs up, everything was blended perfectly and by using the pulse function, I was able to keep the onions with some texture.  The curry had a lovely smooth, unctuous sauce that was just perfect for dipping your naan bread into.

By this time, I was feeling pretty pleased with our new kitchen helper!


Hmmn, now what's next?  Ah yes, a fruit smoothie for breakfast.

First blend ready to go.
Historically, we've always made smoothies with yoghurt or, at the very least, some milk (goat's milk for its health benefits usually).  However, I wanted to make one that was simply fruit - and I wanted it to be fairly lip puckering and zesty.  I don't know about you, but sometimes in the morning I want something that's going to make my taste buds sit up and pay attention, plus my tummy wake up from its pasta-induced slumber from the night before.

Hubby was going to the supermarket on some technical computer-orientated errand, so I asked him to pick up some random fruit suitable for a smoothie.  Thus, we wound up with a punnet of blueberries and a punnet of strawberries from the reduced section.  To these, I added three ripe peaches (I'd been sent some fantastic South African peaches and plums that were going ripe faster than we could eat them) and a couple of bananas.
All blending beautifully.

Now, what happens when you peel and cut a banana and a peach?  Correctimundo - they start to oxidise and go a funny colour.  What stops that?  Lemon juice.  Well, I did say that I wanted this smoothie to be zesty!  Why was the oxidisation an issue?  Well, I wanted to make a fruit smoothie the night before so that come the morning, all we had to do was pour it into a glass, add a straw and get woken up.

With the experience from the Iced Raspberry Yoghurt in mind, I decided not to throw the entire ingredients list into the blender all at once.  Thus, I started with the banana pieces, half a lemon in juice (oxidisation in mind, you see!) and the blueberries.  Gave them a quick pulse to get them mushy - which happened in the blink of an eye, so powerful is the motor - and then added the strawberries and skinned peach pieces.

I turned the blender on to its "Smoothie" setting and off it went.  There's something extraordinarily satisfying about watching pieces of fruit get utterly pulverised and the colour of the ensuing mixture change as various pieces come into contact with the blades.  (Hmmn, sounds a tiny bit "Silence of the Lambs", that!).  It really is that easy.  Peel, chop, blend, done.

Wakey wakey, Jenny!
The resultant smoothie was just that - completely smooth and silky, however what surprised me was the degree of bubbles involved.  It was less a smoothie and more a frothy!  Now that was an unexpected bonus.  The texture was quite thick - but it would be easy to let it down slightly by adding a glug or two of apple juice.  I really liked the frothy texture, it was totally different to the dairy smoothies and rather fun.

Well that was breakfast sorted very satisfactorily.  Now let's fast forward to lunch.

Just look at that - smooth as silk and a beautiful colour.
For me, I felt that blending a hot soup would be a really good test of the blender's capabilities.  In the past, I've used various types of blender with various forms of success but nothing ever rendered soup down to that velvety smooth gorgeousness that you see in recipe books and on t.v. cooking shows.  So soup was on the menu for lunchtime - and a soup which I had singularly failed with previously, watercress.

Sweating off the watercress, leek & potato in goat's butter.
I borrowed Saint Delia's recipe for watercress and leek soup, as I figured that if I got the recipe right, then the blending would be a true test - and Saint Delia's recipes are so easy to make.  You can find the recipe by Googling "Delia Watercress soup" if you want to give it a try - and I heartily recommend it.  I did deviate from the recipe slightly, in that I only included two thirds of the watercress to the saucepan.  The remainder went into the blender raw, to encourage the vibrant green of the colour and to brighten the flavours.  It worked, too.

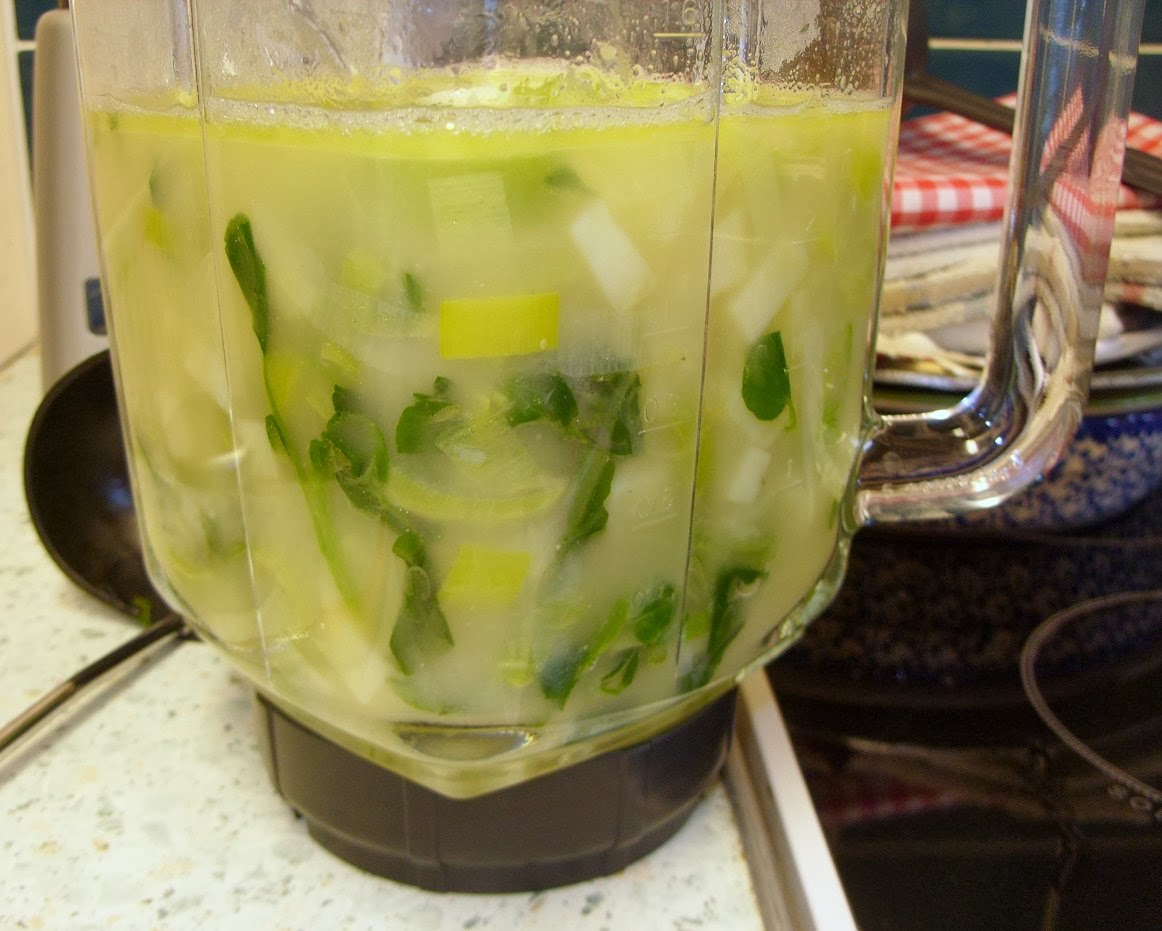
Ready to blend - don't forget the lid!
The soup was sufficient for 3 people for a lunch, or 4 people for a starter - and it all fitted into the 1.8 litre jug.  The jug's lid has a natty little cap that can be removed when you're blending hot and steamy liquids, which helps to prevent the lid from being forced off by a build up of steam.  (Although with the sealing system that the lid has, it'd take a fair old pressure to move it - I can only just get it moving!).  I just held the cap over the hole for the 2-3 seconds it took for the level to settle while being blended, then removed it entirely.  I used the "Soup" setting - and it was perfect.

Blend, blend, my green loveliness!
For once, I had my silky smooth, unctuous, velvety soup with no random pieces of potato that had been left behind, no forgotten leaves of watercress surfacing slowly like tiny pieces of flotsam - just perfectly smooth, blended soup.  To say I was chuffed to bits with it, is putting it mildly.

As I have mentioned, the jug is heavy.  Fill it full of soup and it's flipping heavy.  I had to get hubby to pour the soup from the jug back into the saucepan - but as I say, I have really poor gripping ability with my left hand particularly and it was definitely a two handed job for me.  Yes, the lid is firmly seated when it's on properly, but I can move it - I just have to hug the jug when I'm doing it, for fear that the whole lot will get propelled across the worktop.  Still, I might set up a "hug a jug" day, who knows?

One aspect of the blender would be a real problem, if it wasn't for its absolutely genius self cleaning programme.  I just cannot separate the bottom section (which houses the blades) from the jug, no matter how hard I twist, or how many tea towels and rubber gloves I press gang into helping out.  However, aha!  In the event of hubby not being there to separate the two (simple twisting action - not difficult, just beyond my hands), I can easily set it to self clean instead!  Add a litre of warm water with a few drops of washing up liquid and pulse a couple of times.  Pour out the yukky water, give it a rinse and hey presto - clean.  As I say, genius.

Le Blender certainly isn't one of the cheapest blenders on the market at around £179 from Argos.  However, is it the best?  Well, it's the best I've ever had the pleasure of using - and I've used a few!

~~ : ~~

This post has been produced in association with Argos, where you too can find a Le Blender and have the kind of whizzed up fun that we're having!

Recipes for each dish are available, simply ask and I shall supply.

Related Posts Plugin for WordPress, Blogger...