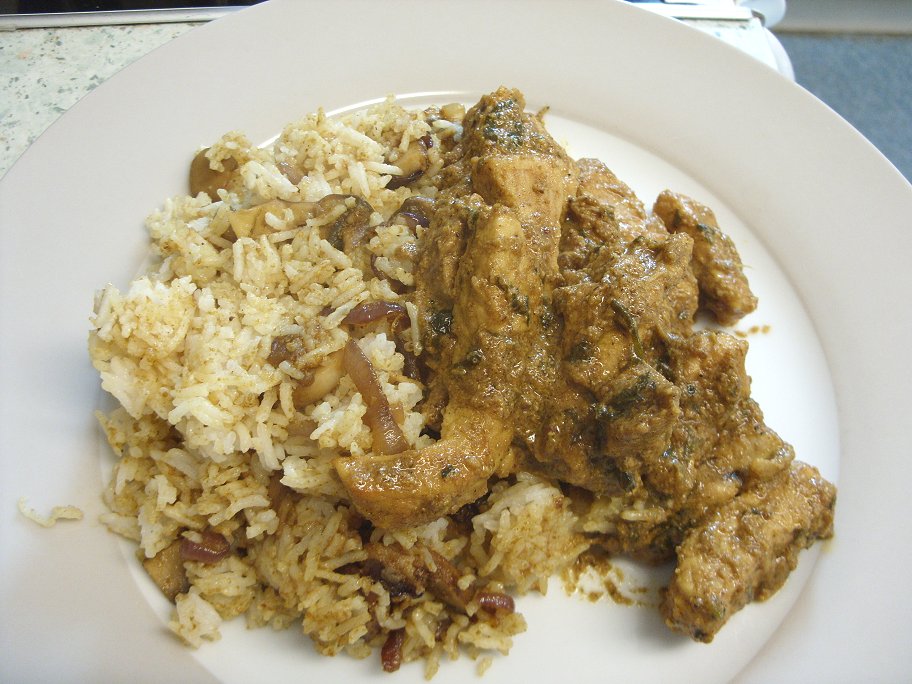
This is one of those recipes that has jumped the queue of recipes waiting to come to you, just because it is SO good.
With rhubarb leaping out of the ground in abundance (well, it is in our garden), you might be looking for something new to do with it - and this relish is a thing of rare beauty that deserves to be made.
My hubby is going through a bit of a purple patch with regard to cooking at the moment. He's bored rigid with cooking dinners, but interesting little challenges like making a relish out of our gorgeous rhubarb still have the capacity to fire him up. We were discussing what to eat for the week (also known as "making the menu plan") and had decided to go for a Ploughman's Lunch (or Ploughman's Dinner, as it shall be). Now of course, a Ploughman's requires some tasty pickle or another. "Perhaps piccalilli?", said hubby. "Or, or - rhubarb chutney!" he amended, with obvious keenness.
Well that was it. He was out in the garden, laying waste to the nearest rhubarb, before I could say "great idea!".
The end result is truly one of those pickles/preserves that you taste at a Farmer's Market and think "I'll never be able to afford some of that", before finding out that a small jar costs about a million quid. Here, you wind up with about four times the amount, for a fraction of the price. I think that probably, the most expensive item was either the sugar, vinegar or ginger (presuming you've got the rhubarb in the garden already), but if you've a well stocked larder you may well find that you can come up with the ingredients without a trip to the shops.
The relish is jammy, dark and sticky with a most delicious crunch from the mustard seeds and a delightful warmth from the chilli. The rhubarb flavour is very definitely right up there and is supported by the tart apple. As I said to hubby, I'll have mine on my ice cream please!
In fact, we've tried it on chicken sandwiches, cheese sandwiches, cheese with biscuits, tinned mackerel, off a teaspoon and of course as part of the aforesaid Ploughman's. In every context it has been flipping gorgeous.
I have no Cook's Notes for you, as there are so few instructions - just put it all in a pot and cook - there is very little that can go wrong! Just don't overheat it and allow it to burn.
Oh and incidentally, if you're wondering what makes it a relish instead of a chutney, a relish is a chutney that isn't made to be able to store for long periods. For this little lovely to be a relish is absolutely 100% appropriate, as I doubt it is going to stay in our fridge for very long at all.
RHUBARB & APPLE RELISH (Makes a large (12oz) jar or around 2 cups)
Ingredients:
250g rhubarb, chopped into 1 inch chunks
250g soft dark brown sugar
125ml good quality cider vinegar (Aspall's is great)
200g Granny Smith apple, peeled and cut into half inch chunks
100g onion, chopped
20g stem or crystallised ginger, finely chopped
50g sultanas
1 tsp yellow mustard seeds
half a tsp of sea salt
a pinch of dried red chilli flakes - to taste
pinch of ground cloves
half a tsp of allspice
pinch of freshly ground nutmeg.
Method:
1. Put everything in a non-reactive saucepan. Bring to a simmer. Simmer for 1 hour - stirring regularly - until the relish is good and thick.
2. Pour into a sterilised jar (or jars), seal and leave to cool.
Refrigerate, the relish will keep for approximately 1 month.
Printable version
Showing posts with label ginger. Show all posts
21 April 2015
21 February 2013
Allspice chicken and mango rice - suddenly, we're in the Caribbean!
I'm often drawn towards recipes for traybakes. They always look so good, with beautifully golden roasted chicken pieces nestling amongst gorgeous roasted vegetables that have just begun to caramelise. However, my efforts haven't always been successful in the traybake department.
As such, I was bearing this in mind when I found myself drawn towards the recipe for Mango chicken, bean & rice bake in the latest BBC Good Food magazine. There were the golden roasted chicken pieces, as cosy as can be beside chunks of glowing mango, on a bed of fluffy rice and shiny red kidney beans.
Looking at the ingredients, they seemed to fit what we like - but in a different way to normal. There were Indian curry ingredients there (chilli, coriander, ginger, onion, rice) with Caribbean influences (allspice, mango and kidney beans). The recipe even called for lime - which as you know, I have quite a few of just at the moment!
I had a little word with hubby about whether he felt he could cope with chicken thighs in this instance. He's a chicken breast man, ordinarily, you see. I felt that the chicken thighs would give more flavour to the rice (as they sit on the rice to cook) than ever chicken breast would - plus thighs could cope better with the hour and a half they would be in the oven! He wasn't convinced, but decided to take it like a man - and have a strategic sandwich afterwards if it all goes to worms.
Making the marinating mix was a breeze - a simple matter of chopping everything into bits and chucking it into the food processor, then whizzing, mixing and we're done for a day.
In fact, for all that the recipe is three main processes - marinating, 30 mins cooking then another 35-40 mins cooking, it really is incredibly easy to do. Once again, it is a one-pot dish (unless, like me, you decide to add something like red cabbage & apple as a side dish - but that's up to you!) and they really are the easiest things in the world to make.
I have a couple of cook's notes for you though :
1. If you can, following the 30 minutes cook under silver foil and before the next batch without the silver foil, remove the centre pieces of chicken and give the rice a bit of a stir there. I found that at the very middle of my dish, the rice was still fairly under done and a bit of a stir at a judicious moment, would have solved that.
2. If you have anyone who is - like hubby - a bit phobic about "globby bits", remove the skin from their chicken before marinating. The skin is delicious eating - but not for certain people - and to remove it before serving will mean that they lose all the effects of the marination on the chicken, plus the mango chutney.
3. Don't be tempted to put too much mango chutney onto the chicken. I have reduced the amount to half a teaspoonful from a full teaspoonful, as it made the chicken rather too sweet.
4. The marinade was full of flavour, but if you like the chilli heat do leave the seeds in. I removed them from our chilli - and rather wished I hadn't by the end of it!
Hubby didn't have need of his emergency sandwich, he enjoyed the new combination of flavours and found the chicken agreeably tender (and free from the dreaded "globby bits", thanks to some careful trimming!). He did make the comment - and I think he's quite right - in that pineapple would have been a good substitute for the mango.
Son and heir wasn't so keen on the clove-like allspice flavour that is prevalent all the way through the dish, but I think that is simply a matter of being unfamiliar with that particular flavour. I really liked the dish and agreed, to some extent, with son & heir's lament about the allspice, so I have reduced it from one and a half teaspoonfuls to just the one teaspoonful, in acknowledgement of its dominance - which was a bit too much, I felt. However, I really liked how sitting on top of the rice - initially in a stock bath - made the chicken incredibly tender. It was literally falling off the bone. Lovely!
Considering how differently this turned out to how I was expecting, it was a very interesting and remarkable dinner that is very well worth repeating. I may well experiment with using chicken breast next time - and cook the rice in the oven without the chicken on board for the first half hour. Interesting! I'll let you know what happens.
ALLSPICE CHICKEN AND MANGO RICE (feeds 4)
Ingredients :
1 small onion, roughly chopped
1 tsp finely grated ginger
2 garlic cloves
1 red chilli, seeds removed if necessary, roughly chopped
small handful of coriander - including stalks - chopped roughly
2 tsp thyme leaves
zest and juice of 2 small limes
1 tsp ground allspice
2 tbsp sunflower oil
8-10 chicken thighs, skin left on but trimmed of fat
300g long grain rice
400g tin kidney beans, rinsed and drained
500ml chicken stock
1 ripe mango, peeled, stoned and cut into small cubes
150g mango chutney.
Method :
1. Marinate the chicken up to a day, or as little as an hour, before you want to cook it, by putting the onion, ginger, garlic, red chilli, coriander, thyme, lime, allspice and oil into a food processor and blitzing until a paste has been formed. Pour the paste onto the trimmed chicken thighs in a large bowl and mix until the chicken has been coated. Cover with cling film and leave in the fridge to marinate.
2. Heat your oven to 180degC/350degF/Gas4.
3. Rinse the rice in a sieve under the cold water tap until the water runs clear. Then place the rice into a large high sided flat baking dish (a lasagne dish is perfect). Add the kidney beans and a pinch of salt and level out the surface.
4. Remove the chicken from the marinade onto a plate and stir the stock into the remains of the marinade in the bowl. Pour the stock over the rice and beans.
5. Sprinkle the mango pieces onto the top of the rice mixture and place the chicken pieces on top again.
6. Cover the dish with silver foil and bake for 30 minutes.
7. Remove the foil from the dish and increase the oven temperate to 220degC/425degF/Gas 7. Spoon a half a teaspoon of mango chutney onto each chicken piece and return the dish to the oven for a further 35-40 minutes to brown the chicken and cook the rice.
8. Before serving, remove the chicken pieces and fluff up the rice with a fork.
Serve.
Printable version

As such, I was bearing this in mind when I found myself drawn towards the recipe for Mango chicken, bean & rice bake in the latest BBC Good Food magazine. There were the golden roasted chicken pieces, as cosy as can be beside chunks of glowing mango, on a bed of fluffy rice and shiny red kidney beans.
Looking at the ingredients, they seemed to fit what we like - but in a different way to normal. There were Indian curry ingredients there (chilli, coriander, ginger, onion, rice) with Caribbean influences (allspice, mango and kidney beans). The recipe even called for lime - which as you know, I have quite a few of just at the moment!
![]() |
| After 30 mins cooking - all chutneyed up and ready to go back in! |
I had a little word with hubby about whether he felt he could cope with chicken thighs in this instance. He's a chicken breast man, ordinarily, you see. I felt that the chicken thighs would give more flavour to the rice (as they sit on the rice to cook) than ever chicken breast would - plus thighs could cope better with the hour and a half they would be in the oven! He wasn't convinced, but decided to take it like a man - and have a strategic sandwich afterwards if it all goes to worms.
Making the marinating mix was a breeze - a simple matter of chopping everything into bits and chucking it into the food processor, then whizzing, mixing and we're done for a day.
In fact, for all that the recipe is three main processes - marinating, 30 mins cooking then another 35-40 mins cooking, it really is incredibly easy to do. Once again, it is a one-pot dish (unless, like me, you decide to add something like red cabbage & apple as a side dish - but that's up to you!) and they really are the easiest things in the world to make.
I have a couple of cook's notes for you though :
1. If you can, following the 30 minutes cook under silver foil and before the next batch without the silver foil, remove the centre pieces of chicken and give the rice a bit of a stir there. I found that at the very middle of my dish, the rice was still fairly under done and a bit of a stir at a judicious moment, would have solved that.
2. If you have anyone who is - like hubby - a bit phobic about "globby bits", remove the skin from their chicken before marinating. The skin is delicious eating - but not for certain people - and to remove it before serving will mean that they lose all the effects of the marination on the chicken, plus the mango chutney.
3. Don't be tempted to put too much mango chutney onto the chicken. I have reduced the amount to half a teaspoonful from a full teaspoonful, as it made the chicken rather too sweet.
![]() |
| So munchable! |
4. The marinade was full of flavour, but if you like the chilli heat do leave the seeds in. I removed them from our chilli - and rather wished I hadn't by the end of it!
Hubby didn't have need of his emergency sandwich, he enjoyed the new combination of flavours and found the chicken agreeably tender (and free from the dreaded "globby bits", thanks to some careful trimming!). He did make the comment - and I think he's quite right - in that pineapple would have been a good substitute for the mango.
Son and heir wasn't so keen on the clove-like allspice flavour that is prevalent all the way through the dish, but I think that is simply a matter of being unfamiliar with that particular flavour. I really liked the dish and agreed, to some extent, with son & heir's lament about the allspice, so I have reduced it from one and a half teaspoonfuls to just the one teaspoonful, in acknowledgement of its dominance - which was a bit too much, I felt. However, I really liked how sitting on top of the rice - initially in a stock bath - made the chicken incredibly tender. It was literally falling off the bone. Lovely!
Considering how differently this turned out to how I was expecting, it was a very interesting and remarkable dinner that is very well worth repeating. I may well experiment with using chicken breast next time - and cook the rice in the oven without the chicken on board for the first half hour. Interesting! I'll let you know what happens.
ALLSPICE CHICKEN AND MANGO RICE (feeds 4)
Ingredients :
1 small onion, roughly chopped
1 tsp finely grated ginger
2 garlic cloves
1 red chilli, seeds removed if necessary, roughly chopped
small handful of coriander - including stalks - chopped roughly
2 tsp thyme leaves
zest and juice of 2 small limes
1 tsp ground allspice
2 tbsp sunflower oil
8-10 chicken thighs, skin left on but trimmed of fat
300g long grain rice
400g tin kidney beans, rinsed and drained
500ml chicken stock
1 ripe mango, peeled, stoned and cut into small cubes
150g mango chutney.
Method :
1. Marinate the chicken up to a day, or as little as an hour, before you want to cook it, by putting the onion, ginger, garlic, red chilli, coriander, thyme, lime, allspice and oil into a food processor and blitzing until a paste has been formed. Pour the paste onto the trimmed chicken thighs in a large bowl and mix until the chicken has been coated. Cover with cling film and leave in the fridge to marinate.
2. Heat your oven to 180degC/350degF/Gas4.
3. Rinse the rice in a sieve under the cold water tap until the water runs clear. Then place the rice into a large high sided flat baking dish (a lasagne dish is perfect). Add the kidney beans and a pinch of salt and level out the surface.
4. Remove the chicken from the marinade onto a plate and stir the stock into the remains of the marinade in the bowl. Pour the stock over the rice and beans.
5. Sprinkle the mango pieces onto the top of the rice mixture and place the chicken pieces on top again.
6. Cover the dish with silver foil and bake for 30 minutes.
7. Remove the foil from the dish and increase the oven temperate to 220degC/425degF/Gas 7. Spoon a half a teaspoon of mango chutney onto each chicken piece and return the dish to the oven for a further 35-40 minutes to brown the chicken and cook the rice.
8. Before serving, remove the chicken pieces and fluff up the rice with a fork.
Serve.
Printable version
11 January 2012
Stir-fried pork with ginger & honey : another quick, satisfying supper
Harking back to the previous post (Lemony Prawn & Chorizo Rice), this is another one cropped from the Good Food Magazine.
February's magazine seems to have been a fund of interesting recipes, perhaps because the emphasis is on "healthy" instead of "expensive indulgence". Don't get me wrong, I'm all for a bit of expensive indulgence - but after Christmas and New Year I find I start hankering for sausage & mash, or meatballs & pasta.
Well, this recipe isn't either of those - but it was completely gorgeous.
I'm always keen on a stir fry and a stir fry that involves noodles and pork? Well immediately I'm interested. Ordinarily, I'd have got six pork steaks from our local butcher to do this recipe. However, having bought a pork fillet for the Ballotines, I realised that - at the moment - it's an affordably good source of extremely lean pork. Unlike the Ballotines, if you're buying just the one fillet then it becomes almost affordable as there is so little waste.
Hubby really liked this dish - as did I. The only tweak to the original recipe I made beforehand was the inclusion of a red pepper along with the green. That was largely because I had a spare red pepper sitting in the fridge without a home to go to. In retrospect, I think I would add some mushrooms to it as they would fit very well within the flavour profile and just add to the interest.
Of course, this then places the stir fry completely outside of son & heir's comfort zone. He'll eat the pork, noodles & mange tout happily enough, but the peppers received a big negative, as would mushrooms. In fact, I'll keep on serving this sort of dinner up to him from time to time, ever hopeful that his taste buds will have matured and he'll find the vegetables palatable. Well, it might happen!
February's magazine seems to have been a fund of interesting recipes, perhaps because the emphasis is on "healthy" instead of "expensive indulgence". Don't get me wrong, I'm all for a bit of expensive indulgence - but after Christmas and New Year I find I start hankering for sausage & mash, or meatballs & pasta.
Well, this recipe isn't either of those - but it was completely gorgeous.
I'm always keen on a stir fry and a stir fry that involves noodles and pork? Well immediately I'm interested. Ordinarily, I'd have got six pork steaks from our local butcher to do this recipe. However, having bought a pork fillet for the Ballotines, I realised that - at the moment - it's an affordably good source of extremely lean pork. Unlike the Ballotines, if you're buying just the one fillet then it becomes almost affordable as there is so little waste.
Hubby really liked this dish - as did I. The only tweak to the original recipe I made beforehand was the inclusion of a red pepper along with the green. That was largely because I had a spare red pepper sitting in the fridge without a home to go to. In retrospect, I think I would add some mushrooms to it as they would fit very well within the flavour profile and just add to the interest.
Of course, this then places the stir fry completely outside of son & heir's comfort zone. He'll eat the pork, noodles & mange tout happily enough, but the peppers received a big negative, as would mushrooms. In fact, I'll keep on serving this sort of dinner up to him from time to time, ever hopeful that his taste buds will have matured and he'll find the vegetables palatable. Well, it might happen!
STIR FRIED PORK WITH GINGER & HONEY (feeds 3)
Ingredients :
3 nests medium egg noodles
3 tsp cornflour
1 tbsp water
3 tbsp soy sauce
1½ tbsp runny honey
1 tbsp sunflower oil
500g pork tenderloin (fillet) cut into thin bite-sized pieces
1 tsp ginger, chopped
2 garlic cloves, finely chopped
1 green pepper, deseeded and sliced
1 small red pepper, deseeded and sliced
a handful of chestnut mushrooms, sliced
150g mange tout
1 tsp sesame seeds.
Method :
1. Bring a large pan of salted water to the boil and cook the noodles according to the pack instructions.
2. Mix the cornflour with the water, soy sauce & honey and set aside.
3. Heat the oil in a wok or deep frying pan over a high heat until it’s as hot as you dare. Then add the pork and cook, stirring regularly, until browned all over.
4. Add the ginger, garlic, peppers, mushrooms and mange tout and cook until the peppers are demonstrably softened.
5. Reduce the heat, then add the soy and honey mixture, stirring until the sauce bubbles and thickens – which will be just a moment or two, so don’t leave it!
6. Add the drained noodles and toss to combine, then serve adding a sprinkling of sesame seeds at the last minute.
.
24 October 2011
Saag Aloo - perfect accompaniment to a curry.
So there I was, plucking up courage to cook the Beef Rendang. However, I knew that the Rendang didn't contain anything in the way of vegetable matter (well, except for shallots and chillis). You know how I'm always keen to get some vegetables into my chaps, so I set out to find a recipe for an accompaniment that would complement the Rendang, whilst ticking off some of the all-important vegetable matter.
I knew the Rendang was likely to be saucy (ooh, matron!), so didn't really want another saucy dish for fear of swamping out the plate. What was required was something like a bhajee - a fairly dry vegetable recipe.
There, on the My Dish website, I found a recipe for Saag Aloo which was attributed to someone called Renu. Thank you, Renu, for providing the perfect accompaniment!
Now you won't be surprised to hear that I deviated from the original recipe somewhat. After all, it'd be unusual if I didn't, hey?
Firstly, I couldn't find any frozen spinach in our local supermarket so bought the biggest bag of fresh spinach it was possible to buy - and wilted it in a dry pan at the beginning of the recipe. To be honest, I think this was probably an improvement on the requirement for frozen spinach, as it wasn't all munched up and indistinguishable. Even after being squeezed out between two plates (my Nanna's preferred method for removing the water from spinach or cabbage) it was still distinguishable as spinach leaves. Plus, it just feels worthier to be using fresh spinach, even if it isn't.
The second deviation from the original, was that I added a chopped onion to the mix. Now I can recall seeing and tasting fried onion in Saag Aloo that I've had from the takeaway and it didn't seem right to not include some. I do appreciate that it may not have been authentic to include the onion, but I was going for "what we like" rather than "authenticity", on this occasion.
I also didn't have any asafoetida or any jaggery, so left the former out and substituted soft brown sugar for the latter. It may have made a huge difference, but we were certainly happy enough with the results, so I think it worked.
The recipe was very acceptably simple to produce and I was perfectly able to conduct the trio of pans (Rendang, Saag Aloo and Rice) without getting all stressed and in a flap.
It was lovely to use the whole spices (mustard seeds and cumin seeds) and toasting them in the pan beforehand almost had me feeling like a proper chef.
One point worth noting is that, regarding the potatoes and because of hubby's hatred of the poor old things, I gave them three minutes in the microwave (with a small amount of water) once I'd diced them. This just softened them down enough that once they went into the pan, they didn't take so long to cook and were at the stage of just beginning to break up by the time they were served. Hubby declared that he wouldn't have wanted the potatoes again, but the spinach was fine. Both he and son & heir cleared their plates though, so not only was this a vote of confidence in the recipe, but I managed to get an unfeasibly huge amount of spinach into the pair of them! Result!
SAAG ALOO (serves 3)
Ingredients :
350g bag of fresh spinach, washed
1 tsp mustard seeds
1 tsp cumin seeds
1 knob of butter
1 onion, chopped fine
3 medium potatoes, peeled and diced finely
2 cloves garlic, grated
1 tsp turmeric powder
1 tsp sea salt
1 tsp soft brown sugar or jaggery
1 tsp ground cumin
1 tsp ground coriander
1 tsp chopped red chilli
1 tsp ginger paste
a handful of chopped fresh coriander.
Method :
1. Gently heat a large wok, then add the fresh spinach. Allow to wilt without browning and drain the excess water from the pan.
2. Once wilted, place the spinach onto a plate and place another identical plate on top of the spinach. Squeeze the two plates together, effectively squashing all the water from the spinach. Once water has stopped running, set aside.
3. Dry the pan and replace onto a medium heat. Add the mustard and cumin seeds and occasionally toss, to toast them evenly. You'll know when they're done as the cumin will darken, the mustard seeds will pop and the aroma will be fabulous.
4. Add the knob of butter and onions and stir to combine. Cook the onions for 4-5 minutes or until they are softened and just beginning to brown.
5. Add the potatoes and a splash of hot water and stir to combine. Allow to cook for 2-3 minutes, so that the potatoes begin to take on a little colour.
6. Add the garlic, turmeric, salt, sugar, ground cumin, ground coriander, chillis and ginger and stir to combine. Allow to cook until the potatoes are tender. You may need to add a little more water to encourage the potatoes to cook, but take care to not swamp the mixture.
7. When the potatoes are done (and not before), add the spinach and fresh coriander and give everything a good stir to ensure the vegetables all have a good coating of spices. Place a lid on the pan to help the vegetables to heat through and serve.
.
I knew the Rendang was likely to be saucy (ooh, matron!), so didn't really want another saucy dish for fear of swamping out the plate. What was required was something like a bhajee - a fairly dry vegetable recipe.
There, on the My Dish website, I found a recipe for Saag Aloo which was attributed to someone called Renu. Thank you, Renu, for providing the perfect accompaniment!
Now you won't be surprised to hear that I deviated from the original recipe somewhat. After all, it'd be unusual if I didn't, hey?
Firstly, I couldn't find any frozen spinach in our local supermarket so bought the biggest bag of fresh spinach it was possible to buy - and wilted it in a dry pan at the beginning of the recipe. To be honest, I think this was probably an improvement on the requirement for frozen spinach, as it wasn't all munched up and indistinguishable. Even after being squeezed out between two plates (my Nanna's preferred method for removing the water from spinach or cabbage) it was still distinguishable as spinach leaves. Plus, it just feels worthier to be using fresh spinach, even if it isn't.
The second deviation from the original, was that I added a chopped onion to the mix. Now I can recall seeing and tasting fried onion in Saag Aloo that I've had from the takeaway and it didn't seem right to not include some. I do appreciate that it may not have been authentic to include the onion, but I was going for "what we like" rather than "authenticity", on this occasion.
I also didn't have any asafoetida or any jaggery, so left the former out and substituted soft brown sugar for the latter. It may have made a huge difference, but we were certainly happy enough with the results, so I think it worked.
The recipe was very acceptably simple to produce and I was perfectly able to conduct the trio of pans (Rendang, Saag Aloo and Rice) without getting all stressed and in a flap.
It was lovely to use the whole spices (mustard seeds and cumin seeds) and toasting them in the pan beforehand almost had me feeling like a proper chef.
One point worth noting is that, regarding the potatoes and because of hubby's hatred of the poor old things, I gave them three minutes in the microwave (with a small amount of water) once I'd diced them. This just softened them down enough that once they went into the pan, they didn't take so long to cook and were at the stage of just beginning to break up by the time they were served. Hubby declared that he wouldn't have wanted the potatoes again, but the spinach was fine. Both he and son & heir cleared their plates though, so not only was this a vote of confidence in the recipe, but I managed to get an unfeasibly huge amount of spinach into the pair of them! Result!
SAAG ALOO (serves 3)
Ingredients :
350g bag of fresh spinach, washed
1 tsp mustard seeds
1 tsp cumin seeds
1 knob of butter
1 onion, chopped fine
3 medium potatoes, peeled and diced finely
2 cloves garlic, grated
1 tsp turmeric powder
1 tsp sea salt
1 tsp soft brown sugar or jaggery
1 tsp ground cumin
1 tsp ground coriander
1 tsp chopped red chilli
1 tsp ginger paste
a handful of chopped fresh coriander.
Method :
1. Gently heat a large wok, then add the fresh spinach. Allow to wilt without browning and drain the excess water from the pan.
2. Once wilted, place the spinach onto a plate and place another identical plate on top of the spinach. Squeeze the two plates together, effectively squashing all the water from the spinach. Once water has stopped running, set aside.
3. Dry the pan and replace onto a medium heat. Add the mustard and cumin seeds and occasionally toss, to toast them evenly. You'll know when they're done as the cumin will darken, the mustard seeds will pop and the aroma will be fabulous.
4. Add the knob of butter and onions and stir to combine. Cook the onions for 4-5 minutes or until they are softened and just beginning to brown.
5. Add the potatoes and a splash of hot water and stir to combine. Allow to cook for 2-3 minutes, so that the potatoes begin to take on a little colour.
6. Add the garlic, turmeric, salt, sugar, ground cumin, ground coriander, chillis and ginger and stir to combine. Allow to cook until the potatoes are tender. You may need to add a little more water to encourage the potatoes to cook, but take care to not swamp the mixture.
7. When the potatoes are done (and not before), add the spinach and fresh coriander and give everything a good stir to ensure the vegetables all have a good coating of spices. Place a lid on the pan to help the vegetables to heat through and serve.
.
Beef Rendang - the slow cooker version
![]() |
| Beef Rendang, Saag Aloo & white rice : double yum factor! |
Having done so, I really don't know what I was worried about - as it was the easiest recipe to follow (even with my deviation into cooking with the slow cooker and taking two days over it). The "two day" thing was purely by accident. However, I really think that I might do that again with a curry, because they seem so much nicer the day after. The spices all seem to mellow out beautifully the longer you leave it.
So what were my concerns? Well, firstly, the recipe demanded fresh lemongrass which (*blush*) I hadn't ever cooked with before. Add that to the fact that lemongrass isn't my favourite flavour - nor is it hubby's - and you can probably understand that concern.
Secondly, the recipe demanded Kaffir Lime Leaves - another ingredient that would be a first for me. I was fairly confident that we'd enjoy the inclusion of these, however.
Thirdly, as the recipe was for a Beef Rendang I had the problem of how to cook the beef well enough to ensure that it didn't retain any "bounciness" (hubby hates chewy meat), whilst not racking up the electricity bill by using the cooker for hours on end (which sometimes is unavoidable, but can be offset by the meals around it being easy on the electricity consumption), and working out how to use the slow cooker (the best way to ensure non-bounciness and economy) to advantage, without spoiling the recipe.
Well, I'm very pleased - nay, relieved - to say that I achieved it. Even with the deviation from the plan which was caused by hubby spotting a Flying V Guitar for sale in the local small ads, (which son & heir would have given his eye teeth for) then ringing up for it and arranging to go and view, which meant we would have to have had dinner half an hour early - which as you know, is impossible when the slow cooker is involved!
![]() | |
| Click to open the picture up - it's worth it! |
Hence the two days' preparation.
The following day, while I was cooking the Saag Aloo (see next blog posting!) to accompany the Rendang, I separated the meat from the sauce and reduced the sauce by simmering it until it achieved the desired consistency. I then added the meat - which served to dilute the sauce a tad as the juices combined - and continued to reduce as the meat warmed through. I was a bit worried that the meat would begin to fall apart as the sauce reduced, which is why I separated the two to begin with.
That plan of action worked perfectly and we were left with a beautifully soft, mysteriously spiced, deep and rounded curry with wonderful flavours. The lemongrass just disappeared into the general melange (I suspect that the blitzing it received in preparation of the original paste helped with that) and even the blisteringly hot bird's eye chilli that I used along with a red chilli, was tempered and controlled by the sugar and sweetness of the coconut milk.
The recipe I detail below is the recipe that I prepared - using the slow cooker. If, however, you don't have one or alternatively don't want to use yours, then the original recipe can be found on the UKTV Food website here. I also used a piece of galangal (who thinks of these names?) in my version of the recipe, purely because it came with the shallots and lemongrass. I tasted it beforehand and it seemed to have a similar effect to ginger, so I halved the amount of ginger and included the galangal. Certainly didn't do the recipe any harm! If you don't have galangal, just double the amount of ginger you use.
BEEF RENDANG (feeds 3-4)
Ingredients :
3-4 large finely diced shallots
1 stem of lemongrass, chopped
3 cloves garlic, cut into halves
a thumb-sized piece of Galangal, peeled and chopped roughly (optional)
3 tbsp vegetable oil
1 tbsp red chilli paste - or 2 red chillis, chopped finely (I used a red chilli and a green bird's eye chilli)
1½ tsp muscovado sugar
2 cm piece of ginger, peeled and finely shredded (I used ready-prepared ginger - 1 tsp)
1½ tsp turmeric
800g beef brisket, trimmed of all fat and cubed
3 Kaffir lime leaves
400ml tin of coconut milk.
Method :
1. Put the shallots, lemongrass, garlic and galangal into a small food processor, add a splash of water and blitz until a paste.
2. Heat the vegetable oil on a frying pan and fry the shallot mixture for about 5 minutes or until you can catch a fragrant toasted garlic and lemony aroma.
3. Blitz the chillis in the same way and add them to the pan, along with the sugar. Continue frying for another 5 minutes or until the mixture darkens and the oil separates from the paste.
4. Add the beef and cook until lightly browned, taking care not to let the spice mix catch on the bottom of the pan.
5. Add the ginger, turmeric, lime leaves (crushed lightly) and enough water to half-cover the meat. Cook, uncovered, until the masala clings to the meat.
6. Decant into the slow cooker and turn on to High.
7. Add the coconut milk and stir to combine. You may need to add a little more water at this stage as the sauce shouldn't be covering the meat, but be very much in evidence.
8. Leave to cook for a minimum of 3 hours. If cooking for longer, turn the slow cooker down to medium.
9. It is at this stage that you can leave the curry until the following day. Simply refrigerate once it has cooled down.
10. Remove the meat using a slotted spoon and retain. Decant the sauce into a frying pan and bring to a simmer, stirring occasionally.
11. Simmer until the sauce has gained the desired consistency - one of thickened double cream. Return the meat to the sauce and continue to simmer so as to heat the meat through and reduce the sauce back to the desired consistency.
12. Serve.
.
Labels:
beef brisket,
Beef Rendang,
coconut milk,
curry recipe,
galangal,
garlic,
ginger,
Kaffir lime leaves,
lemongrass,
main course recipe,
muscovado sugar,
red chillies,
shallots,
turmeric
5 June 2011
From the Gurkha section of the British Army Cookbook : Fried Pork Curry with sauce
There now, that's an intriguing title for a blog post!
The lovely Willie turned up at my work the other day, clutching a brown envelope in which was a copy of the Gurkha section of the British Army Cookbook for me. Now this on it's own would have been interesting enough, but of course, I had to try at least one recipe from it - and if that recipe went off well, maybe more.
I have huge respect for the Gurkhas, having spent time in their vicinity when Dad (who was a Royal Engineer, Warrant Officer Class 1) - and the whole family - was stationed at the same place as them in the past. I can always remember feeling very safe when there were Gurkhas around. My impression of them was that they were incredibly cheerful little chaps who had a fearsome reputation as a Soldier, and an unshakeable moral code.
So that lent a little connection to the recipes I had before me.
The booklet is fascinating and leads me to believe that there is little a Gurkha won't eat, just so long as it is combined with a curry in some form or another. For example, Liver Curry, Curried tinned vegetables, Omelette with curry and Scrambled Eggs Gurkha style which involves eggs, onions, tomatoes, chillies, mustard leaves, ginger and Garam Masala.
Having eaten the Pork curry we had last night, I can tell you that the Gurkha digestion has to be one of the most impressive out there.
One thing that you quickly come to realise, when reading through the booklet, is that "a curry" is not one thing. There are as many curries out there as the imagination can rustle up. It seems to me as though the definition of "a curry" is "a substance that has been cooked in hot (as in chilli-hot) and fragrant spices" and that's about where you have to leave it.
With some of the curries I have cooked in the past, (not all), Hubby's complaint has sometimes been that "it doesn't taste of curry". With this Gurkha cookbook, this is something that Hubby had to throw over his shoulder and forget about. Not all curries taste of curry. Whilst undoubtedly being "a curry", the meal we had last night could in no way be described as "tasting of curry". In fact, it tasted as though lemon was involved quite heavily - yet there wasn't a lemon in sight. An education for the tastebuds!
The first challenge I had was to scale down the recipe quantity-wise, as it was in two grades - the first for 10 people, the second for 50. Well, they ARE feeding an army, when all is said and done. I mean, how do you scale down a pinch of nutmeg? So it took some intuitive knowledge of how each ingredient tasted and the effect it was likely to have on the whole. One big change from the original recipe is that I increased the amount of Garam Masala from 1 tsp (approx) to 3 tsps. We particularly enjoy the flavour of Garam Masala and I couldn't imagine that the 1 tsp sprinkled over the top (which was what was recommended) was going to do it for us.
Once I'd got into the cooking of it, I can remember thinking to myself how much I enjoy cooking curries. I think it's the randomness of the result, dependent upon just how much of each spice you use and how you deal with them. After all, curry spices put "raw" into a stew-like substance will taste totally different to those that have been fried before the wet ingredients are added. Same ingredients, just a different way of dealing with them that ends in a completely different flavour. Fascinating stuff.
Oh yes - and I have to make mention of the beautiful pork that I got from Spring Fields butchers. I asked for their six pork steaks for £2.99 and came away with so much pork that I put two of the steaks in the freezer for another time. Cut from the loin, they had that stripe of fat along their back, but otherwise were completely lean. I trimmed the fat off and roasted it, saving the rendered fat for the roast potatoes again and gave the crispy pieces to the dogs, who couldn't stop licking their lips. Amazing value for an amazing product.
GURKHA FRIED PORK CURRY WITH SAUCE (feeds 3)
Ingredients :
500g of lean pork, sliced into strips
half a tsp of cayenne pepper
half a tsp of sea salt
4-5 tbsp low fat plain yoghurt
a large thumb-sized piece of ginger, peeled and grated
large knob of butter
5-6 black peppercorns, crushed in a pestle & mortar, or freshly ground
half a tsp of turmeric
2 tbsp fresh coriander, chopped
3 tsp Garam Masala
pinch of ground nutmeg
Water as necessary.
Method :
1. Place the pork into a large bowl and sprinkle with the cayenne pepper and salt. Mix to combine.
2. Add the yoghurt and ginger and mix well to ensure everything is well coated. Cover and leave to marinade for as long as you've got - to a maximum of 2 hrs.
3. Pre-heat the oven to 200deg C.
4. Melt the knob of butter in a deep frying pan and once it's sizzling, add the pork with all the marinade. Add the turmeric and black pepper and keep on stirring until it has reached a boil.
5. Decant into a warmed casserole dish, cover and cook for an hour.
6. Remove from the oven and add the coriander, then drizzle some 2-300ml of water down the sides of the casserole dish. Add the Garam Masala and give everything a jolly good stir (and don't panic at the fact that it looks remarkably like pond water). Replace, uncovered, in the oven for 15 minutes.
7. You can take two routes with this curry from hereon in. Either leave it in the oven to reduce, or take it from the oven and pour back into the deep frying pan and boil to reduce, which is what I did. I think this is the preferred method, as it puts you much more in control of what the sauce looks like, as with judicious stirring, it does improve in texture. Once the sauce has stopped resembling pond water and started to look like a sauce, you're done. Add the pinch of nutmeg, give a last stir - taste to check the seasoning and adjust if necessary.
8. Serve with mushroom rice.
.
The lovely Willie turned up at my work the other day, clutching a brown envelope in which was a copy of the Gurkha section of the British Army Cookbook for me. Now this on it's own would have been interesting enough, but of course, I had to try at least one recipe from it - and if that recipe went off well, maybe more.
I have huge respect for the Gurkhas, having spent time in their vicinity when Dad (who was a Royal Engineer, Warrant Officer Class 1) - and the whole family - was stationed at the same place as them in the past. I can always remember feeling very safe when there were Gurkhas around. My impression of them was that they were incredibly cheerful little chaps who had a fearsome reputation as a Soldier, and an unshakeable moral code.
So that lent a little connection to the recipes I had before me.
The booklet is fascinating and leads me to believe that there is little a Gurkha won't eat, just so long as it is combined with a curry in some form or another. For example, Liver Curry, Curried tinned vegetables, Omelette with curry and Scrambled Eggs Gurkha style which involves eggs, onions, tomatoes, chillies, mustard leaves, ginger and Garam Masala.
Having eaten the Pork curry we had last night, I can tell you that the Gurkha digestion has to be one of the most impressive out there.
One thing that you quickly come to realise, when reading through the booklet, is that "a curry" is not one thing. There are as many curries out there as the imagination can rustle up. It seems to me as though the definition of "a curry" is "a substance that has been cooked in hot (as in chilli-hot) and fragrant spices" and that's about where you have to leave it.
With some of the curries I have cooked in the past, (not all), Hubby's complaint has sometimes been that "it doesn't taste of curry". With this Gurkha cookbook, this is something that Hubby had to throw over his shoulder and forget about. Not all curries taste of curry. Whilst undoubtedly being "a curry", the meal we had last night could in no way be described as "tasting of curry". In fact, it tasted as though lemon was involved quite heavily - yet there wasn't a lemon in sight. An education for the tastebuds!
The first challenge I had was to scale down the recipe quantity-wise, as it was in two grades - the first for 10 people, the second for 50. Well, they ARE feeding an army, when all is said and done. I mean, how do you scale down a pinch of nutmeg? So it took some intuitive knowledge of how each ingredient tasted and the effect it was likely to have on the whole. One big change from the original recipe is that I increased the amount of Garam Masala from 1 tsp (approx) to 3 tsps. We particularly enjoy the flavour of Garam Masala and I couldn't imagine that the 1 tsp sprinkled over the top (which was what was recommended) was going to do it for us.
Once I'd got into the cooking of it, I can remember thinking to myself how much I enjoy cooking curries. I think it's the randomness of the result, dependent upon just how much of each spice you use and how you deal with them. After all, curry spices put "raw" into a stew-like substance will taste totally different to those that have been fried before the wet ingredients are added. Same ingredients, just a different way of dealing with them that ends in a completely different flavour. Fascinating stuff.
Oh yes - and I have to make mention of the beautiful pork that I got from Spring Fields butchers. I asked for their six pork steaks for £2.99 and came away with so much pork that I put two of the steaks in the freezer for another time. Cut from the loin, they had that stripe of fat along their back, but otherwise were completely lean. I trimmed the fat off and roasted it, saving the rendered fat for the roast potatoes again and gave the crispy pieces to the dogs, who couldn't stop licking their lips. Amazing value for an amazing product.
GURKHA FRIED PORK CURRY WITH SAUCE (feeds 3)
Ingredients :
500g of lean pork, sliced into strips
half a tsp of cayenne pepper
half a tsp of sea salt
4-5 tbsp low fat plain yoghurt
a large thumb-sized piece of ginger, peeled and grated
large knob of butter
5-6 black peppercorns, crushed in a pestle & mortar, or freshly ground
half a tsp of turmeric
2 tbsp fresh coriander, chopped
3 tsp Garam Masala
pinch of ground nutmeg
Water as necessary.
Method :
1. Place the pork into a large bowl and sprinkle with the cayenne pepper and salt. Mix to combine.
2. Add the yoghurt and ginger and mix well to ensure everything is well coated. Cover and leave to marinade for as long as you've got - to a maximum of 2 hrs.
3. Pre-heat the oven to 200deg C.
4. Melt the knob of butter in a deep frying pan and once it's sizzling, add the pork with all the marinade. Add the turmeric and black pepper and keep on stirring until it has reached a boil.
5. Decant into a warmed casserole dish, cover and cook for an hour.
6. Remove from the oven and add the coriander, then drizzle some 2-300ml of water down the sides of the casserole dish. Add the Garam Masala and give everything a jolly good stir (and don't panic at the fact that it looks remarkably like pond water). Replace, uncovered, in the oven for 15 minutes.
7. You can take two routes with this curry from hereon in. Either leave it in the oven to reduce, or take it from the oven and pour back into the deep frying pan and boil to reduce, which is what I did. I think this is the preferred method, as it puts you much more in control of what the sauce looks like, as with judicious stirring, it does improve in texture. Once the sauce has stopped resembling pond water and started to look like a sauce, you're done. Add the pinch of nutmeg, give a last stir - taste to check the seasoning and adjust if necessary.
8. Serve with mushroom rice.
.
25 May 2011
Pepperpot Beef & Orange Stew
We had this for dinner on Sunday last. As you'll know if you've been reading along for a while, I got bored with doing the same old roasts on a Sunday and went looking for more interesting recipes to try.
However, I think I'm going to have to ban myself from buying Brisket of beef for a while, as that seems to wind up being the meat of choice for a Sunday - and that's getting just as boring as doing the same old roast chicken! In fact, I found myself hankering for a lovely pot-roast chicken, but that may also have something to do with the fact that my reservoir of chicken stock is running low!
Anyway, the reasons I chose to do this Pepperpot Beef & Orange Stew are as follows. For starters, it's beef and oranges. Now you don't often find those two in the same cooking dish. Secondly, it involved mashed red kidney beans being used as a method of thickening the gravy. An interesting idea and one which I was keen to try out. Lastly, it had Caribbean overtones and I'm very interested in Caribbean cooking, as I really like the combination of meat and fruit which they are very good at.
So that all amounted to an interested "I'll give that a try!".
As a first go, it didn't turn out too badly. I made one or two mistakes which I would remedy the second time around - and which have been incorporated into the recipe below. For example, I used the aforesaid Brisket of beef rather than the braising steak that was originally suggested. Do you blame me? There's a whole heap of difference in the price of the two! However, that meant that the dish would require a minimum of 2 hours cooking and a maximum of 3 hours. Regrettably, it never occurred to me that in that time the red and yellow peppers would have been cooked away to nothing more than an ingredient in the gravy/sauce, which was a shame. It would have been nice to have had them more prominently in the dish. As such, I have suggested adding them a lot later into the cooking process.
I was also a little leery of putting too much chilli in - and as it happened, I would have been absolutely fine to have included the seeds, rather than binning them. I did test the chilli on my tongue (for heat), but couldn't have paid much attention to the result, as a) I don't remember it and b) if I had have done, I'd have included the seeds!
What you wind up with, is a casserole dish full of lovely tender beef in a thick pinky-brown gravy (that's the red kidney beans) that is multi-faceted in flavour and well worth the effort of making it.
PEPPERPOT BEEF & ORANGE STEW ( serves 3-4)
Ingredients :
700g brisket of beef, trimmed and cut into small cubes
2 tbsp vegetable oil
2 tbsp plain flour
1 tbsp tomato puree
1 red onion, peeled and chopped
25g fresh ginger, peeled and grated
1 small red chilli, de-seeded (if it's a hot one!) and chopped
400ml beef stock
410g can red kidney beans, drained and rinsed
1 small orange, cut into six wedges
1 red pepper, de-seeded and chopped
1 yellow pepper, de-seeded and chopped
2 tbsp roughly chopped coriander leaves.
Method :
1. Pre-heat the oven to 180deg C/Gas 4.
2. Heat 1 tbsp of the oil in a non-stick frying pan and add half the meat, browning all over. Decant into a warmed casserole dish.
3. Repeat the process with the second batch of meat, but when browned, sprinkle with the flour and add the tomato puree. Mix well and cook for a couple of minutes without burning. Decant the lot into the casserole dish.
4. Give the frying pan a wipe out, then add the remainder of the oil and the onion, ginger and chilli. Cook gently until softened and golden brown - around 10 minutes.
5. Take one half of the red kidney beans and mash them with a potato masher, then add them to the casserole dish, along with the whole beans.
6. Add the stock and tip into the casserole dish, add the orange and stir to ensure everything is amalgamated.
7. Cover the casserole dish and place into the oven for 1 hour.
8. In the meantime, add the peppers to the frying pan and fry them lightly until just beginning to soften.
9. At the end of the first hour, remove the casserole dish from the oven and give the contents a good stir. Add the peppers and stir again. Season, cover and replace into the oven for another hour and a half.
10. Remove from the oven and test the beef. If not tender enough, return to the oven for another half an hour. You may need to add a little water at this stage, if the gravy/sauce has reduced too much.
11. Once the beef is tender, remove and serve with rice and green peas with a blob of sour cream on the side.
Delicious!
However, I think I'm going to have to ban myself from buying Brisket of beef for a while, as that seems to wind up being the meat of choice for a Sunday - and that's getting just as boring as doing the same old roast chicken! In fact, I found myself hankering for a lovely pot-roast chicken, but that may also have something to do with the fact that my reservoir of chicken stock is running low!
Anyway, the reasons I chose to do this Pepperpot Beef & Orange Stew are as follows. For starters, it's beef and oranges. Now you don't often find those two in the same cooking dish. Secondly, it involved mashed red kidney beans being used as a method of thickening the gravy. An interesting idea and one which I was keen to try out. Lastly, it had Caribbean overtones and I'm very interested in Caribbean cooking, as I really like the combination of meat and fruit which they are very good at.
So that all amounted to an interested "I'll give that a try!".
As a first go, it didn't turn out too badly. I made one or two mistakes which I would remedy the second time around - and which have been incorporated into the recipe below. For example, I used the aforesaid Brisket of beef rather than the braising steak that was originally suggested. Do you blame me? There's a whole heap of difference in the price of the two! However, that meant that the dish would require a minimum of 2 hours cooking and a maximum of 3 hours. Regrettably, it never occurred to me that in that time the red and yellow peppers would have been cooked away to nothing more than an ingredient in the gravy/sauce, which was a shame. It would have been nice to have had them more prominently in the dish. As such, I have suggested adding them a lot later into the cooking process.
I was also a little leery of putting too much chilli in - and as it happened, I would have been absolutely fine to have included the seeds, rather than binning them. I did test the chilli on my tongue (for heat), but couldn't have paid much attention to the result, as a) I don't remember it and b) if I had have done, I'd have included the seeds!
What you wind up with, is a casserole dish full of lovely tender beef in a thick pinky-brown gravy (that's the red kidney beans) that is multi-faceted in flavour and well worth the effort of making it.
PEPPERPOT BEEF & ORANGE STEW ( serves 3-4)
Ingredients :
700g brisket of beef, trimmed and cut into small cubes
2 tbsp vegetable oil
2 tbsp plain flour
1 tbsp tomato puree
1 red onion, peeled and chopped
25g fresh ginger, peeled and grated
1 small red chilli, de-seeded (if it's a hot one!) and chopped
400ml beef stock
410g can red kidney beans, drained and rinsed
1 small orange, cut into six wedges
1 red pepper, de-seeded and chopped
1 yellow pepper, de-seeded and chopped
2 tbsp roughly chopped coriander leaves.
Method :
1. Pre-heat the oven to 180deg C/Gas 4.
2. Heat 1 tbsp of the oil in a non-stick frying pan and add half the meat, browning all over. Decant into a warmed casserole dish.
3. Repeat the process with the second batch of meat, but when browned, sprinkle with the flour and add the tomato puree. Mix well and cook for a couple of minutes without burning. Decant the lot into the casserole dish.
4. Give the frying pan a wipe out, then add the remainder of the oil and the onion, ginger and chilli. Cook gently until softened and golden brown - around 10 minutes.
5. Take one half of the red kidney beans and mash them with a potato masher, then add them to the casserole dish, along with the whole beans.
6. Add the stock and tip into the casserole dish, add the orange and stir to ensure everything is amalgamated.
7. Cover the casserole dish and place into the oven for 1 hour.
8. In the meantime, add the peppers to the frying pan and fry them lightly until just beginning to soften.
9. At the end of the first hour, remove the casserole dish from the oven and give the contents a good stir. Add the peppers and stir again. Season, cover and replace into the oven for another hour and a half.
10. Remove from the oven and test the beef. If not tender enough, return to the oven for another half an hour. You may need to add a little water at this stage, if the gravy/sauce has reduced too much.
11. Once the beef is tender, remove and serve with rice and green peas with a blob of sour cream on the side.
Delicious!
10 April 2011
Pork steaks with rhubarb : chinese style!
I guess that title has probably put at least 50% of you off reading this recipe, but if you got this far do please read on - it's very worth it!
I was very keen to make the most of the butcher's special offer regarding the pork steaks, plus Ruby our rhubarb plant has been growing like a proverbial weed and needed cropping. You might think "main course and dessert", but if you're me, you think "how can I combine the two"?
I had a recipe for braised pork with plums which I'd been hanging onto with a view to making some day soon and, having had a bit of a review of it, began to consider the concept of replacing the plums with rhubarb. There wasn't any other ingredient that would clash with the rhubarb and I felt that the astringency would sit well beside the pork and in place of the plums.
I had another potential area of difference with regard to the original recipe, over cooking time. The recipe recommended cooking for 2 hours, although it was dealing with pork shoulder - and I had pork loin. I knew if I cooked the loin steaks for too long, they stood the chance of being like shoe leather. However, if I didn't give them long enough to render down any areas of fat (even following on from a judicious trimming), neither of my chaps would be able to eat it. The saving grace, in this instance, was the oven temperature, which the recipe recommended at 140deg C (fan). I reckoned that if I kept a lid on the casserole dish, at that temperature, covered in sauce, the steaks would (hopefully) come out without damage. As it turned out, the meat was perfectly tender and without a scrap of fat to cause confusion and dismay. (Thomas the Tank engine reference there - did you get it?)
There was also required to be some juggling where the timings for cooking was concerned. It required two hours, so let's allow some three quarters of an hour preparation time (other people could do it quicker, but it takes time when you're sitting down for some reason), so probably three hours would see it right. So, we would eat at 6pm so three hours would take us back to 3pm - the trouble is, I needed to be out at 2.30pm on an errand, which was right in the midst of prep. time. The only thing for it, was to prep. the dish right up until the "putting in the oven" stage, minus the rhubarb, then put it in the oven when I returned - all of which worked like a charm.
I served the dish with plain white rice, but it was crying out for some vegetable involvement. Next time - and there will be a next time - I'll cook some mushrooms with the pork and maybe some baby corn. Perhaps I might even go mad and steam some Pak Choi to serve alongside.
CHINESE STYLE PORK STEAKS WITH RHUBARB (Serves 3)
Ingredients :
3 pork steaks or 800g pork shoulder, diced
3 tbsp mirrin or rice wine
3 tbsp soy sauce
2cm piece of root ginger, grated
2 garlic cloves, grated
a red chilli, deseeded and chopped
2 tbsp vegetable oil
a small onion, chopped fine
a star anise
1 heaped tsp Chinese five-spice powder
1 cinnamon stick
1 tbsp granulated sugar
half a tbsp tomato puree
250ml chicken stock
2 large sticks of rhubarb, trimmed and cut into 2cm chunks.
Method :
1. Heat oven to 160deg C/140deg C fan/gas 3 (or not, if you're doing the two-stage preparation method).
2. Heat the oil in a large frying pan. Tip in the onions, ginger, chilli and garlic, star anise, five spice powder and cinnamon. Fry until fragrant and soft.
3. Stir in the sugar, then increase the heat and add the pork. Turn in the oniony mix until the meat is just sealed, but not browned.
4. Add the mirrin and soy sauce, tomato puree and stock. Stir well and decant into a casserole dish and cover. Then either place to one side to cook later, or place into the oven to cook for 1 hr.
5. After the hour is up, remove from the oven and add the chopped rhubarb. Stir well to combine, then replace in the oven uncovered, to cook for a further hour.
6. At the end of that hour, if the sauce is still fairly thin (the rhubarb will have added to the juices as it cooks), simply separate the meat from the liquid then pour the liquid into a small saucepan and reduce until you're happy with its consistency.
7. Pour the sauce over the meat and serve.
.
![]() |
| Ruby - growing well, but before she went for world domination |
I had a recipe for braised pork with plums which I'd been hanging onto with a view to making some day soon and, having had a bit of a review of it, began to consider the concept of replacing the plums with rhubarb. There wasn't any other ingredient that would clash with the rhubarb and I felt that the astringency would sit well beside the pork and in place of the plums.
I had another potential area of difference with regard to the original recipe, over cooking time. The recipe recommended cooking for 2 hours, although it was dealing with pork shoulder - and I had pork loin. I knew if I cooked the loin steaks for too long, they stood the chance of being like shoe leather. However, if I didn't give them long enough to render down any areas of fat (even following on from a judicious trimming), neither of my chaps would be able to eat it. The saving grace, in this instance, was the oven temperature, which the recipe recommended at 140deg C (fan). I reckoned that if I kept a lid on the casserole dish, at that temperature, covered in sauce, the steaks would (hopefully) come out without damage. As it turned out, the meat was perfectly tender and without a scrap of fat to cause confusion and dismay. (Thomas the Tank engine reference there - did you get it?)
There was also required to be some juggling where the timings for cooking was concerned. It required two hours, so let's allow some three quarters of an hour preparation time (other people could do it quicker, but it takes time when you're sitting down for some reason), so probably three hours would see it right. So, we would eat at 6pm so three hours would take us back to 3pm - the trouble is, I needed to be out at 2.30pm on an errand, which was right in the midst of prep. time. The only thing for it, was to prep. the dish right up until the "putting in the oven" stage, minus the rhubarb, then put it in the oven when I returned - all of which worked like a charm.
I served the dish with plain white rice, but it was crying out for some vegetable involvement. Next time - and there will be a next time - I'll cook some mushrooms with the pork and maybe some baby corn. Perhaps I might even go mad and steam some Pak Choi to serve alongside.
CHINESE STYLE PORK STEAKS WITH RHUBARB (Serves 3)
Ingredients :
3 pork steaks or 800g pork shoulder, diced
3 tbsp mirrin or rice wine
3 tbsp soy sauce
2cm piece of root ginger, grated
2 garlic cloves, grated
a red chilli, deseeded and chopped
2 tbsp vegetable oil
a small onion, chopped fine
a star anise
1 heaped tsp Chinese five-spice powder
1 cinnamon stick
1 tbsp granulated sugar
half a tbsp tomato puree
250ml chicken stock
2 large sticks of rhubarb, trimmed and cut into 2cm chunks.
Method :
1. Heat oven to 160deg C/140deg C fan/gas 3 (or not, if you're doing the two-stage preparation method).
2. Heat the oil in a large frying pan. Tip in the onions, ginger, chilli and garlic, star anise, five spice powder and cinnamon. Fry until fragrant and soft.
3. Stir in the sugar, then increase the heat and add the pork. Turn in the oniony mix until the meat is just sealed, but not browned.
4. Add the mirrin and soy sauce, tomato puree and stock. Stir well and decant into a casserole dish and cover. Then either place to one side to cook later, or place into the oven to cook for 1 hr.
5. After the hour is up, remove from the oven and add the chopped rhubarb. Stir well to combine, then replace in the oven uncovered, to cook for a further hour.
6. At the end of that hour, if the sauce is still fairly thin (the rhubarb will have added to the juices as it cooks), simply separate the meat from the liquid then pour the liquid into a small saucepan and reduce until you're happy with its consistency.
7. Pour the sauce over the meat and serve.
.
23 February 2011
Nasi Goreng - the power of a food memory.
Some twenty five years ago, my then boyfriend and I went to a baby's christening. The baby's parents, Michael & Vida (they ran the Singapura Restaurant in Fulham), hailed from China and Singapore respectively and this was no ordinary christening. Regrettably, owing to one of my horses being poorly at the time and requiring veterinary intervention, we missed a large part of the Christening itself but managed to get back in time for the reception afterwards.
This was a very good thing, as Vida's Mum was in the kitchen of the hired Hall, making Nasi Goreng (amongst other things) for all the guests. Huge platters kept appearing, with piles of steaming rice, chicken and prawns on board - which tasted divine.
Now, I knew I liked Nasi Goreng, as because my father was in the Royal Engineers we had lived abroad quite a bit during my childhood. I was born in Malaysia and we spent intervals in Germany. I'm not sure about experiencing Nasi Goreng as a baby in Malaysia (I doubt it, somehow!), but my parents (or my Dad, to be specific) obviously enjoyed it because I recall that when we were in Germany, we would often buy a big tin of Nasi Goreng from the Naafi. I can very definitely remember eating that and liking it a lot.
That flavour - of Nasi Goreng (or Fried Rice) - has stayed with me down the years.
I can remember getting very excited some years ago when Sainsbury's started stocking small packs of Nasi Goreng seasoning, which contained instructions on making Nasi Goreng. I tried it out, but the flavour wasn't quite how I remembered Vida's Mum's Nasi Goreng tasting, so it wasn't quite right.
Since then, I've tried a recipe from the BBC Good Food website - and it's the first recipe that's ever let me down in a big way, as it was not only horrible, but didn't taste in the slightest bit right.
That has to have been some three or four years ago.
So there I was, on Monday evening, trying to think of something relatively easy that I could make on Tuesday evening (following a busy day). I've described how, at moments like this, I examine how I'm feeling and what I would really like to eat - and there, out of the gloom, came the answer "Nasi Goreng". As ever, my mouth watered at the very idea.
It occurred to me that I had some chicken left from the weekend's roast, which if I added a bag of prawns to, would do fine. Next, I needed an authentic recipe so turned to the internet. There are plenty of recipes out there, but everything is slightly different, but intrinsically the same. Having read them all, I decided that none of them were right but the thought had occurred to me that maybe I'd be better off following my memory of the flavours. After all, I knew what I didn't want - a very highly flavoured, saucy, mixture - and I knew the flavours I did want - heat, sweetness, savouriness, but in a dry rice mix. I had some Mirrin (sweet Japanese rice wine) in the cupboard, along with Soy sauce and Fish sauce. I had chicken and could get prawns. I could get some spring onions, I had ginger and coriander .... the thought had formulated into a plan.
The recipe is below and if this isn't Nasi Goreng, then Vida's Mum must have been making something else!
24.05.2013 : I've cooked this Nasi Goreng recipe a number of times since the first go - but this time of trying made me realise how much better I am getting, at handling a blisteringly hot wok. I very definitely cooked this attempt far more proficiently - which basically means far quicker - than ever before and it showed. The flavours were beautifully balanced, the chicken didn't dominate and the prawns were still pinkly munchy. Having been given the idea by my Facebook friend Viv Braznell, I put a few fresh lime wedges on the side, as they do in Thailand. It was a bit of a departure from the Chinese/Singpore tradition, but is a wonderful addition - so thanks, Viv! Good gracious, but I love this dish!NASI GORENG (FRIED RICE) (feeds 2-3) NEW IMPROVED RECIPE!
Ingredients :
2-300g Basmati rice, cooked and cooled
2 eggs, lightly whipped
salt & pepper
3 individual knobs of butter
1 tbsp rapeseed or vegetable oil
2 skinless, boneless chicken breasts, cut thinly on the diagonal
a bunch (6 or 7) of spring onions , cleaned and chopped
a medium hot red chilli, stalk removed and chopped - seeds are optional
2 fat cloves of garlic, grated
2 thumb-sized pieces of ginger, grated
4 chestnut mushrooms, cleaned and sliced
a handful of frozen peas
fresh coriander, chopped, to taste
3 heaped tsp of red Thai curry paste
3 tbsp dark soy sauce
2 tbsp fish sauce
1-2 tbsp mirrin (Japanese Rice Wine)
300g cooked and peeled prawns, drained but not rinsed.
Method :
1. Cook the basmati rice according to the instructions on the packet, but stop the cooking a fraction before it is done, leaving a slight bite in the rice. Drain it well and spread it out onto a plate (or two) to cool. Fork the rice over from time to time to keep it fluffy. Don't use a spoon, as this will encourage the grains to break and clump together.
2. Empty the prawns into a colander and leave to drain.
3. Using a deep frying pan or wok, melt one of the knobs of butter and add half the seasoned egg mixture. Roll the pan to spread the egg out thinly and cook to form a thin omelette, then reserve to keep warm whilst you cook a second omelette. Reserve to keep warm, on top of the first.
4. Melt the butter with the oil until really quite hot and add the chicken. Fry until the chicken is almost cooked through and has gained some golden colour.
5. Add the spring onions and chilli. Stir and fry until softened - around 4-5 mins or so.
6. Add the ginger and garlic and continue to stir and fry for another 1-2 minutes, taking care not to let it stick to the bottom of the pan. Add the mushrooms and continue to fry until the mushrooms have gained some colour and softened a little.
7. Add the Thai curry paste. Stir well and cook for some 4-5 mins.
8. Add the soy sauce, fish sauce and mirrin and reduce the heat to prevent it burning. Continue to cook until a sticky and thick consistency has been achieved.
9. Add the frozen peas and stir until they have defrosted and softened slightly.
10. Add the rice and toss regularly to prevent it sticking.
11. Add the prawns and stir to combine. You'll need to increase the heat slightly to make sure that the rice and prawns heat through properly.
12. Take the two omelettes, roll and cut into strips. Once everything is heated through and piping hot, add the coriander and omelette strips and stir through.
Serve at once.
Printable version
Subscribe to:
Posts (Atom)