Showing posts with label streaky bacon. Show all posts

29 December 2017

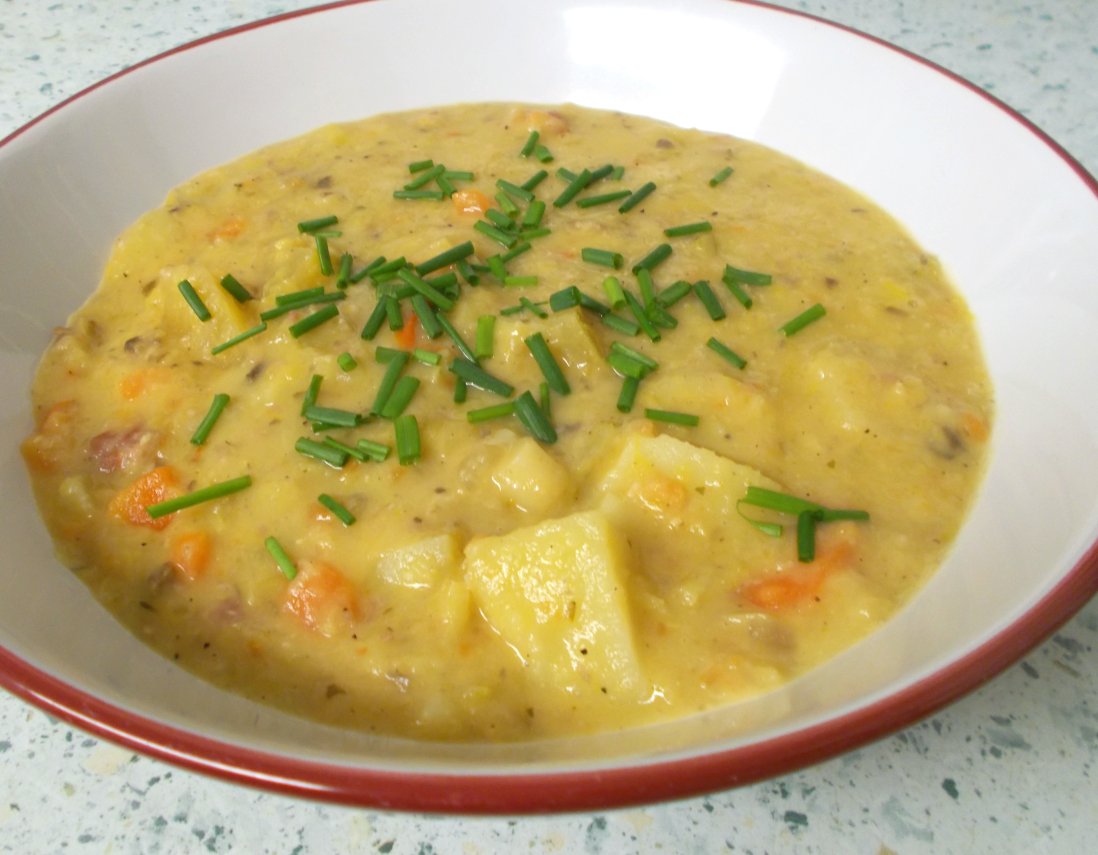
Thick, chunky creamed vegetable soup (with a little bacon)

It's the 29th December, 2017.  We have eaten our own body weight in turkey over Christmas.  It is time to give our digestions a bit of consideration, hence, a vegetable soup.  However, because we're not vegetarians, it's got a wee bit of bacon in it too - just for the flavour input, don'tcha know.

Now for all that I like the brothy kind of soups, I wanted this one to be hearty, thick and worthy of being served as a dinner soup.  Perhaps with some crusty bread, or as it turned out, a gorgeous thin flatbread with mozzarella, basil and olive oil.  Mmmnn, delicious.

Truth be told, you could use just about any vegetables you wanted for this soup.  I will give you the full rundown of vegetable input in the recipe, but you need to follow a few rules, no matter what veggies you use.  Said rules go like this :

a)  chop some veggies very small, so that they cook down and disappear into the vegetable stock.

b)  chop some veggies into bite sized pieces, so that they will be retained and create lovely texture.

c)  start with a tasty oil - coconut, or butter, or rapeseed - and a finely chopped onion.  Do not be tempted to use a bland vegetable oil, or a slightly bitter olive oil.  If you start wrong, you won't ever be able to come back from it.

d)  use the best vegetable stock you can source.  It is the base of your soup and deserves to be delicious.


So there you are.  Not difficult at all, but make sure to set aside a good time to be spent  choppin', cuttin' and a-peelin'.  Not to mention a good hour or so in the preliminary cooking stage and a pause in the middle of however long you've got.  Good soup does not come about in a half an hour.  Well actually it can, but not with this one.


Here comes the recipe!

THICK, CHUNKY CREAMED VEGETABLE SOUP    (Serves 4)

Ingredients :

1 tbsp coconut oil
1 red onion, finely chopped
4 rashers of streaky bacon, finely chopped (optional)
2 tsp ground coriander
a large pinch of sea salt
1 tsp ground black pepper
half a tsp dried thyme
half a tsp dried parsley

Peeled and chopped small :

1 medium carrot
1 large stick of celery, with fluffy green bits if possible
1 large leek
2 chestnut mushrooms
6 sweet cherry tomatoes (halved works for these)
half a medium potato

Peeled and chopped into bite sized chunks :

2 medium carrots
2 large sticks of celery
5 chestnut mushrooms (quartered)
1 and a half medium potatoes
2 small parsnips
a decent sized chunk of swede or turnip

plus :

750ml of strong vegetable stock (I used 1.5 tsp Marigold vegetable bouillon and 1 tsp Essential Cuisine vegetable stock powder)
4-5 tbsp dry split red lentils
3-4 large leaves of Savoy cabbage, ribs removed and leaves sliced
2-3 tbsp double (or heavy) cream
2 tsp cornflour mixed with a drop of water to thick pouring consistency
sea salt & ground black pepper to taste.

Method :

To begin, make sure you are using a pan which can contain the entire contents.  It needs to be BIG and have a lid which fits.  I used my steep sided wok, which worked perfectly.

Heat the oil and add the onion & bacon (if using).  Cook, stirring often, until the onion is transparent and the bacon is beginning to render its oil.  Add the coriander, sea salt, black pepper and herbs and stir through.

Add all the chopped small ingredients and cook on, stirring regularly to turn the pan contents.  Once the leek and mushroom pieces are softened and the whole is beginning to look cooked, add the vegetable stock.

Increase the temperature under the pan and bring the contents to a gentle boil.  Add the bite sized chunks of veggies, the red lentils and the cabbage.  Gently stir through, cover the pan and bring back to a gentle boil.  Cook on for 30-40 minutes, stirring occasionally.

Taste to check the seasoning levels - which should be fairly high as when you add it later, the cream will obliterate a certain level of seasoning.

Remove from the heat, leave covered and go and have a sit down for a couple of hours.

When you return, using a hand blender, blitz a certain amount of the soup to your preference.  I probably made it 50:50 blitzed to chunks which seemed to go down well.

Turn the heat on under the pan and add the cream and cornflour slurry and stir through.  As the soup heats up to a lively simmer, the cornflour will thicken the soup to a consistency where it will coat the back of a spoon - which is what you are aiming for.  If it becomes too thick, add a little water.

Finally, check the seasoning and adjust to your taste.  Serve into warm bowls with crusty bread for dipping.

Printable version

22 March 2017

Red lentil, butternut squash & chilli soup

Red lentil, butternut squash & chilli soup. Get your fix of beta carotene here, orange coloured food for the win. LOL You certainly know you've eaten something by the end of a bowl of this - and all for around 300 calories, which can't be bad. Of course, the crusty bread and butter blows the calories out of the water, but it's good to start low!

When I dreamt this soup up, I was after a main course soup that didn't involve much meat but that tasted like it did. Because of my predilection towards developing gouty painful feet from time to time, it is useful to have a few mainly vegetable recipes to lean on during these periods. Now I know there are those who would tut heavily and announce that lentils are incredible bad for gout - and I know that. However, not with me. They most definitely are not one of my gout triggers, whereas meat very often is - and pork (not bacon, interestingly!) can often be a prime trigger.

Well, I certainly scored with this soup as it is hearty, wholesome and would fill you up on a chilly winter's night. The chilli gives it a nice friskiness that helps to keep your tongue interested, while the butternut squash and lentils give it that heartiness that satisfies. Oh and of course, discovering a piece of bacon every so often will reassure those carnivores amongst us that there is, in fact, some meat in their dinner and they haven't had a vegetarian dish sneaked onto their plate.

Now, where Cook's Tips are concerned, the top one for today is that it is really important to use low sodium stock cubes for this soup. Ordinary, salty, stock cubes will spoil the soup with salt overkill so it is way better to use a low salt stock powder or cube and have to add a little extra salt at the end, rather than the alternative.

As you will see from the recipe, I recommend using a potato masher a few times to break up the vegetables a little and so thicken the soup. Now, you can use a stick blender and whizz the lot, but you will lose a lot of the lovely interest from the texture and of course, you will lose the bacon pieces. However, if that's not important to you and you prefer a more pureed texture to your soup, then whizz away.

For all you vegetarians out there the soup is easily converted to being veggie. Simply leave the bacon out, use all vegetable stock and add half a tsp smoked paprika for the smoky flavour the bacon would have brought and you're home and dry.

Okay, well, I think that's it - so onwards to the recipe!

RED LENTIL, BUTTERNUT SQUASH & CHILLI SOUP (serves 3 as a main meal)

Ingredients :

1 tbsp olive oil
6 rashers streaky bacon, cut into lardons
1 red onion, diced finely
1 clove garlic, chopped finely
1 large red chilli pepper, de-seeded and diced finely
2 carrots, peeled and diced finely
1 celery stick, diced finely
half a butternut squash (I used the stalk end), peeled and diced
3 large juicy tomatoes, cored, diced and as much juice as possible included
8 cherry tomatoes, quartered
1 tbsp tomato puree
1 tsp dried basil
1 tsp low salt chicken stock powder or 1 low salt stock cube
1 tsp low salt vegetable stock powder or 1 low salt stock cube
500ml hot water
150g dried red lentils
sea salt
ground black pepper.

Method :

Use a large sized saucepan and heat the olive oil over a moderate heat. Add the streaky bacon lardons and cook until the fat has rendered and the bacon is golden.

Add the onion, garlic, chilli pepper, carrots and celery and continue to cook, sweating the vegetables down and stirring regularly until they have just begun to soften - around 10-15 minutes.

Add the butternut squash pieces and give them enough time - stirring regularly - to warm up.

Next, add the diced tomatoes, cherry tomatoes and tomato puree and stir to combine. Cook on until the tomatoes have begun to break down.

Add the dried basil, the two stock powders (or stock cubes), hot water and red lentils. Stir through until well combined, then cover the saucepan and bring to a lively simmer.

Remember to stir the contents regularly, as red lentils can sink to the bottom and singe if left unstirred.

Once the lentils are almost cooked and the butternut squash is tender, taste to test for seasoning and add sea salt and ground black pepper as necessary.

Continue to simmer the soup until the lentils, carrots and butternut squash are tender, then taking a potato masher, press it through the soup some three or four times to just break up some of the vegetables which will have the effect of thickening the soup. You can, if you prefer, whizz the soup with a stick blender, but I much prefer to have some chunky texture to it - I think it keeps you interested as you eat it.

Ladle into warmed bowls and serve with warm, buttered chunks of bread for dipping.

Printable version

12 July 2012

We're sold on the Rootbeer Float, so now we try the Wedge Salad!

Wedge salad.  So what's that all about, then?

Well, you get an iceberg lettuce, cut a humungous wedge out of it - and dress it.  Done.

No, seriously - it's as easy as that.

I too, was a tad surprised when I learned that this "Wedge Salad" that I'd been hearing mentioned in various American blog posts was as simple as that.  After all, it was American!  Where was the dry soup base, or the American cheese, the sweetened condensed milk, or the pre-mixed seasoning?  But no - the classic American wedge salad contains none of these things.  Just lettuce, a creamy dressing of some sort and whatever extra bits you fancy.

So I included it on the menu list for that week.  After all, we were going to be pushed for time on a lot of those days and a simple salad was just the job.

Hubby had the great idea of pairing it up with some Scampi and his home made Crunchy Krauters (or crunchy croutons, as they are probably known everywhere else).  With the last minute addition of some cherry tomatoes, it made an absolutely lovely meal.

On our Wedge Salad, we went for a blue cheese dressing along with some grilled streaky bacon pieces, spring onion and sweetcorn.  Now you seriously wouldn't expect something that was just cut differently, to be quite so successful.  However, I think the thing with this salad is indeed the shape.  When the dressing is drizzled over, it seeps in through the cut sides of the wedge of lettuce and when you cut through, every leaf has had its own little bath in dressing.  Some rather more, some rather less.  Add together a few of the bits and pieces that are sprinkled over and adhering to the dressing - and you've got an amazingly satisfying salad forkful.

Hubby's crunchy krauters are simplicity itself to make.  You take a piece of two day old baguette and cut it into large cubes.  Pre-heat the oven to 180degC/350degF/Gas 4 and while it's warming up, place the cubes into a bowl and drizzle over some Rapeseed oil or extra virgin Olive oil.  Add some seasoning - this is definitely one for the sea salt flakes - and toss to coat each cube in seasoned oil.

Tip the cubes out onto a baking sheet and spread them out into one flat layer.  Bake for just 5 minutes, then check them to see how they're doing.  They should be golden and crunchy on the edges.  If not, leave them for - literally - just another minute or two.  Don't leave the kitchen or take your eyes off them, or they'll burn.

As soon as they're done, serve.  They make a delicous and crunchy change from potatoes or pasta!

Oh, and the rootbeer float?  Easy peasy.  Get yourself some root beer (most major supermarkets sell it now) and if you like the stuff (I think it's redolent of cough mixture and hate the stuff, but the chaps love it) pour into a glass.  Take vanilla icecream and scoop out a good sized ball and drop it (carefully) into the glass.  Add a straw, a deckchair and some sun.  Sorted.

WEDGE SALAD  (serves 3)

Ingredients :

A fresh, clean, whole Iceberg lettuce
3-4 rashers streaky bacon
Blue cheese dressing (feel free to make your own - I didn't have either time nor inclination)
2-3 spring onions, sliced finely
3 tbsp sweetcorn (from a can is easiest).

Method :

1.  Grill the bacon rashers until crispy, then cut into small pieces and set aside to cool.

2.  Take your Iceberg lettuce and trim off the brown stump end, to 2-3 leaves back.  Remove the outer leaves and discard (or give them to your rabbit/guinea pig/goat etc).

3.  Taking a sharp knife, make one cut from top to bottom through one side of the lettuce, then make another cut some 2-3 inches away - again from top to bottom, so removing a wedge of lettuce.

4.   Place the iceberg on its back on your serving plate and trickle the blue cheese (or dressing of your choice) over it.

5.  Sprinkle over the bacon pieces, spring onion and sweetcorn.

6.  Serve.

Printable Version
.   

8 March 2012

Stilton, bacon & maple pear tart - utter gorgeousness

Where do you do the majority of your food dreaming?  We do ours in the car - usually when we're waiting for son & heir to come out of school.  Maybe you don't dream up recipes at times like these, but instead dream of beach holidays, or a fine bottle of wine!  Well, this tart was dreamt up (mostly) when we were sat in the car waiting for son & heir.

I had the streaky bacon in the fridge already, as I'd bought it with a view to wrapping the chicken with it on Sunday last, or at the very least using it to contribute some flavour to a chicken and cider casserole.  However, neither of those things happened and instead we had a lemon & thyme roasted chicken - which was okay, but nothing to write home about.

So our starting point for the tart was the sole sheet of puff pastry that was lurking in the fridge.  I'd very nearly turned it into an apple pie, only to be thwarted by the sudden onset of chauffeuring duties, so it lived to fight another day.

Hence, we'd got the pastry and the bacon - so what went with those, that we hadn't already made?  Hubby came up with the pear idea and I embellished it with the Maple syrup.  We then needed something to hold everything else together - and a blue cheese seemed the obvious choice.  Because of the bacon having the potential to be salty we decided against a creamy Danish Blue as they are often so very salty.  A nice piece of Stilton seemed the obvious choice thereafter.  

Now, what to serve with the tart?  We figured that, as the tart itself would be really quite rich, perhaps a salad would be a good idea - and opted for a mixed salad with walnuts and a walnut vinaigrette.  It sounded as though that would complement the ingredients in the tart quite nicely - and so it did.  The vinaigrette was a simple matter of crushing 4-5 walnut halves in a pestle & mortar and adding Extra Virgin Olive Oil, some of the gorgeous Maille Cider Vinegar, plus sea salt & freshly ground black pepper.  Powerful stuff - but very effective.

This isn't a meal to serve to young children, as the flavours are incredibly adult and the juxtaposition of the sweet pear, salty bacon, rich cheese and dry, earthy walnuts is not for the faint-hearted.  I was pleased that son & heir managed the whole very well, albeit he opted not to have the vinaigrette.  He did have some walnuts on his salad, though.  As a 13 year old gastronome, I think he's showing promise.  His comment was that the tart was lovely, but the sweetness of the maple pears was a bit too much for his taste.

I know that, next time I make this tart, I'll abandon the idea of the Maple syrup even though it accentuated the flavour of the pear beautifully.  Maple syrup seems to have an unwanted effect upon me, much the same as Asparagus does.  'Nuff said. Still, I don't think that the tart will notice the lack of Maple syrup.

Just look at that expanse of melted Stilton .. mmmn!
The pear I used was a Comice - an enormous Comice - which was slightly under ripe.  Owing to the fact that it was quite hard, it pan-fried perfectly.  I wouldn't want to try pan frying a ripe pear, as I suspect you'd wind up with pear mush rather than discernible slices!

As I said previously, I love making tarts - and this one was no exception.

STILTON, BACON & MAPLE PEAR TART  (serves 4)

Ingredients :

250g smoked streaky bacon, sliced into small pieces
1-2 Comice pears, peeled, cored and cut into slices 2-3mm thick
1 tbsp Maple syrup (optional)
160g sheet of puff pastry, ready rolled
170g Stilton cheese

Method :

1.  Pre-heat your oven to 190degC/375degF/Gas 5.

2.  Take a frying pan and add the bacon.  Dry fry over a medium heat, to render the fat out of the bacon and until it has just begun to crisp.  (Don't cook until crisp, or the bacon will overcook in the oven).  Remove and set aside to cool.

3.  In the bacon fat, place the slices of pear and cook over a high heat until caramelised.  Don't keep turning the slices - just leave them where they are, but check the underside until it has reached a nice golden colour - then turn.  If you are using the Maple syrup, drizzle it over the pears after you have laid them into the pan.

4.  Once the pears are done, turn the heat off and begin to assemble the tart.

5.  Take a large baking tray that is bigger than your sheet of pastry.

6.  Lay the pastry onto the baking tray and make sure it is evenly flattened out.  Then taking a sharp knife, score - without cutting through - a line 1" inside the edge to demark where the tart crust should be.

7.  Taking the pear slices, lay each one onto the middle of the tart in a pleasing and even arrangement.  Do not be tempted to pour the pan juices over, or the tart will become too greasy.

8.  Next, sprinkle the bacon pieces evenly over the pear slices, remembering to leave the crust edge uncovered. 

9.  Crumble the Stilton cheese evenly over the bacon.

10.  Place into the oven and bake for 25-30 minutes, or until the crust has risen and browned to a deep gold.

11.  Remove from the oven and leave for 5 minutes or so, just to settle, before slicing and serving.

.

20 February 2012

Bacon & Asparagus Risotto

This lovely risotto isn't the risotto it should have been - although as it worked out, it was fairly exceptional in its own right.

You see, we had invited my parents over for lunch last week.  It seemed like a good moment, as son & heir was on holiday and we hadn't had them over to our place for quite some time.

However, we hadn't banked (and neither had he) on son & heir going down with what appeared to be a nasty cold, just two days before they were due to come.  Poor chap, he wasn't very well at all, and as my Dad is isn't in his first flush of youth, we figured that he could do without contracting such nastiness.  So, it was regrettably all called off - the day after we'd done all the shopping for the meal.

We had planned for hubby to make a Prosciutto, Asparagus & Petit Pois Risotto.  Problem number one came when the supermarket didn't have any Prosciutto.  We bought some bacon as a fall-back position and crossed our fingers that we'd be able to find some elsewhere.  In the circumstances we didn't need to - and the bacon got press ganged into use.

The Petits Pois got abandoned when we realised that we had double the quantity of (Moroccan - it'd be absolutely fabulous with English) Asparagus necessary to feed three people - and the Bacon & Asparagus Risotto was born.

Like a lot of recipes, this simple to make, comforting and very satisfying taste of Italian indulgence came out of necessity rather than via a recipe book.  I like it when that happens!


BACON & ASPARAGUS RISOTTO  (feeds 3)

Ingredients :

500g asparagus, cut into pieces
250g streaky bacon, grilled and liquid fat reserved
25g butter
1 tbsp olive oil
2 banana shallots, diced finely
1 clove garlic, minced
320g arborio or carnaroli rice
half a glass of white wine
2 ham stock cubes in 1.2L of water
1 tsp dried basil
50g grated parmesan.

Method :

1.  Bring a saucepan of lightly salted water to the boil and, while you are waiting for it to boil, prepare a bowl of cold water with a tray of icecubes in it.

2.  Once the water is boiling, add the asparagus pieces and cook for 3 minutes.  Retaining the water, remove the asparagus and place into the iced water to stop the cooking process and retain the bright colour.

3.  Grill the bacon until the fat has rendered out of it.  Reserve the fat and slice all but 2 rashers into small pieces and reserve.

4.  Chop the remaining two rashers until finely minced and set aside.

5.  Now we get on with the risotto itself.  Using the cooking water from the asparagus, prepare the stock with the dried basil and have this simmering in a saucepan next to the risotto pan.

6.  In a large heavy bottomed saucepan, melt the butter and add the olive oil.

7.  Add the shallots and cook until softened, but not browned.  You want to keep the colour of the rice as pure and white as possible.  If you allow the shallots to brown, which will affect the colour of the end risotto.

8.  Add the garlic and cook for 1 minute, then add the rice and half the bacon.  Cook and stir on as hot a heat as you dare, until the rice is completely coated in the buttery juices.

9.  Add the wine and continue to cook until it has sizzled all the alcohol out - a mere 30 seconds to a minute.  Stir continuously.

10.  Add a ladleful of stock and stir until the rice has absorbed the stock, then add another ladleful and stir.  Continue in this fashion until half the stock has been absorbed, then add the remainder of the bacon.

11.  Continue with the ladleful of stock and stirring, until the rice has become tender to the bite.

12.  Drain the asparagus and add it to the risotto, along with the Parmesan cheese.  Give everything a good stir and then leave, with a lid on, to rest for 5 minutes.

13.  Serve onto warmed plates and garnish with an asparagus point and the minced bacon.  A bowl of additional grated parmesan can also be served, for diners to help themselves.

.

15 October 2011

Spicy chicken & bacon pasties .. or tarts, in this case.

Why "tarts", you may ask?

Well, it's because the art of pleating a pasty completely deserted me.  Four times over.

Exhibit A
Normally, I'm pretty good at pleating a pasty - although I usually do sideways pleats, as opposed to "straight across the top" pleats.  I think, next time I make these pasties - and there will be a next time - I'll stick to what I know and go for sideways pleating.  Oh, and I might very well remember to cut my fingernails next time too.  How anyone with long fingernails ever gets pastry to stay together without their fingernails cutting half moon shapes into the pastry, is beyond me.  I certainly can't!

As a consequence, my pasties burst asunder in the oven and turned themselves into boat-shaped tarts.  See Exhibit A, alongside.  Fortunately, it didn't matter overly much (perhaps a little dry in places) as the contents began life fairly moist and the risen edges of the pasties obviously protected the contents from over cooking.

The original recipe (which you can see here) called for a ready cooked chicken breast, but I didn't have one of those.  I did, however, have a raw chicken breast so I pan-fried it and left it to cool before doing anything else.  Personally, I think that this approach saved the chicken component from being over dry, as I stopped cooking the chicken just slightly before I would ordinarily have done.  This left the meat still slightly pink, which was obviously cooked out by the baking that the pastry received.  Ingenious, eh?

Well they didn't look too bad ...

In addition, I also tinkered about with the original recipe in that instead of using three spring onions, I used half a sliced leek and one small shallot.  I suspect that doing this gave a lot more moistness to the mixture (from the leek) and boosted the gentle onion flavour (care of the shallot).  Sometimes I find spring onions to be a bit harsh.

I also put way more bacon in than the recipe said.  After all, two rashers of streaky bacon rather depends on how big your rashers are, doesn't it.  Mine were teensy wee little things (supermarket bacon, in this instance), so I wound up using half a pack.

As a consequence, I suspect I had rather more "middle" to my pasties than was originally intended.  However, I reckon that the next time I make them, I can easily make five out of the same ingredients, so that's the way to go.

I served ours, as you can see, with a salad.  I'm not entirely convinced that a salad was the right thing for them, as they seemed to need something more robust.  I might try them, next time, with baked beans and something like Nigella's Rapid Roastini's or maybe hash browns or sweet potato wedges.  They do need something juicy (which the baked beans would provide), but because of the complex nature of their contents, need something fairly bland beside that.

So that's a work in progress - and if you try this recipe, perhaps you could report back on what you served them with and how well you feel they went together.  I'd be interested to know, as this is definitely one of those recipes that doesn't suit what immediately comes to mind!

As for the flavours, well they're very acceptable indeed.  Hubby wasn't too keen on his to begin with, but the flavour develops as you eat your way through the pasty and, by the end, he was ready to demolish the leftover one.  Now, if I tell you that he didn't get to eat it all on his own, but son & heir had the other half, that will indicate just how nice these are.  I suspect they'd be perfect picnic food and will behave in exactly the same way that a Cornish Pasty does - except with more chilli!

SPICY CHICKEN & BACON PASTIES  (serves 4, with one each)

Ingredients :

1 skinless & boneless chicken breast
1 tbsp olive oil
125g streaky bacon, chopped
1 large potato (about 250g total weight), peeled and sliced on the mandolin
1 small red chilli, deseeded if necessary and finely chopped
a small, or half a, leek - sliced
a small shallot, sliced
sea salt & freshly ground black pepper
375g pack ready-rolled puff pastry
2 tbsp milk or 1 beaten egg.

Method :

1.  Heat oven to 200deg C (fan).

2.  Place the chicken breast in between two pieces of cling film and bash it with something heavy (a rolling pin, for ease!) until it is thin and flat.

3.  Take a large frying pan, add the olive oil and fry the chicken breast, seasoning each side as you go.  Remove from the pan when there is still a little pinkness left in the middle of the meat.  Set aside to cool.

4.  Fry the bacon over a medium heat until it starts to release its fat.

3.  Add the potato, turn up the heat and fry, stirring occasionally, until the bacon is crisp and the potato just underdone.

4.  Add the chilli, leeks and shallot and cook and stir until the leeks are softened and the shallot transparent.

5.  Season with pepper and add a pinch of salt, then set aside to cool.

6.  Take the chicken and shred it into long thin strips.  Once the bacon mixture is cool, add to the chicken and stir to combine.

7.  Roll out the pastry until you can cut 5 tea plate size rounds from it.

8.  Lift circles onto a baking tray.

9.  Spoon the filling into the middle of each circle.  Brush the edges of the pastry with the milk or egg, then bring the sides up to the middle (or one side to the other, if you prefer your pasties laid on their sides), pinching the pastry together to make a pasty.

10.  Brush with a little more milk or egg and bake for 15 minutes until golden.

Serve.

.


11 September 2011

Macaroni Cheese - the gold standard

You may remember my talking about my Hubby's longing for a macaroni cheese recipe that didn't involve a roux-based sauce.  He had a memory of a macaroni cheese that a friend's wife had made for a dinner party, which he was sure contained wine - and was itching to re-create that.

Well, he'd gone a little way along that route by learning how to make a roux-based sauce, so that at least he understood the process in order to deviate from it.  I detailed his learning process in the blog posting about the Cauliflower Cheese - and indeed it was a beautiful cheese sauce.

Like me, he'd scoured the internet and my recipe books, looking for a recipe that satisfied all his criteria, but without success.  So he took a recipe that was nearest to what he wanted, and adapted it with the best bits from several other recipes.

I can confirm that the Macaroni Cheese he came up with was quite categorically the best Macaroni Cheese I have ever tasted - and was perfectly able to see it on a dinner party menu.  Macaroni Cheese isn't the first thing you'd think of for a dinner party, but this one is quite simply the Gold Standard for Macaroni Cheeses.

The cheese sauce was made more in the style of a fondue, rather than a cheese sauce.  As such, it contained the desired white wine, simply loads of cheese (cheddar and gruyere) along with cream and milk.

As if that wasn't enough, the whole dish was sprinkled with a mixture of buttered breadcrumbs, herbs, parmesan and salt which gave it a lightness of texture and a simple delicious crunch.

It's not the cheapest Macaroni Cheese in the world - but I'd go so far as to say that it is certainly the best I've ever had!

3 January 2018

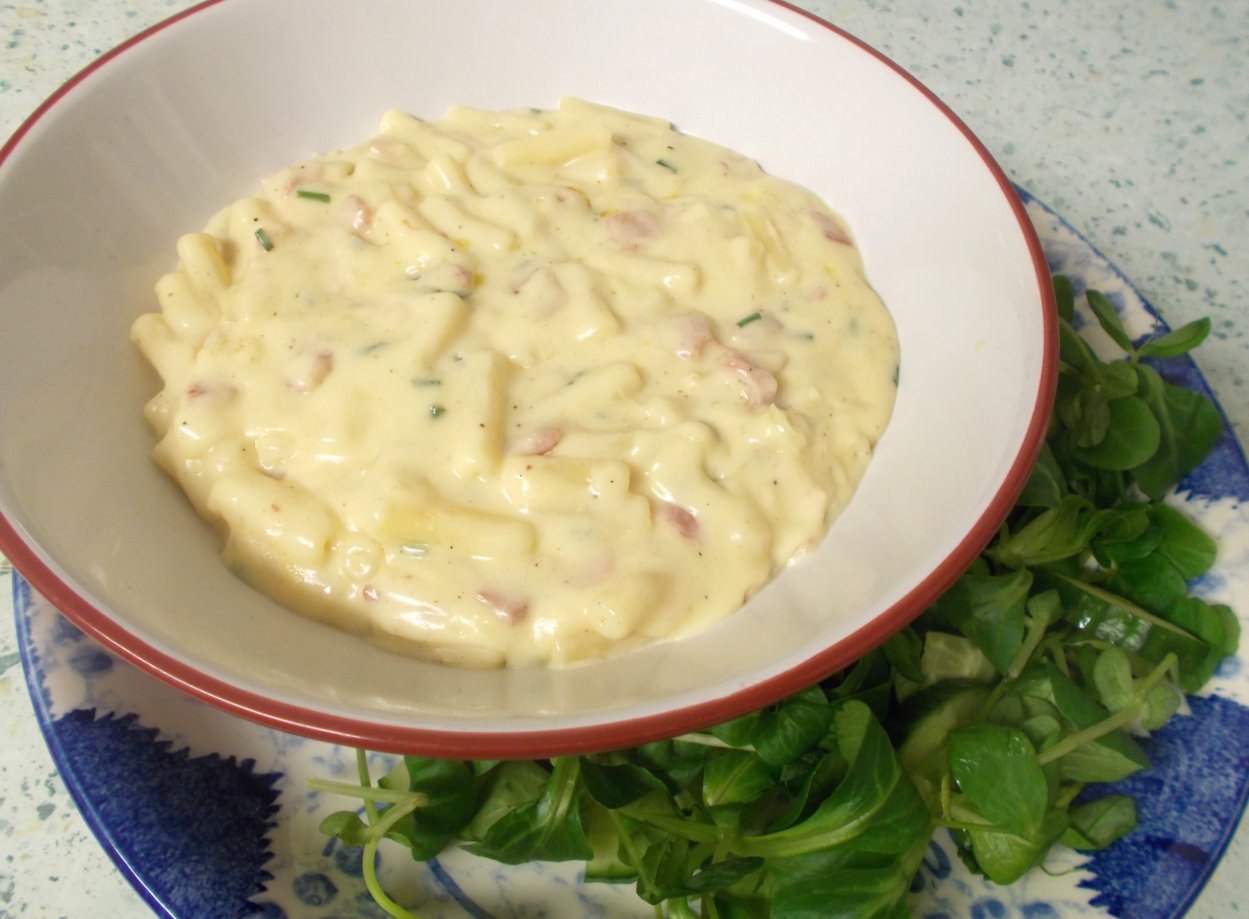
I've just made a version of this macaroni cheese - following the recipe apart from three differences.  I used The Black Farmer's Sweet Mature Cheddar and a ball of Mozzarella in the cheese sauce - which were both SUCH a success.  The cheddar is truly packed full of gorgeous flavours and the mozzarella, well, mozzarella makes any cheesy thing wonderful.  The last difference was that I skipped the breadcrumb and baking part completely.  Did we mind?  Not one bit.  Here's how it looked.  SO yum.  


MACARONI CHEESE  (feeds 4-5)

Ingredients :

225g macaroni pasta
5-6 rashers lean unsmoked streaky bacon
3 tbsp butter, plus a little for the breadcrumbs
3-4 small shallots, chopped
2 tbsp plain flour
150ml white wine
100ml whole milk
300ml double cream
115g gruyere cheese, grated
115g mature cheddar cheese, grated
2 tbsp fresh chives, chopped finely
1 tbsp Dijon mustard
pinch of cayenne pepper
pinch of nutmeg
110g crusty breadcrumbs
enough parmesan to grate over.


Method :


1.  Pre-heat oven to 200deg C/180deg C fan/Gas mark 6.


2.  Cook pasta in boiling salted water according to packet directions until tender to the bite.  Drain well, but do not rinse.


3.  In a large frying pan over a medium to high heat, melt the butter and add the bacon.  Fry until fat is rendered and just beginning to turn crusty around the edges.  Add the shallots and cook until golden, approx 3 minutes.


4.  Sprinkle mixture with flour and cook, stirring all the time, for around a minute.  Add the wine and stir, then the milk, still stirring, making sure to collect all the flavour from the bottom of the pan.  Add the cream and continue to stir.  Sprinkle in the cheeses, a handful at a time, continuing to stir until each handful is melted before adding the next.

5.  Stir in 2 tbsp chives, mustard, a pinch of salt, the cayenne and nutmeg.  Add the pasta to the sauce and stir lightly to combine.

6.  Add to a baking dish.

7.  To make the breadcrumb mixture, (which can be made ahead of time), in a food processor pulse the breadcrumbs with one and a half tbsp of butter, 1 tsp chives, grated parmesan and a pinch of salt, until mixed.

8.  Sprinkle over the pasta and bake until the top is browned and the cheese sauce is bubbling, around 15-20 minutes.

Serve.
 
.

8 September 2011

Borscht! Deep purple goodness.

As many of you know, we had been growing a little collection of beetroots in the garden - just as an experiment and to see how they'd get on.

Well, we harvested them the other day and only one of the ten or so was a particularly good size.  Which was okay, as we hadn't thought any of them would come to anything.  Next year we'll have to plant them a bit further apart, I think.

However, I'd been putting some thought into what I'd do with them if any were any good - and had the thought of Borscht floating around in my back of my head.

Now Borscht is not something I'd ever had (prior to last night, anyway), nor was it anything that had particularly appeared on my radar as being something that I just had to try.  I like beetroot - and a salad just isn't a salad without it - but an entire soup made from beetroot?  That was a bit more of a challenge.

Having spent time thinking about it though, I had (sort of) committed myself to giving it a go.  So, I researched various recipes and put a bunch of fresh beetroot on the shopping list.  I didn't plump for one particular recipe, eventually I took the best bits from three different recipes and made my own - which accorded with the image I had in my mind, of what Borscht looked like and tasted like.  Which was tricky, because as I say, I'd never seen it (other than in photographs), much less tasted it!

Having heard all kinds of horror stories of kitchens being painted purple (one Twitter friend dropped a panful of the stuff), and having watched Nigel Slater turn his hands purple when grating a beetroot, I also put a pair of rubber gloves on the shopping list.

My recipe required a number of the vegetables to be julienned and I didn't much fancy turning the chopping board purple, so I'd been pondering on this conundrum for a while.  Ultimately, I utilised a version of Rachel Allen's method of rolling out pastry - and put a double sheet of cling film onto the worktop, which I then put the mandolin onto and julienned the beetroot onto that.  (What, use a knife?  Not when there's a mandolin around!).  This stroke of inspiration (as well as the rubber gloves), meant that absolutely nothing got dyed purple and the beetroot could be conveyed from whole to julienned, then from worktop to saucepan, without any evidence appearing on the worktop, chopping board, floor or my clothes.  (The latter of which is completely amazing, if you know what a muck magnet I am usually!).

As for the flavour, well, it's not exactly beetroot - but the earthiness is there and not overpoweringly so.  The sweetness of beetroot is there, naturally.  However, it seems as though the combination of flavours does that unusual thing in that they combine, amalgamate and come forth in a collection of flavours that is unlike anything you've ever had before.  Nothing is a huge flavour, nothing outweighs anything else.  Even the cabbage is welcomed with open arms by the remainder of the flavours and just sort of disappears.  I can completely understand the addition of vinegar at the end, as this serves to sharpen up the taste, giving you a complete and rounded flavour as a whole.  Borscht has umami by the bucketload.


The recipe is all about preparation.  If you get the vegetables sliced up and prepared before you start cooking, it's just a simple matter of putting items one after the other into the saucepan until they're cooked.

BORSCHT  (feeds 2)


Ingredients :

1 tbsp butter
4 slices streaky bacon, cut into thin strips
1 medium potato, diced small
1 large carrot, julienned (use the mandolin)
1 stick celery, de-stringed and chopped fine
2 shallots (or 1 onion), chopped
200g raw beetroots, skinned and julienned
100g sweetheart cabbage, sliced finely
600ml beef stock
a tinned plum tomato, chopped finely
the juice from the tomato tin
2 tsp red wine vinegar
salt & pepper
sour cream.

Method :

In a large heavy pan, melt butter and lightly fry the bacon until fat has rendered and is becoming brown.

Then add the shallots and fry until softened.

Add the potatoes, carrots, celery and beetroot and cook for another 5 minutes.


Add beef stock, tomatoes and tomato juice plus some pepper and bring to the boil, then reduce to a simmer.

Add the cabbage and stir to combine.  Bring back to a simmer, cover and cook until potato cubes are done.

Take a potato masher and gently crush the soup, to break up the potato but not mashing the vegetables.  Give a good stir and taste for seasoning.  (Add loads of  black pepper – it can take it).

Add vinegar and simmer for another 5 minutes.

Serve with a swirl of sour cream.


.

28 May 2011

Bacon & Goat's Cheese Pasta

This is one of my favourite lighter pasta dishes, at the moment.

It has the benefit of the lovely gently flavoured mild goat's cheese (I use the £1.50 soft goat's cheese log from Asda, which I believe originates in France) which melts beautifully and doesn't soak into the pasta, resulting in a claggy, sticky mess as the pasta cools.  Because the goat's cheese has a sharpness, it doesn't cling to your palate and each mouthful goes down as well as the first one did.

I hate pasta in thick cream sauces (particularly cream cheese-based ones) which begin to set as the pasta cools on your plate, resulting in a clagged up lump of pasta pieces that need to be cut with your fork.  Bleaugh.

The recipe originally stated to use Kale, and although I love Kale, hubby has some issues with its leatheriness.  As such, I swapped onto Savoy cabbage - which if you make sure to give it just 3 minutes in the pasta water, is perfectly fine.

So, it's just a brief chopping job, then a two-pan cooking job - and onto your plate.

Couldn't be easier!  Which is why I booked it in for a Monday - after a day at work, I need a meal that's going to come together easily.

Don't be frightened of the goat's cheese - if you get a mild flavoured creamy one, you'll hardly notice the goatiness of it.  It really is streets ahead of plain ordinary cream cheese.


BACON & GOAT'S CHEESE PASTA (Serves 3-4)


Ingredients :


400g penne or fusilli pasta
200g shredded Savoy cabbage
150g streaky bacon, chopped
1 medium red onion, chopped
150g soft mild goat's cheese
grated parmesan to serve.


Method :


1.  Bring a large pan of lightly salted water to the boil.


2.  Cook the pasta according to the manufacturer's instructions, however, 3 minutes before the pasta is due to be cooked, add the cabbage to the pasta water.


3.  In the meantime, dry-fry the bacon pieces in a frying pan until starting to brown, then drain the fat off (into a cup for roast potatoes!).  Remove the bacon to keep warm.


4.  Put the onion into the frying pan with 2 tsp of the bacon fat and fry lightly until softened and transparent.  Return the bacon to the pan.


5.  Add the goat's cheese to the bacon/onion mixture and heat slowly, adding a little milk, to help break the cheese down and make it saucy.  Add seasoning (salt & black pepper) to taste.

6.  Once the pasta & cabbage are done, drain (retaining a little of the cooking water) and replace in the cooking pan.  Add the bacon mixture and lightly fold it through, adding a little of the cooking water if the sauce appears too thick.

Once you're happy with the consistency, serve with a bowl of grated parmesan for sprinkling over.


Yummy!


27 February 2011

Chicken & Bacon Cacciatore

Well, this recipe had mixed results in our family in that I loved it, son liked it, hubby liked it, but wouldn't go out of his way to have it again.

I thought I'd post it up, on the reckoning that there's a nasty cold bug travelling through the household (which started with son) and there's every chance that hubby's taste buds could have been affected.

We had tried a recipe for Chicken Cacciatore previously, which had turned out to be pale pink in the extreme.  So I'd been looking for another recipe which looked likely to turn out something flavoured rather more robustly.  Inevitably, I've tinkered around with the recipe so that it suits our requirements (breast of chicken instead of pieces, plus additional herbs) but the net result was a very creditable meal.

I served it with mashed potato, carrots and stringless beans, however it would be just as nice with anything from chip shop chips to plain white rice.  (Mmmmn .. did someone mention chip shop chips, just then? lol).


CHICKEN & BACON CACCIATORE (Serves 3, but is easily adjustable)

Ingredients :  

2 tbsp olive oil
3 skinless chicken breasts
6-9 rashers streaky bacon, chopped
2 onions, sliced
2 rosemary sprigs
1 x 400g can plum tomatoes
2 tbsp red or white wine vinegar
1 tbsp sugar
500ml chicken stock
small bunch of parsley, chopped
5-10 leaves of basil, (depending on their size) chopped.


Method :

1.  Heat the oil in a deep frying pan.  Brown the chicken until golden, then reserve and keep warm.


2.  Add the bacon and cook until the fat has rendered and the bacon is crisping.  Then reserve with the chicken.


3.  Add the onions and rosemary (leave the rosemary as a sprig, don't remove the leaves from the stick) to the pan and fry for 5-10 minutes or until the onions have softened and are beginning to brown.


4.  Add the tomatoes, vinegar, sugar, stock and seasoning.  Taste to check the seasoning.


5.  Add the bacon, then the chicken and bring to a simmer.


6.  Cover and cook for 25-30 mins until the chicken is tender.  If the sauce is still quite thin, add a teaspoon of cornflour slaked with a little water and stir until the sauce thickens.


7.  Add the parsley and basil, stir to combine and serve.


.
Related Posts Plugin for WordPress, Blogger...