23 August 2015

Reviewing Malay Taste - Nasi Goreng paste

I got chatting on Facebook the other day to the very lovely Jack from Hungry Communic-ations, about Nem Viet and their range of Vietnamese food products.  During the conversation he mentioned that Nem Viet has two sister product ranges, being Malay Taste and Thai Taste and I have to admit, that I dropped huge hints about maybe reviewing some of the products on the blog.

Well, this is the first of said reviews.  *chuckle*  With many thanks to Jack for taking me up on my ever-so-slightly embarrassingly overkeen offer.

As soon as I saw a Nasi Goreng paste was in the box, I knew what we'd be sampling first.  My dedication to a good Nasi Goreng is well documented on this blog and in the spirit of same, let me just direct you to my own home-made version which you'll find here.


Even though there is a perfectly reasonable Nasi Goreng recipe on the side of the jar, I am so keen on the stuff that I couldn't bear it not to carry some of the flavours that I know it should.  Hence, I followed my own recipe, but instead of using red Thai chilli paste, I used the Malay Taste Nasi Goreng paste.

Now, ordinarily, I don't use either oyster sauce or tomato paste in my Nasi Goreng but they are in the Malay Taste paste so I was interested to see how it would shape up with these two new flavours.

I added dark soy sauce, rice wine vinegar and fish sauce to the Nasi Goreng paste which helped to ensure that the flavours that I remembered so well were there.  However, I wasn't keen on the addition of tomato paste to the Malay Taste Nasi Goreng paste.  I felt that it was something of a Westernised copout.  I definitely missed the Thai lemongrass flavours and to add that in and either no tomato paste or just a little, would have improved the product no end.

Still, for all that, I liked it.  No, I really did!  If I was to give my own home-made Nasi Goreng marks out of 10, it would be a 10 (naturally).  The Malay Taste Nasi Goreng would come in at a good 8.5 by comparison.  Just lost a couple of points for the tomato paste and no lemongrass.

The chilli flavour is really good.  It doesn't knock your head off, just builds to a nice heat and keeps on a steady course instead of constantly increasing until you can't stand it any more, as lots of them do.  I like the oyster sauce addition, it gives it a deeper flavour profile than just fish sauce would have.


If I had have gone to someone's house for dinner and they'd have served Malay Taste Nasi Goreng, I wouldn't be disappointed.  It's different to mine, but it's still Nasi Goreng and that definitely floats my boat.

You can find out where to buy Malay Taste products from their website, on the "Where to buy" page.  One of the outlets is Amazon UK, so you've no excuse not to try them!  Currently there is just the Nasi Goreng kit available at around £2.50 for the one (you have to buy 6 in one go, so maybe get some for all the family or add the neighbours in!).


I'm very much looking forward to trying the other products now!

20 August 2015

The best Game Pie, made for Farmer's Choice (Free Range) Ltd

Tucked away - nay, nestled - in our freezer for the last few weeks has been a pack of mixed diced Game, (being venison, rabbit, pheasant, partridge and wood pigeon), just waiting for the stars to align and for me to come up with a recipe.

Those lovely people at Farmer's Choice (Free Range) Ltd were kind enough to respond to my promise of a good Game Pie recipe and very obligingly supplied the necessary, for which, my thanks.  (Follow the link here which will take you to the relevant page of their website).  However, none of us quite reckoned on just how good this good Game Pie recipe would be.  It was more than good - it was (to quote my hubby) "a triumph".


Now bear in mind that I'm a bit of a novice when it comes to Game.

Yes, I've cooked several wild rabbits with success in the past, I've had a very bad experience with someone else's pheasant dish that was so high it was inedible and consigned two Mallards to the bin that just didn't even bear description.  So I think you could considered my experience somewhat chequered.

Undaunted, however, I had a vision of a Game Pie in my imagination and that vision was just busting to be made real.  Not a raised Game Pie (a sort of wild meat version of a pork pie) but a good old fashioned country style, hearty, stick to your ribs kind of pie.  One with a golden crispy crust that hides the cornucopia of deliciousness below.  All I can say is that I just wish I had this kind of vision more often, as the actuality exceeded expectation by a factor of many - and the expectation was pretty darned high to begin with!
I dare you to identify any one piece ... lol
I had the picture of the pie mapped out in my head from an early stage.

What I was lacking, were the links and balances between ingredients which would result in a great combination.  My starting point is always "what does the primary ingredient taste like?".  Now I have tasted venison before, but only in a sausage.  Rabbit I'm well versed in, pheasant - not so much, partridge was a new one and wood pigeon I've had once previously and loved.  So I had an idea of how the meats would taste, but only an idea.  (Incidentally, I had no compunction in eating wood pigeon having had many tubes of niger seed go down their gullets instead of into the intended goldfinches.  I considered it payback).  I knew I wanted BIG flavours, flavours that were easily accessible by most home cooks and a nice selection of herbs.  After that, it was open season.


A couple of rashers of smoked bacon were a definite, so the next question was what vegetables would go nicely and look appealing in the pie?  Good old favourites onion, garlic, carrot and celery always make a great start to a good flavoured gravy and sliced carrots add colour.  Mushrooms are excellent for flavour and baby button mushrooms look delicious, too.  I knew I wanted to use red wine, so I was looking for something to combat the acidity that the red wine would bring.  Carrots were a good start, but I needed something that would echo the earthy, whilst balancing the acidity with sweetness.  Something that would go well with Game.  Something like ... chestnuts.  Having had the chestnut idea, it led on to considering prunes.  Prunes - just a few cut in half - would lend their deep sweetness, fruity flavour and dark colour to the equation perfectly.


It was all coming together nicely.

The last question was regarding herbage.  My dislike of thyme is well documented and I felt it was too easy to just opt for that.  It's rapidly becoming today's Herbes de Provence.  Way back in the eighties, that hideous stuff was in just about every Delia Smith recipe that had been documented and as such I'm sick to death of it.  The same goes for thyme and .. whoops, narrowly avoided an anti-thyme rant.  *phew*

I remembered my two front-door herbs, rosemary and bay.  (So called because they are either side of my front door).  Both would be perfect with the wild flavours of the Game and I liked the idea of those straight away.  My mind was wandering along pine nut routes when I suddenly remembered Juniper berries.  They would provide a gorgeous aromatic quality, along with a subtle citrussy fruitiness that would be hard to pin down but very "there".  Oh yes, it was all coming together beautifully.

The pastry was an unspoken given, in that I would be using my superb (and it IS superb, I kid you not) butter/suet pastry.  Just the sheer fact that it contains suet qualified it for the job, but the deliciously crisp lightness of the end result was absolutely spot on.

I added a few more ingredients over the course of the cooking process - the spoonful of tomato puree both for colour and fruitiness, the Knorr stock pot for its invaluably deep, dark colouration and excellent flavour - and I can safely say that each and every ingredient became as important as the next in the production of the pie.


Yes, it is basically a day-long labour of love to make this pie - but oh my gosh it is worthwhile.  Taken in stages, the process becomes an easy matter which I grant you is time consuming, but not difficult.  If you're looking for a dish with which to impress (and you could easily prepare the pie filling ahead of time and freeze it - which would make things a whole lot easier) you don't need to look much further.

"The nicest pie - both filling and pastry - I've had in many a long year" was my hubby's verdict. I think he liked it.


Perhaps not surprisingly, I have a few Cook's Tips for you.

The most important thing is not to rush this pie.  Give yourself a complete day in which to produce it if you're intending on making it all in one day, as it does take time.  Cutting the oven time short will only result in a potentially tough or undercooked filling that has none of the deep, developed flavours that a long oven bake will bring.

Don't make the pastry until the filling is made.  That way the pastry has a shorter time to wait and won't deteriorate in the fridge.

Don't be tempted to add the pastry to the pie until the filling is, at worst, luke warm or at best, stone cold.  Any significant heat will instantly melt your pastry, which will dissolve distressingly before you can get it into the oven.

Lastly, don't be scared to add a good deal of black pepper.  It gives a lovely warmth to the sauce that lingers on the tongue like a delicious echo.

You're also in luck that August is currently within Game season  - so invest in some mixed Game and tuck it away for a rainy day that can only be salvaged by the application of delicious Game Pie.  Your family will thank you.


GAME PIE     (Serves 3-4)

Ingredients :

1 tbsp olive oil
10g butter
500g mixed Game, diced  (I used venison, rabbit, pheasant, partridge & wood pigeon)
sea salt & freshly ground black pepper
1 large onion, finely chopped
1 large garlic clove, finely chopped
1 large carrot, half finely diced, half sliced small
1 stick celery, finely diced
2 rashers back bacon, diced
10 small round shallots
150g small button mushrooms, left whole
3 bay leaves
1 tsp fresh rosemary
8 juniper berries, crushed well
200ml red wine
1 heaped tsp tomato puree
1 Knorr rich beef stock pot
500ml water
10 semi dried prunes, halved
100g chestnuts.

For the pastry :

150g plain flour
50g vegetable suet
50g cold salted butter
sea salt
freshly ground black pepper
Carbonated mineral water as necessary.

1 egg yolk to glaze.

Method :

In a deep frying pan, heat the olive oil and add the butter.  When the butter is frothy, add the game and sear over a high heat with a tiny pinch of sea salt and a good pinch of black pepper.  Just get two or three sides of the meat coloured, then remove to an ovenproof casserole dish, using a slotted spoon.

Add the chopped onion, garlic, carrot (both sizes), celery and bacon to the pan.  Season with a small pinch of sea salt and black pepper.  Fry over a moderate heat until the onion is transparent and the bacon fat has begun to render.

Add the whole shallots and button mushrooms and increase the heat under the pan.  Fry until everything has gained a little colour - around five minutes, or so.

Add the bay leaves, rosemary and crushed juniper berries and stir through.

Add the red wine and tomato puree, stir through and allow to boil rapidly for 2-3 minutes, then reduce the heat to moderate and add the beef stock and the water.  Stir through again to ensure the stock has melted properly.

Simmer the pan contents for 10 minutes, then taste for seasoning and add more salt or pepper, as necessary.

Add the prunes and chestnuts.

Decant into the casserole dish and gently stir to mix the game through.

Cover the casserole dish and place into a pre-heated oven at 180degC/350degF/Gas 4 for 2 hours.

Once the cooking time is up, decant the casserole contents into your pie dish, cover lightly and set aside to cool.

Make the pastry by gathering all the ingredients except the water (and egg) into a large bowl.  Using your fingertips, rub the butter into the flour and suet, until you have a cross between breadcrumbs and cornflakes.  Add around 100ml of water and stir with a knife.  You will probably need a little more water, but what you are looking for is that the pastry dough just clings together and is damp, not wet.  Do not knead the dough at all, just pat and push it together then place onto a sheet of cling film and wrap tightly.  Rest in the fridge for at least 30 minutes before using.

When your dough is rested and your filling lukewarm, roll out the pastry to just bigger than the size of your pie dish.

Using a pastry brush, brush egg yolk around the lip of the pie dish.

Carefully lift the pastry on top of the pie, so that it overhangs the edge.  Using the tip of a knife, press down all around the edge then trim off the excess.

Brush all but a small amount of the remaining egg yolk over the surface of the pastry, taking care to go right to the edges.

Cut out some leaves or other decoration from your leftover pastry and lay them on top of the egg wash.  Brush egg onto the leaves.

Take a sharp knife and cut some holes into the pastry to allow the steam to escape.

Place into a pre-heated oven at 180degC/350degF/Gas 4 for 35-40 minutes until the pastry is crisply golden and the filling is bubbling hot.

Serve with buttered new potatoes and vegetables of your choice.

Printable version


1 August 2015

Rhubarb Dream Bars - cakies of much deliciousness!

The good - very good - thing about having a blog called "Rhubarb and Ginger" is that every so often, someone will recommend a rhubarb recipe to me.  Which is what happened with regard to these Rhubarb Dream Bars.  I'd never heard of them before, but it seems that they're well known in the States and Canada.  I suppose it's like the gorgeous Rhubarb & Strawberry Pie, which - even though England grows some of the best strawberries available anywhere - is not a well known combination over here.

I'd had the recipe for these totally scrummy little pieces of deliciousness for a few weeks but either the butter kept being eaten before I could get to it, or we were too busy, or I just ran out of spoons (see the definition of the Spoon Theory here).

I was getting a bit fed up with not making these and was beginning to panic that our rhubarb might have dwindled before I could get the chance to make the most of it.  So as hubby was in charge of dinner and I had spoons to spare, it was the perfect chance.

I'm not sure why, but I was under the impression that it was likely to be a bit of a long process to make the bars.  I'm scratching my head about this, because it really was the simplest thing!  In fact, the hardest bit was doing the maths to halve the recipe.  The original recipe is here, but I've reproduced it below as I've made it a bit less American and this is the halved version.  If you've got two baking tins, then by all means make the full version as for sure they won't stay around for long!  However, know that they don't keep well.  You need to not seal them into whatever container you're planning on keeping them in, as they will soften very quickly.  Hence it is not worth making loads, if you're not going to be able to eat them all.

Just as an aside, I loved the fact that I could step out of the kitchen door and pick two rhubarb stalks from our plants, wash them, chop them and bake them.  Now it doesn't get much fresher than that.


So apart from knowing that the end result was delicious - after all, they'd been recommended - I had no clue as to how they would end up.  Would the base be hard, or soft?  Would the top be crumbly or spongey?  So it was a voyage of discovery that only made sense as I was creating them.  Of course, the base is very similar to a shortbread recipe, so naturally it comes out of the oven crisp and smelling deliciously buttery.  I wasn't sure how the fruit layer would react to meeting the hot base, but baking magic happens and it all does what it should, winding up with a gorgeously soft from the fruit juices and crusty from the oven, sweet and deliciously rhubarby top layer.


Have I sold you on the idea yet?

The mix for the top layer.  Unassuming, isn't it?
As for Cook's Tips, I have a few :

Because the recipe originates across the pond, measurement is in cups.  It really isn't a difficult thing to get hold of a set of cup measures, so I've left it as is and not twisted my poor old melon any further in trying to convert them.

I used salted butter for the base as I think the mixture needs the salt to bring out the best flavour.  By all means use unsalted butter though, if that's your thing.

Make sure to slice each rhubarb stalk thinly (not paper-thin, obviously) as this helps the fruit layer to not become waterlogged with juice.  The smaller pieces cook quickly and a degree of the water is evaporated during the cooking process.

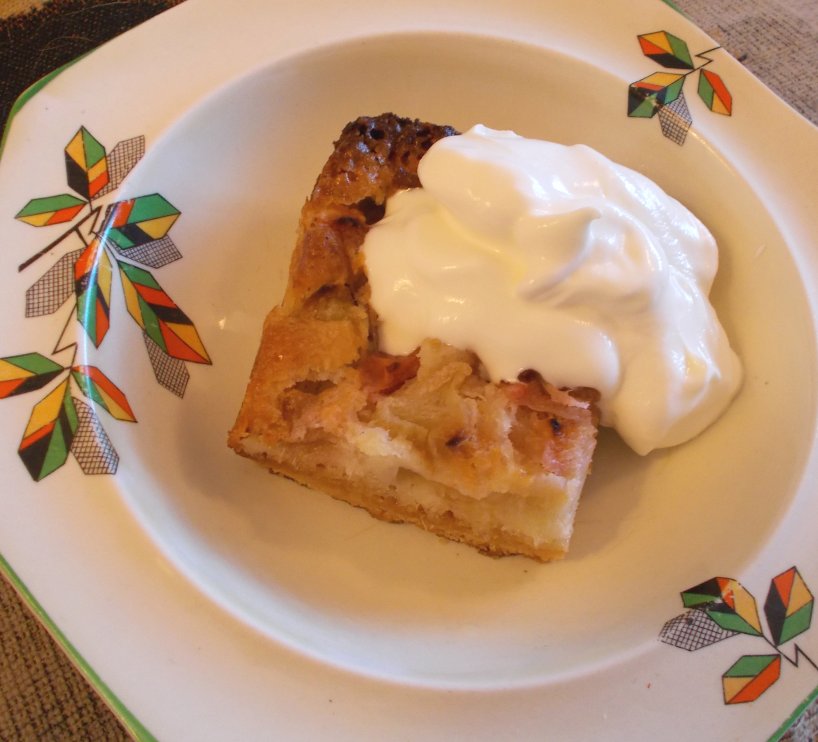
For dessert, with gorgeous Greek yoghurt

RHUBARB DREAM BARS    (makes 12)

Ingredients :

For the base
1 cup plain flour
a scant half cup of icing sugar
half a cup of butter.

For the fruit layer
2 large eggs
three quarters of a cup of caster sugar
one quarter of a cup of self raising flour
half a tsp of salt
2 cups rhubarb, finely sliced.

Method :

1.  Line a 8" square baking tin with parchment paper so that the paper extends beyond the sides of the baking tin (to make it easy to remove the cake) and lightly grease with butter.

2.  Add the flour, icing sugar and butter for the base together in a food processor and whizz until thoroughly mixed and looking like fine breadcrumbs.

3.  Tip the mix into the baking tin and press firmly with the back of a spoon until the base is smoothly covered.

4.  Bake in a pre-heated oven at 180degC/350degF/Gas4 for 10-15 minutes or until golden brown.

5.  While the base is baking, mix up the fruit layer.  Place the eggs, sugar, flour and salt into a bowl and beat until well blended.  Add the rhubarb and mix through.

6.  As soon as the base is baked and removed from the oven - and while it is still hot - pour the fruit layer on top and quickly level it.

7.  Replace into the oven for another 35-40 minutes.

8.  Cool and cut into 12 bars.

Serve with a cup of tea, or with clotted cream, ice cream or custard, for a yummy dessert.
Printable version


28 July 2015

General Tso's chicken - a real crowd pleaser!

Now this is one recipe that I should have blogged a long time ago, as I've made it countless times since I discovered it on La Table de Nana.  As you may have guessed from the name, it sounds as though it should be of Chinese origin and to quote Wikipedia, "General Tso's chicken is a sweet, slightly spicy, deep-fried chicken dish that is popularly served in most Chinese and Asian themed American restaurants. The dish is most commonly regarded as a Hunanese dish.  The dish is named after General Tso Tsung-tang, or Zuo Zongtang, a Qing dynasty general and statesman, although there is no recorded connection to him".  So now you know.

I have to first deny all knowledge of deep frying my chicken.  You would have to pay me quite a lot to get me to deep fry anything, these days.   Not just from the health point of view, but um ~koff-blush~ I'm actually scared of deep frying.  I know.  I write a food blog and I'm scared of deep frying.  What can I tell you?  I think all those Public Information Films about the dangers of chip pan fires back in the seventies are still playing out in my head.

As a consequence, after velveting the chicken I just heat up a tablespoonful of oil in a wok and shallow fry to my heart's content.  The chicken still gets lovely and golden and I don't have a nervous conniption.  It's all good.

Served with coconut rice
The combination of goodies in the sauce is just an inspired thing.  Each contributes something to the final flavour(s) and it just wouldn't be right without any one of the ingredients.  Mind you, I do have to say that I don't use fresh ginger - as was recommended by the original recipe.  Both hubby and myself react badly to fresh ginger these days, whereas if I use ground (powdered) ginger, we're fine.  Yes, the flavour is slightly different, but we still get the ginger kick and flavour - so I'm not arguing.  I put the small amount of ginger into the sauce, where it incorporates nicely.

Something I would recommend highly to you - and yes, it could almost be construed as a Cook's Tip, is to invest in some authentic soy sauce.  If you can get them, both light soy and dark soy, as the difference in flavour to the small amounts of Blue Dragon, or even Kikkoman, is just incredible.  Once I'd invested in a large bottle of both, I wouldn't ever go back to "Westernised" soy sauce.  It's just a whole different ball game and you'll find you use far less as the flavour is so much more intense.

Cooked together with sliced green pepper
Okay, so while we're doing the tips, you absolutely must have everything chopped before you start.  This recipe moves so quickly once you begin cooking, that you definitely don't have time to leisurely chop a half a dozen spring onions.  It's a case of grab it and cook it so you need to have everything ready!

Oh, and it is nice to keep a certain amount of chopped green onion back for sprinkling over the top once served.  It definitely helps the dish to look fresh and tasty.  Unfortunately, I can't cope with raw spring (or green) onion, so I restrict myself to some toasted sesame seeds.

Served with a spring roll and some prawn crackers
Son and heir consistently finds the texture of the velveted chicken a surprise and requires reassurance that it is the cooking process, not the chicken, that has made it feel that way on the tongue.  As if I'd feed him dodgy chicken!  *tut*  The very idea.

Hubby and I, however, just love the recipe.  I've cooked it with toasted sesame seeds and without, with a sliced green pepper or mushrooms and without - in all sorts of incarnations - and we've loved them all.

As a super-quick meal to cook, you really can't do better than General Tso's chicken.  It's almost one of my favourite "bung it in the wok in order and serve" recipes.  If it wasn't for the fact that you cook the chicken first, then reserve it for later, it'd qualify.  But then, it's just another bowl to wash up and what's another bowl when dinner tastes so good?

GENERAL TSO'S CHICKEN    (serves 3-4)

Ingredients :

½ cup soft brown sugar
3 tbsp hoisin sauce
3 tbsp rice wine vinegar
3 tbsp tomato ketchup
2 tbsp soy sauce
1 flat teaspoonful of powdered ginger
a good pinch of dried red chili flakes (optional)
½ cup water
3-4 tablespoons cornstarch
500g boneless, skinless chicken breasts, cut into 1-inch cubes
1 tbsp olive oil
1 tsp sesame oil
6-8 spring onions chopped
toasted sesame seeds (optional).

Method :

If you are intending on using toasted sesame seeds as garnish, now is the time to toast them.  Heat up your wok or frying pan and place the seeds in dry.  Keep an eye on them, as once they start to toast it happens quickly!  Once nicely brown and toasty, decant into a ramekin to use later.

Next, mix the brown sugar, hoisin sauce, rice wine vinegar, tomato ketchup, soy sauce, ginger powder, chili flakes (if you're using them, which I recommend you do!) and water together in a bowl.  This is your sauce, so set aside - but within reach!

Dredge the chicken chunks in the cornstarch and shake off any excess.

Heat the pan again and add the olive oil.  Cook the chicken in the olive oil briskly on a high heat until golden brown on at least two sides.  Remove the chicken and retain in a warm place.

Add a little more olive oil if necessary, plus the sesame oil and green onions (and any other veggies you might have thought to include). Cook until softened, then add the sauce and quickly bring to a boil.

Allow the mix to boil gently for as long as it takes for it to thicken slightly, then add the chicken and coat with sauce.  Reduce the heat and simmer until the chicken is cooked through and the sauce has reduced to a glossy, syrupy consistency.

Serve with white rice, garnished with the toasted sesame seeds and some raw spring onion pieces.

Printable version

    20 July 2015

    Bacon & tomato gnocchi bake

    This unctuous, decadent and totally yummy dish is one of those "made it in the past, didn't get around to blogging it" meals that really should have been blogged long before now.

    I've only made it twice (so far) and I'm sure it will appear on the menu again before too very long.

    The first time, I added some veggies such as green and red pepper to the mix because I had them there and needed to use them up.  This time, I went with just the mushrooms and we all loved it on both occasions.

    I would point out that the dish isn't, strictly speaking, a "bake" but more of a "grill" as you simply grill the sliced mozzarella to melt it and give it a little colour.   However, it really is by the by - I just thought I'd clarify in case you were puzzled by it.


    I must be getting old, as the guilt over the calories involved (bacon, cream, cheese ... need I say more?) resulted in my serving it with a side salad instead of the garlic bread we had previously.  You know what?  I actually preferred it with the side salad.  At which all the men in the audience may now take a sharp intake of breath - salad being an anathema to the majority of man-kind, as I'm given to understand.  The majority of the laydeez may take this opportunity to nod wisely.


    It was the contrast in textures, though.  The richness and softness of the gnocchi beside the freshness and crunch of the salad ingredients, just worked beautifully for me.

    Not that it wasn't extremely good the first, garlic bread accompanied, time.  No, it was pretty darned horny (if you'll excuse the expression - borrowed from my husband, you understand) then, too.  In fact, I think it'd be fairly irresistible no matter how or when you served it.  I'd even give it a go for breakfast, it's that good.

    Plus - and this is a big plus - it is another from the age-old and much favoured school of "chop and peel, put into a pan in order and serve" cooking.  Perfect for when you've spent all day chauffeuring your progeny around from school to concert hall, or just plain worn yourself out doing some retail therapy.  Assuming, of course, that the gnocchi is either already made and in your freezer, or already made and in a bag in your fridge.  Don't tell anyone, but mine was made by Mr Asda.  Their fresh gnocchi is very acceptable indeed.

    If you've got any teenagers in the house, don't expect there to be any leftovers for lunch.  Even after a perfectly adequate serving with salad alongside, they will still find a corner for a little bit more.  I'm not sure, but I think son & heir may even have licked the plate.

    As for COOK'S TIPS, it really is so simple that there aren't many.

    Firstly, it is as well to use the best ingredients you can afford with this one.  The simplicity of the dish is such that if you use cheap tinned tomatoes (for instance), it's going to show.  For the sake of the few pence that's involved, go for the best you can afford.  It really is worthwhile.


    Lastly, don't be tempted to use double cream.  Not even if you've got some left over in your fridge without a home to go to.  Buy some peaches and use it on them, if you must.  Single cream won't leave you with the clagginess that double will, when used in this context.  It really is a very rich tomato sauce - and extra fat is neither required nor welcome.

    Either saladed or garlic breaded, this is a great one for a weekday dinner.  Your menfolk will thank you, either way.

    BACON & TOMATO GNOCCHI BAKE   (serves 3-4)

    Ingredients :

    1 tbsp olive oil
    340g back bacon, diced
    1 large shallot, diced
    2 cloves of garlic, finely chopped
    1 tsp paprika
    half a tsp smoked sweet paprika
    6 good sized chestnut mushrooms, sliced
    1 large tasty tomato, chopped
    400g can of chopped tomatoes
    1 tbsp tomato puree
    1 tbsp tomato ketchup
    150ml water
    1 tsp Worcestershire sauce
    1 tsp sugar
    half a tsp finely ground black pepper
    2-3 tbsp single cream
    1 tbsp finely chopped parsley
    500g fresh gnocchi
    2 balls of mozzarella cheese, sliced.

    Method :

    1.  Heat the oil in a large deep sided frying pan and once hot, add the bacon pieces.  Fry until the fat has begun to render and the pieces have begun to caramelise.  Do not allow to burn.

    2.  Add the shallot and garlic and continue to fry until the shallot has softened and turned transparent.

    3.  Add the two types of paprika and stir to combine.  Fry for another 30 seconds.

    4.  Place a large saucepan of slightly salted water on to boil.

    5.  Add the mushrooms and the tomatoes in all their guises, the Worcestershire sauce, water, sugar and black pepper.  Stir well, then allow to simmer for 15-20 minutes to allow the flavours to combine and the sauce to thicken and reduce.

    6.  Once the sauce has reduced to a thick, chunky texture, remove from the heat and add the cream and parsley.

    7.  Put the gnocchi into the boiling water.  Once they float to the surface (3 minutes, no more), they're done.  Remove from the water using a slotted spoon and add them to the tomato sauce.  Stir them in gently, making sure each gnocchi is coated with sauce.

    8.  Place the sliced mozzarella over the surface of the gnocchi/sauce mixture and place under a hot grill.  Once the mozzarella has melted and begun to colour, you're ready to serve.

    I served mine with garlic bread and on the second occasion, with a side salad.  The choice is yours!

    Printable version


    15 July 2015

    Roast Spiced Hedgehog of Pork with Gooseberry sauce

    Roasting a hedgehog?  Whatever next!  Oh, don't panic - I've not gone THAT exotic - my "Hedgehog" was a piece of hedgehog cut pork - i.e. hatch marks had been cut across the top surface of the piece of pork topside.

    Farmer's Choice (Free Range) Ltd  contacted me again and asked whether I would like to devise a recipe for them to use on their new Facebook page for the Dorset and Bournemouth area (Farmers Choice Bournemouth & Dorset).  Naturally, I said yes please!  After all, the produce from Farmer's Choice is so good, why would anyone in their right mind turn them down?

    Perfectly roasted and ready to carve
    I, pretty much straight away, knew what I was going to go for.  I had been playing about in an imaginary way, with a recipe for spiced roast pork with a gooseberry sauce.  I'd been hoping that our little gooseberry bush would come up with the goods, but regrettably the birdies got there first.

    Ready for the oven
    I had also been waiting for a suitable piece of pork to turn up in the supermarket for a reasonable price, but that hadn't happened either.  So immediately I went to the pork joint section of the Farmer's Choice website and my eye was caught by the Pork Topside Hedgehog.  As it turned out, I couldn't have asked for a better cut.  With absolutely no waste and as lean as they come, this joint was perfect for everyone in the family and with careful but easy roasting, resulted in a super tender and flavoursome roast which wasn't dry at all.

    My order, in the end, became the pork, some gooseberries, a bulb of fennel (also for the sauce) and a wild card entry of a bag of game meat for a game pie which I haven't made yet.  That's what happens when you give me the pick of a site full of produce, you see.  Personally, I think I was very restrained and I'm sure there are many who would have asked for a whole lot more.

    The pork recipe was really incredibly simple.  I just wanted something to flavour the outside of the meat with and give it a lovely colour, rather than something to marinate the joint in for hours and provide a more overall kind of flavour input.


    As such, the oil-based rub that I came up with - of olive oil, thyme, sweet smoked paprika, garlic, lemon juice and ye olde salt and pepper - was just perfect.  It was able to sink easily into the cut marks across the top of the pork and gave a beautiful colour once roasted.  The flavour was subtle but very much there, depending on how much of the outside of the pork you had on your fork.  Subtlety, folks, I'm all about the subtlety (and poetry, looking at that last sentence).  Well, where roast pork is concerned, anyway.


    The roasting was as easy as falling off a log (and I've fallen off a few in my younger days, so I know how easy that is).  For a 1155g piece, I gave it one and a half hours at 180degC (350degF/Gas 4), then gave it a baste and checked the internal temperature was in the range of 77degC - 80degC (meat thermometer - SO useful!) and as such was likely to be done, but still fairly firm.  I then covered the roasting dish with a good layer of aluminium foil and put it back at the much reduced temperature of 130degC for another hour.  Once the hour was up, the whole package was rested for 20 minutes in a warm (but not hot) place.  The meat wasn't fall-apart tender, but I don't much like that in a roast pork joint.  It held together, but you could easily cut it with just a fork.  It was perfect.

    You little beauties!
    The gooseberry sauce was just wonderful.  The sharpness of the gooseberries cut through the richness of the pork and refreshed the palate, ending on a soft note of fennel which left you ready for the next bite.  The sauce is a little more time-consuming to make, but if you tackle it ahead of time (which I recommend, to give it time to cool) it really doesn't impinge on your day much at all.

    The two recipes are really so simple that I don't even have any COOK'S TIPS for you, other than to recommend you keep hold of the fluffy tops and offcuts of your fennel to include in soup or stock, for which they are invaluable.

    The finished gooseberry sauce, hiding its zing behind a benign appearance
    Gooseberries and pork.  Mmmnnnn, our new favourite thing.  In fact, my hubby was so taken with the combination, he remarked that he hadn't ever had a better piece of roast pork in all his forty-mumble years.  Now that's quite a compliment.


    ROAST SPICED HEDGEHOG OF PORK with GOOSEBERRY SAUCE   (Serves 4-5)

    Ingredients :

    For the gooseberry sauce :
    1 tsp yellow mustard seeds
    1 tbsp olive oil
    1 bulb of fennel, sliced finely and tops discarded
    1 large banana shallot (or equivalent), diced finely
    small pinch of salt
    quarter of a tsp dried thyme
    quarter of a tsp finely ground black pepper
    quarter of a tsp vegetable stock powder
    1 tbsp & 50ml water
    125g dessert gooseberries, tops and tails removed
    25g granulated sugar.

    For the pork :
    1kg or thereabouts topside of pork, mine was hedgehog cut
    1 tbsp olive oil
    1 tsp sweet smoked paprika
    1 tsp dried thyme
    1 clove of garlic, grated
    2 tsp lemon juice
    pinch of sea salt
    half a tsp freshly ground black pepper.

    Method :

    1.  Begin, ahead of time, by making the gooseberry sauce.  Heat a small pan and once hot, add the mustard seeds to toast.  Once they start to pop, decant into a small bowl and reserve.

    2.  Heat the olive oil and add the fennel and shallot, plus the sea salt.  Cook gently until the shallot is transparent and the fennel has begun to soften.

    2.  Add the pepper, dried thyme, vegetable stock and water.  Bring to a simmer and cook until the fennel is tender.

    3.  Taking a stick blender, carefully blend until thoroughly combined, but still retaining texture.  Decant into a bowl and reserve.  Replace the pan onto the heat.

    4.  Add the gooseberries directly to the pan and add a tablespoonful of water.  Cover the pan and allow the gooseberries to heat through, giving the pan a little shake every now and then, to prevent them from sticking.  This should only take around 5 minutes if the gooseberries are ripe.

    5.  Once the berries are softened and their juice is beginning to escape, add the fennel mixture and mustard seeds and stir to combine.

    6.  Add the sugar and remaining 50ml of water.  Stir well, then bring to a simmer and cook until the sauce has reduced to a loose jammy consistency.  Taste for seasoning and adjust if necessary, likewise if you think the sauce needs more sugar, correct that too.  Be cautious with the sugar, as you want the sauce to stay tart and not become jam-like.

    7.  Once you are happy with the flavour and consistency, decant into a bowl and allow to cool.

    8.  Remove the pork from the fridge a good half hour ahead of time.

    9.  Place into a roasting tin and mix the seasoning ingredients (oil, paprika, thyme, garlic, lemon juice, salt and pepper) together.

    10.  Spoon the seasoning mix over the top of the pork and rub into all the cracks and crevices.

    11.  Put into a pre-heated oven at 180degC/350degF/Gas 4 for an hour and a half.

    12.  Remove the pork from the oven and baste it with the juices, then cover with tinfoil and return to the oven.

    13.  Turn the oven down to 130degC/250degF/Gas 2 and cook for another hour.

    14.  Remove the pork from the oven and baste it again, then replace the tinfoil and leave it in a warm place to rest for 30 minutes, before carving.

    Printable version


    13 July 2015

    Citrus & spice chicken

    I've been going through a whole heap of old paperwork recently - which included my many and various files and folders chock-a-block full of collected recipes.  In doing so, I have re-discovered several favourites from pre-Rhubarb & Ginger times, one of which being this citrus & spice chicken.

    The recipe has developed over the years (as recipes are wont to do) but I note from the paper recipe in my folder, that the original was adapted from the Good Food Magazine's "40 Best Chicken Recipes" booklet.  Well, it's been adapted yet again - and very much for the better.  The very first recipe was basically a traybake, my first version added several ingredients such as the honey and chilli powder.  This last incarnation has separated out the vegetables to be cooked on the hob instead of in the oven, which I much prefer.

    Marinate, my little lovelies!
    Oven cooking the vegetables inevitably led to burned ends and undercooked middles, as the sheer quantity of meat and vegetables in the tray didn't really allow for even cooking.  Plus, it is nice to have a small degree of char on the chicken, but not so nice on the peppers and mushrooms.

    This way, the chicken has plenty of air space around each piece and the cooking is much more even - particularly if you place the larger pieces to the outside and the smaller pieces to the inside of the tray.  The surface attains nice little charred corners, while the chicken itself stays moist and delicious.

    Cooking the vegetables in a frying pan enables much more degree of control.  Inevitably the leftover marinade isn't enough moisture to see them through the entirety of the cook, but adding a little water from time to time not only allows the vegetables to steam, but also keeps the marinade saucy.  This way, you have the relatively dry chicken, accompanied by the saucy vegetables - which provides a lovely balance and completely without burned ends.

    Ready for the oven - Bacofoil's non-stick aluminium foil is great for this!
    Another huge positive to this recipe - apart from the flavour which is really tasty - is its speed.  Provided you get the chicken on to marinade in advance, it is a really simple task to prepare a couple of salad veggies, cook some rice, put the chicken in the oven and pan cook the vegetables.  From taking the marinating chicken out of the fridge to dishing up, probably only took around 45 minutes in total.  I love that - especially when there's such a pay-off by way of flavour.


    So what's the flavour like?  The chicken flavour is there, no one flavour overrules it and because the curry past is used fairly sparingly and is very much tempered by the use of the yoghurt, it doesn't take precedence.  The honey gives a quiet sweetness and the garlic helps to savoury it all up nicely.  In fact, don't tell anyone, but if you add the yoghurt, then the lemon juice, then the honey, stir it all together and have a taste - mmmmn, it would make a smashing dessert!

    Once the curry paste, oil and garlic are added though, I wouldn't recommend tipping it on top of your strawberries.  The oven adds the last element of flavour to the chicken, in the small degree of charring as the tops of the chicken pieces catch in the oven.  It all amounts to an absolutely scrumptious whole.

    Now, as for Cook's Tips, I don't have many but there are a few worth mentioning.

    The recipe calls for the juice of half a lemon.  If, however, you don't have a lemon but do have a lime - then no worries, use that instead!  You will need the whole lime's juice and the flavour will be slightly different, but no less nice.  I have used both in the past and can't decide which one I like the best.

    Where the chilli powder is concerned, feel free to add as little or as much as you like.  However, if you're new to chilli powder and curry spice, I'd suggest you err on the side of caution to begin with - you can always add a little bit more the next time.


    You can certainly freewheel a bit where the accompaniments are concerned.  I think the chicken and vegetables would be lovely served in a soft Indian flatbread with some salad alongside.  On this occasion, I served the chicken with some basmati rice that I had cooked in chicken stock and turmeric, along with the cooling influence of avocado and cucumber.  For my son, who isn't keen on avocado, I served a sliced juicy tomato and cucumber.  The chicken is certainly flexible enough in flavour profile, that there are a whole host of accompaniments you could serve with it.


    Calories are in the range of 398 per portion, it is low in sodium and high in Vitamins B6 and C, so it could be worse!

    I am so happy to have rediscovered this recipe.  I think it is going to appear fairly regularly on the menu plan and I recommend it to you.  Without the chilli powder, it would be great for children, too.

    CITRUS & SPICE CHICKEN   (Serves 3)

    Ingredients:

    For the marinade :

    150ml natural yoghurt (I used Greek yoghurt)
    juice of half a lemon
    1 tsp runny honey
    1 tbsp vegetable oil (I used sunflower)
    2 generous tsp curry paste or powder
    1 garlic clove, crushed
    chilli powder to taste (I used 1 tsp Kashmiri chilli powder).

    Other ingredients :

    3 skinless, boneless chicken breasts cut into large chunks
    1 red pepper, deseeded and cut into large slices
    half a green pepper, deseeded and cut into large slices
    1 onion cut into large slices
    6 medium chestnut mushrooms , quartered
    1 tbsp olive oil.

    Method :

    1.  Mix together the marinade ingredients in a bowl.

    2.  Add chicken chunks to the marinade, stir to coat and set aside to marinate for as long as you've got - from 4 hours to 30 minutes.

    3.  Pre-heat your oven to 180degC/350degF/Gas 4.

    4.  Place the chicken chunks onto a baking tray, taking care to leave as much of the marinade in the bowl, but without scraping any off the chicken.

    5.  Bake the chicken for 30 minutes, remembering to turn the tray half way through to ensure even colouring.

    6.  Add the vegetables to the bowl and stir to coat them in the marinade.

    7.  Heat the olive oil in a large frying pan and add the vegetables, marinade and 200ml water.  Cook, covered, on a medium heat until the peppers are softened and onions are cooked through.  You may need to add more water, but only a little at a time.

    8.  Once the vegetables are cooked, remove the lid and allow the sauce to reduce and thicken, which will only take 2-3 minutes if you haven't added too much water.

    9.  The chicken is ready once the chunks are cooked through and they have gained a little bit of charred colour.

    Serve with steamed basmati rice, avocado and cucumber.

    Printable version
    29 June 2015

    Rose syrup - oh yes, it's a thing!

    My hubby is a great one for syrups that you use in your coffee.  Hazelnut is a favourite, but Caramel has featured and Chocolate is a definite.  However, we'd never indulged in making any.  Well, not if you don't count the Rhubarb Cordial we made last year, which was a very definite hit.   All that changed as soon as I saw this recipe on my friend Choclette's Tin & Thyme blog at http://tinandthyme.uk/2015/06/rose-syrup-and-what-to-do-with-it/.

    A Facebook friend who lives in India (hello Jasii! ~waves~) has made rose petal jam successfully in the past, but so far we've not had enough quantity of rose petals to want to denude the beautiful roses for them.

    With Choclette's recipe however, you just need one big fat, blowsy fragrant rose in order to make 200ml of the most delicious, Turkish Delight flavoured, warmly pink, headily fragrant quantity of rose syrup.

    Scent-imental - one of the roses that donated their petals to the cause
    Now I had seen the blog posting the day before I made the syrup and hadn't reacted to it immediately, because our roses are quite new to us and we're still in wonder at how beautiful they are.  However, when we left to go shopping that morning, lo and behold there was a heap of beautiful, perfect red and white striped petals on the ground where our Scent-imental rose had abandoned its biggest bloom to the light rain overnight.  Into a bag they went and with the addition of a small deep red rose (which isn't a fragrant variety, but has the most glorious colour) I was set.

    The whole process is so ridiculously and incredibly simple.

    Rinse off the petals to remove dead grass and wildlife, dissolve 200g of caster sugar in a pan with 200ml of water over a low heat.  Add the petals, stir occasionally, cook for 30 mins never letting it rise above a nearly-simmer.  Try not to eat great spoonfuls of it as it cooks.  Strain (I strained mine through a tea strainer) into a suitable jar or bottle, cool and refrigerate.

    The only thing left to do is to then contemplate all the delicious things you can now do with your little jar of rose coloured, scented and flavoured treasure.

    Sweet, syrupy rose scented and flavoured treasure
    I put mine over some Greek yoghurt and strawberries while I contemplated.  Oh my goodness but it was good.  In fact, it was beyond good.  It was so good it actually transcends superlatives.


    If you have to go and invest in a big blowsy fragrant red or pink rose from the nearest florist, do it.  You SO won't regret it!

    For the full recipe and ingredients list go to 

    Related Posts Plugin for WordPress, Blogger...