Showing posts with label easy cake recipe. Show all posts

1 August 2015

Rhubarb Dream Bars - cakies of much deliciousness!

The good - very good - thing about having a blog called "Rhubarb and Ginger" is that every so often, someone will recommend a rhubarb recipe to me.  Which is what happened with regard to these Rhubarb Dream Bars.  I'd never heard of them before, but it seems that they're well known in the States and Canada.  I suppose it's like the gorgeous Rhubarb & Strawberry Pie, which - even though England grows some of the best strawberries available anywhere - is not a well known combination over here.

I'd had the recipe for these totally scrummy little pieces of deliciousness for a few weeks but either the butter kept being eaten before I could get to it, or we were too busy, or I just ran out of spoons (see the definition of the Spoon Theory here).

I was getting a bit fed up with not making these and was beginning to panic that our rhubarb might have dwindled before I could get the chance to make the most of it.  So as hubby was in charge of dinner and I had spoons to spare, it was the perfect chance.

I'm not sure why, but I was under the impression that it was likely to be a bit of a long process to make the bars.  I'm scratching my head about this, because it really was the simplest thing!  In fact, the hardest bit was doing the maths to halve the recipe.  The original recipe is here, but I've reproduced it below as I've made it a bit less American and this is the halved version.  If you've got two baking tins, then by all means make the full version as for sure they won't stay around for long!  However, know that they don't keep well.  You need to not seal them into whatever container you're planning on keeping them in, as they will soften very quickly.  Hence it is not worth making loads, if you're not going to be able to eat them all.

Just as an aside, I loved the fact that I could step out of the kitchen door and pick two rhubarb stalks from our plants, wash them, chop them and bake them.  Now it doesn't get much fresher than that.


So apart from knowing that the end result was delicious - after all, they'd been recommended - I had no clue as to how they would end up.  Would the base be hard, or soft?  Would the top be crumbly or spongey?  So it was a voyage of discovery that only made sense as I was creating them.  Of course, the base is very similar to a shortbread recipe, so naturally it comes out of the oven crisp and smelling deliciously buttery.  I wasn't sure how the fruit layer would react to meeting the hot base, but baking magic happens and it all does what it should, winding up with a gorgeously soft from the fruit juices and crusty from the oven, sweet and deliciously rhubarby top layer.


Have I sold you on the idea yet?

The mix for the top layer.  Unassuming, isn't it?
As for Cook's Tips, I have a few :

Because the recipe originates across the pond, measurement is in cups.  It really isn't a difficult thing to get hold of a set of cup measures, so I've left it as is and not twisted my poor old melon any further in trying to convert them.

I used salted butter for the base as I think the mixture needs the salt to bring out the best flavour.  By all means use unsalted butter though, if that's your thing.

Make sure to slice each rhubarb stalk thinly (not paper-thin, obviously) as this helps the fruit layer to not become waterlogged with juice.  The smaller pieces cook quickly and a degree of the water is evaporated during the cooking process.
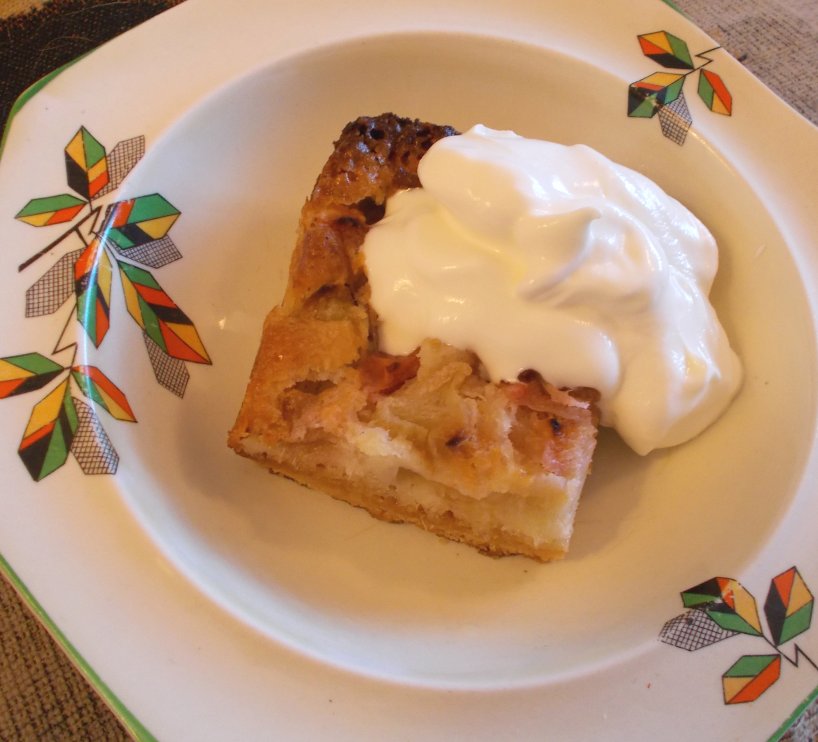
For dessert, with gorgeous Greek yoghurt

RHUBARB DREAM BARS    (makes 12)

Ingredients :

For the base
1 cup plain flour
a scant half cup of icing sugar
half a cup of butter.

For the fruit layer
2 large eggs
three quarters of a cup of caster sugar
one quarter of a cup of self raising flour
half a tsp of salt
2 cups rhubarb, finely sliced.

Method :

1.  Line a 8" square baking tin with parchment paper so that the paper extends beyond the sides of the baking tin (to make it easy to remove the cake) and lightly grease with butter.

2.  Add the flour, icing sugar and butter for the base together in a food processor and whizz until thoroughly mixed and looking like fine breadcrumbs.

3.  Tip the mix into the baking tin and press firmly with the back of a spoon until the base is smoothly covered.

4.  Bake in a pre-heated oven at 180degC/350degF/Gas4 for 10-15 minutes or until golden brown.

5.  While the base is baking, mix up the fruit layer.  Place the eggs, sugar, flour and salt into a bowl and beat until well blended.  Add the rhubarb and mix through.

6.  As soon as the base is baked and removed from the oven - and while it is still hot - pour the fruit layer on top and quickly level it.

7.  Replace into the oven for another 35-40 minutes.

8.  Cool and cut into 12 bars.

Serve with a cup of tea, or with clotted cream, ice cream or custard, for a yummy dessert.
Printable version


22 June 2015

Beautifully healthy banana, oat & chocolate munchy bars

Get this - the recipe contains no eggs, no flour and no fat other than that in the chocolate!  ~confused look~  I know!  How does it work?  Well, beautifully, is the answer - and before we go any further, I can see that this recipe would be a great candidate for those who are after a gluten-free cake recipe.  Just make sure that the oats you choose are gluten free versions.

When this recipe was drawn to my attention by a Facebook friend, I immediately thought "that has to be done".  I just couldn't see how an eggless, flourless, fatless cake bar could possibly taste like anything more than birdseed - and soggy birdseed at that.

Having made it, though, I can see how it works and what's more it takes just a twinkling to put together and I would anticipate could be adapted in many different and delicious ways.


The original recipe - which I followed to the letter .. oh hang on, no I didn't.  ~koff~  It'd be a cold day in hell when I EVER follow a recipe to the letter *chuckle* .. is here, on the Ambitious Kitchen blog.  Now you might have a more capable computer than me, but that blog slows my computer to a confused crawl, so I thought I'd blog my version of the recipe as soon as possible.


These yummy cake bars are just delicious.  We're using them as a treat to go with a cup of coffee at mid-morning or a cup of tea in the afternoon, but as you can eat them both warm and cold, I can quite easily see them with some ice cream or a spoonful of yoghurt as a dessert.  They really are that adaptable.

The flavour is reminiscent of a banana bread (perhaps not surprisingly, as the older the banana the better), but the texture is more of a sticky Brownie kind of affair.  The chocolate chips are scrummy but I can equally see them being luscious with a diced tart apple, or semi-dried apricots, coconut or even dates!  Mix and match - keep the chocolate chips but only add half and make up the rest with apple dice.  I can see there are going to be many and varied versions in our future.


Apart from how moreishly delicious they are, the BIG bonus is how easy they are to make.  All you need is a food processor, a bowl for mixing, a spoon and some cup measures.  Oh and a cake tin, of course.  Not to mention an oven, but then we're probably getting into the blinking obvious, now.  *wink*


Not that you'll have any left, but if (for some strange reason) you do, then these cake bars can be frozen.  You can freeze with or without their drizzle, just put them into a freezer container or a freezer bag - I separated mine with a layer of greaseproof paper, just to be sure - and in the freezer they go.  If you want to, once defrosted, you can give them a quick 30 seconds in the microwave to have hot versions for dessert.

There are no Cook's Tips for this one, as they're so simple to make!  So grab your ailing and old age pensioner bananas and give them a rewarding second life.  It's the decent thing to do.  (And don't forget to get the coffee or tea ready!).


31 July 2016

It's been a while since I made these, as we've been using our old aged bananas in smoothies and suchlike.  However, I wanted to make these again so I bought the bananas and announced they should not be eaten.  LOL  This time, I made the mix with apple sauce as I didn't have any mango puree to hand and included dark chocolate chips in the mix too.  The bars came out slightly lighter in colour (see above), but no less tasty and the chocolate chips were a great addition.

BANANA, OAT AND CHOCOLATE MUNCHY BARS   (makes 8)

Ingredients :

2.25 cups coarse porridge oats
0.5 tsp baking powder
0.5 tsp bicarbonate of soda
0.25 tsp sea salt
1 tsp ground cinnamon
3 very ripe bananas
2 tsp vanilla extract
0.25 cup mango puree (apple sauce is good too)
0.25 cup runny honey
100g dark chocolate chips

For chocolate drizzle:

4-5 squares of dark chocolate.


Method :

1.  Preheat oven to 180degC/350degF/Gas 4.  Oil a 9 x 9 inch square baking tin (I used a silicone version) with a little olive or light vegetable oil.  Add a strip of baking parchment as wide as the base of the tin, that extends higher than the sides, to aid removal of the cake when cooked.

2.  Place oats into a food processor and whizz until the oats resemble a coarse flour.

3.  Pour the oats into a medium bowl and add the baking powder, bicarb., salt and cinnamon.  Mix them through well and set aside.

4.  Break up the bananas into chunks and put them into the food processor.  Add the vanilla, mango puree (or apple sauce) and honey.  Whizz until all the chunks are gone and the mixture is smooth.

5.  Pour the banana mixture into the oaty mixture, add the chocolate chips and stir until just combined.  Don't be tempted to over-stir.

6.  Pour the resulting mixture into your prepared tin and level the surface.

7.  Bake for 15-20 minutes or until a skewer inserted into the centre comes out clean. Cool for 10-15 minutes in the tin, on a wire rack.  Then, using the greaseproof paper, gently remove the cake and set it onto the rack for drizzling.

8.  Prepare the drizzle by placing the chocolate into a bowl over a pan of simmering water.  Make sure the bottom of the bowl does not touch the water.  Leave the chocolate to melt and don't be tempted to over stir, or the chocolate may seize and separate.

9.  Once melted, remove from the pan of water and using a silicone spatula or the back of a large spoon, drizzle the chocolate over the top of bars.

Cut the bars into 8 pieces and enjoy!

Printable version

Related Posts Plugin for WordPress, Blogger...