Showing posts with label Extra Virgin Olive Oil. Show all posts

6 March 2017

Chorizo & saffron baked cod

First of all and before I say anything else, let me just say how much I love this dish.  We thought it up during one of our brainstorming sessions and I liked the idea immediately.  It has everything I could like about a fish dish - it's simple, it only needs a few ingredients and it involves a fillet of fish rather than some broken up pieces in a sauce.

It's hard to imagine, but once upon a time I despised fish.  Couldn't bear the smell of it and certainly wouldn't eat anything more than a fish finger. Although, the seeds were there because I would happily tuck into a fillet of rock salmon (Huss) in batter from our local chippy.  However, all that changed when I fell pregnant with our son (who adores fish of all kinds) and suddenly I was craving fish.  Weird but true.  Since then, the liking for fish has thankfully stayed with me and since we've started shopping at Lidl stores, I have discovered an affordable source of proper fish fillets.  Yay!

As Lidl had their extra large packs of cod fillet on special offer it seemed rude to not take advantage of that, hence we thought up this lovely recipe. 

I reckon that as winter is coming to a close here, that might explain why my culinary head was concentrating on sunnier recipes from warmer climes and I was thinking along Spanish lines, although I do hear tell that this is very much a Portuguese recipe in spirit.  Atlantic or Mediterranean, it's all good to me.

As I've said, I loved this dish.  The cod is beautifully cooked and the en papillote (in a bag) cooking retains all its moisture.  The lovely tasty oils from the chorizo and saffron bathe the fish and just add that extra bonus to the flavour.  Inevitably, there will be some cooking juices from the fish that amalgamate with the oils and provides a perfect light sauce so if you enjoy your fish, you're going to love the simplicity and unfussiness of this recipe.


Again, I don't have many Cook's Tips for you.  Most importantly is not to be scared and cook the fish for too long.  It's far better to open the package and then have to put it back in the oven for another 2-3 minutes, than to overcook and dry the fish out.

Now I know that saffron can be quite expensive, however this recipe isn't asking for a lot so if you can devote some saffron threads to it you'll benefit from the improved flavour.  However, if all you've got is ground saffron, don't sweat it - it'll be fine.  Just add a small amount.


So, there we have it.  This cod dish would go well with paprika roast potatoes and any kind of Mediterranean vegetable, but I served it with Nigella Lawson's rapid roastinis (to which I added some dried rosemary), petit pois and green beans, which were very good indeed.  Now, onwards to the recipe!

CHORIZO & SAFFRON BAKED COD   (serves 3)

Ingredients :

3 good sized, chunky and skinless cod fillets
2 tbsp extra virgin olive oil
2 shallots, diced finely
70g finely cut chorizo slices, cut into fine strips
a small pinch of saffron strands
10g salted butter
a pinch of ground black pepper
a small pinch of sea salt.

Method :

Firstly, cut a long strip of silver foil or greaseproof paper that is twice as long as your pieces of cod when laid in a row.  Fold it in half and lay it onto a baking tray, opening up the top layer.

Take the cod pieces and starting from the folded end, lay them along the centre of the foil right side up, then set aside.

Heat the extra virgin olive oil in a small frying pan over a moderate heat.  Add the shallots and fry for 3-4 minutes, until they have softened.  Then add the chorizo strips and the saffron and cook for another 5 minutes or so or until the chorizo has released some of its tasty oil.  Reduce the heat to low and add the butter, pepper and sea salt and stir to combine.

Spoon the chorizo mixture evenly across the top of the fish, making sure to use all the flavoured oil.  Quickly fold up the sides of the foil package, folding each side at least three times, to secure it well.

Place the fish into a pre-heated oven (180degC/350degF/Gas4) for 20-25 minutes, a little bit less if your fillets aren't of the chunky kind.  When the fish is cooked, the foil package will be puffed up like a balloon.

To serve, simply make an incision across the top of the foil package and using a fish slice, plate up each piece of fish onto hot plates, making sure to capture as many of the chorizo pieces as you can, placing them on top of the fish.  Drizzle with the cooking juices.  Serve with roast potatoes, or rosemary fried gnocchi, along with a few vegetables of your choice.

Printable version

1 March 2017

Smoked mackerel, capers & tomato spaghetti with pesto

I'm really quite proud of this little recipe, as it came about during one of our "staff meetings" when we were having a brainstorm about what we would actually like to eat as opposed to what we thought we should have to eat.  I can remember thinking, as we were contemplating complimentary flavours for it, that less is more and this was definitely one of those pasta dishes.

Now I know that smoked mackerel isn't to everyone's liking, but for this recipe I've used some honey smoked mackerel which is a lot milder in flavour than the peppered or just straight smoked versions.  I heartily recommend that you go for a sweeter type of smoked mackerel, as not doing so will affect the sweet/savoury balance.  If you just can't find any, don't despair, just add a half a teaspoonful of honey along with the tomatoes and you'll be fine.


Speaking of tomatoes, I recommend raspberry tomatoes if you can get them. They are really big, quite fleshy tomatoes with a gorgeously rich tomato flavour - and perfect for something like this.  I get mine from my local Polish delicatessen, so if all else fails, try your closest Polish shop or even an Ethnic shop if you have one.

The recipe doesn't have a sauce as such, as quite simply the extra virgin olive oil and tomatoes (devoid of seeds, but still full of juice) combine with the shallots, pepper and capers to make this dish anything but dry.  The oiliness of the smoked mackerel is tempered by the tomatoes but the secret weapon of the dish are the capers.  Every now and then your tongue trips over one and the intense flavour just wakes up your palate, all ready to again be soothed and comforted by the spaghetti and green pesto.

I hesitate to draw your attention to the fact, but this dish is also extraordinarily good for you. Nutritionally, I reckon it's probably one of the best I've come up with in some time.  But let's skip lightly over that and concentrate on how good it tastes, eh?  After all, I don't want to put anyone off it by shouting too loudly about how good it is for you.

As for the Cook's Tips, the recipe is so simple I don't have many.  Just to say to make sure that you have the spaghetti water boiling before you put the shallots on to cook, or you'll be waiting for the pasta while your tomatoes are cooking instead of heating up, which will spoil the texture if not the flavour.

Oh - and don't forget to rinse the capers.

So, onwards to the recipe!

SMOKED MACKEREL, CAPERS & TOMATO SPAGHETTI WITH PESTO   (serves 3)

Ingredients :

2 tbsp extra virgin olive oil
1 shallot, finely chopped
250g dried spaghetti
2 large full flavoured tomatoes, pips removed, diced
6 cherry tomatoes, pips removed, quartered
2 tbsp capers, rinsed of salt or brine
half a tsp ground black pepper
a good pinch of sea salt
4 honey smoked mackerel fillets, skinned, boned and flaked into small chunks
2 tbsp fresh basil leaves
3 heaped tsp green pesto, to serve
1 tbsp chopped parsley, to serve.

Method :

Begin by putting a large pan of water on to boil.

Next, heat the extra virgin olive oil over a low heat in a frying pan.  Add the chopped shallot and fry very gently until softened.

When the water comes to a boil, add the dried spaghetti and cook to manufacturer's instructions (usually around 10-12 minutes).

In the meantime, add all the tomatoes, capers, black pepper and sea salt to the shallots and just warm them through, without really cooking them.  They should be distinctly warm to the touch before the next stage.

Once the spaghetti is cooked to your preference, drain and return to the hot pan.

Add the tomato mixture, the flaked mackerel and tear the basil leaves into the pan.  Stir through gently and serve immediately with an extra splash of extra virgin olive oil.

Garnish with a good heaped teaspoonful of green pesto and a light sprinkle of chopped parsley.

Printable version

23 June 2012

Smoked mackerel & Mediterranean potato salad - Mediterranean week gets under way!

It seems as though we may very well have had our summer - but in the two days of sunshine that came our way just recently, it sparked off a desire for Mediterranean-style eating.

Ever hopeful that we might get a day or so of sun before winter is upon us again, I thought I'd share the best of the recipes.

Now you know how much hubby loves his smoked mackerel - and I do too, but to a slightly lesser degree.  Hubby will eat his smoked mackerel any way he can get it - hot or cold - but I find that a hot mackerel dish will repeat on me for a month of Sundays.  Now for all that repeated burping causes some hilarity amongst the family, it does get a bit much when it's followed by terminal heartburn - or is that too much information?

As a result, the first dish of our Mediterranean week is smoked mackerel, served cold, with an accompanying warm Mediterranean Potato Salad and a tomato & red onion salad.  If you prefer your mackerel hot, then by all means warm it up - it won't make a jot of difference to the dish.

I spotted the Mediterranean Potato Salad in the BBC Good Food Magazine and it ticked all the right boxes for both son & heir and myself.  I wasn't too sure about hubby, though, as we all know his relationship with potatoes isn't great.  Still, I crossed my fingers that the use of Jersey Royal new potatoes, together with the roasted red peppers and black olives in the dish (both of which are particular favourites), paired with mackerel might do the trick.

Well, it almost did.  It was the garlic that did for him - and oddly, it seemed to be the pairing of garlic and tomato.  Still, there's no accounting for taste - and it will be easy to leave the garlic out next time.

Both son & heir and I really liked the warm salad.  It was a lovely departure and a welcome change from using Jersey Royal New Potatoes in a traditional way (i.e. with butter and mint).  I have also taken to using English rapeseed oil instead of olive oil, now that we have found a couple of suppliers that provide affordable rapeseed oil.  This was, pretty much, my first voyage with using the oil in a salad sense - and we like it.  Rapeseed oil has a much nuttier flavour than olive (not surprisingly) and I've found that it blends very easily with Mediterranean style flavours.  Well worth doing, when you consider all the health benefits of rapeseed oil over olive oil.  If you thought olive oil was good for you, have a look at a comparison between the two.  With half the saturated fat of olive oil and a higher flashpoint which means it can be used in roasting and stir frying, it wins my vote!

It did occur to me, that the salad could be made even more Mediterranean style, by using sun dried tomatoes instead of the tin of tomatoes - but I have yet to try this theory out!

The Mediterranean Potato Salad as it stands, is simplicity itself to make and the sauce can be put together as the potatoes cook.  Paired with the simple tomato & red onion salad and an even simpler smoked mackerel, this really is a meal that takes minutes to prepare - and is good for you on all sorts of levels!

MEDITERRANEAN POTATO SALAD   (feeds 3)

Ingredients :

1 tbsp olive oil (I used Rapeseed Oil)
1 small onion, thinly sliced
1 garlic clove (optional, leave it out of you're sensitive to garlic)
1-2 tsp oregano, either fresh or dried
200g tinned cherry tomatoes (I used the other half for breakfast the next day!)
100g roasted red peppers, sliced (I used them from a jar and rinsed off the vinegar)
300g new potatoes, halved if large
25g black olives, sliced
handful of basil leaves, torn.

Method :

1.  In a small saucepan, heat the oil and add the onion.  Cook on a gentle to medium heat for 5-10 minutes until soft.

2.  Add the oregano and continue to cook for another minute.

3.  Add the tomatoes and peppers, season well and simmer gently for 10 minutes.

4.  Meanwhile, cook the potatoes in a pan of boiling salted water for 10-15 minutes or until tender.  Drain well, mix with the sauce and serve warm, sprinkled with olives and basil.

Printable version
.

2 September 2011

Lemony new potatoes

Not so fattening - the majority of the dressing falls off!
I was looking for something to go with the Tenderstem Broccoli & Bacon Quiche, when I remembered I had part of a bag of pearl new potatoes left.

Immediately ('cos I love the stuff), I thought "potato salad!".  However, that thought was swiftly dampened by the memory that I was supposed to be watching the fat content of food and perhaps lashings of mayonnaise wasn't quite the thing - even if they were diluted by greek yoghurt.

There then came to mind the many recipes I've seen for a new potato salad that involves lemon zest and juice.  Now these had intrigued me, as I couldn't really imagine how the two would taste together, yet it very definitely appealed.

I didn't have time to consult my recipe book of choice - t'internet  - so had to rely on my memory of the many recipes I'd seen, together with what was available in the fridge at the time.

So, I got the potatoes on to boil (accompanied by a couple of sprigs of mint, because new potatoes without mint just can't be done, right?) and considered the dressing.

Lemon zest was a must, as was lemon juice, so they were easily put into a bowl.  Then I considered what would turn them into a dressing, so on came the Extra Virgin Olive Oil - but not so much that I would feel I might as well have opted for the mayonnaise.

It needed another dimension, so I considered what it was going to be eaten with - and bacon (in the quiche) likes mustard, so in went a teaspoonful of wholegrain mustard.  Next came the ubiquitous seasoning and I paused to taste.  Wow!  Not bad, but missing some savoury elements.  So in went a half a small clove of garlic, grated, and the green part of one spring onion, chopped fine.  Mmmmn .. that tasted good!

So, once the potatoes were cooked, I removed the mint, drained them well and added them to the dressing.  They were tossed liberally in it and allowed to cool until they were just warm.

Do you know, I may just have come up with a contender for the mayonnaise-based potato salad.  It was completely delicious - and just as good when eaten cold the next day!

LEMONY NEW POTATOES (serves 3)

Ingredients :

Enough pearl new potatoes for each person.
a couple of sprigs of fresh mint
sea salt.

For the dressing :
1 lemon, zested and juiced
2-3 tbsp extra virgin olive oil
half a clove of garlic, grated
half a tsp sea salt and freshly ground black pepper
1 tsp wholegrain mustard
1 spring onion, green part only, chopped fine.

Method :


1.  Bring a pan of salted water to the boil, add the potatoes and mint and simmer until cooked (around 10 minutes).


2.  Drain, remove the mint and add to the dressing :


3.  In a large enough bowl to take the potatoes, add the ingredients for the dressing and whisk lightly to combine.

4.  Add the potatoes and toss liberally in the dressing.

5.  Serve warm.  It is worth leaving the potatoes to steep in the dressing for 5-10 minutes before serving, as they will soak up all the lovely flavours.


.

14 August 2011

Crunchy Baked Pork, Baked Sweet Potato and Tomato Salad

It's a bit of a long title that one, isn't it?  However, the title is the hardest part of this meal - and I'll treat it as a meal, rather than three separate dishes, as it all went so well together.  With no pots or pans to wash up, this one is definitely a winner in my book!

To begin with, I set to with scrubbing the sweet potatoes.  Their skins never appeal as far as eating them is concerned - although they're very tasty, in fact - but I like to make sure they're scrupulously clean, all the same.  I always top and tail them too, as these bits always seem so gnarly, I can imagine dirt can't help but hide in there.  If I was dirt, I would.

I then dry them off, rub them with olive oil, liberally sprinkle with salt & pepper and into the oven they go for their first half an hour.

Next, I tackled the pork steaks - which was easy enough.  They just needed the bulk of the fat trimming from their backs and they were good to go.  Dustbin 1 (Jonty) was on hand for this operation, just in case there wasn't enough room in the actual bin for the offcuts.  He's a thoughtful dawgie, like that.

Next job was to make up the flour/egg/breadcrumb plates.  The flour was easy enough, or so I thought.  It seems that the abortive gnocchi attempt had used up all our plain flour, but fortunately we had lots of bread flour, which got used instead.

I consulted the recipe (which again, I can't remember where I got it from.  I am SO going to have to keep a note of recipe sources)  as to how much dijon mustard to use in the egg mix.  I had copied down three tablespoonfuls!  Surely not!  I pondered this for a while, then decided on three teaspoonfuls as being the far more sensible alternative.  As it was, I would only use two teaspoonfuls in future, as it had far too obvious an influence on the overall flavour, I felt.

Next, was the breadcrumbs, garlic and herbs.  I quickly ran two slices of Oatilicious bread across the grater to create the 1 cup of breadcrumbs.  Next, I grated two cloves of garlic in there, then chopped a tablespoonful of fresh parsley and a teaspoonful of dried tarragon.  If I could have found fresh tarragon, I'd have used it.  However, Mr Asda hadn't heard of fresh tarragon, so that was that.  In retrospect, I'd cut the garlic down to one clove, as it did tend to slap you around the face a bit.  Between the garlic and the mustard, I'm afraid the tarragon took a very back seat - which wasn't how it was supposed to be, I'm sure!

So, on with the dipping.  First in the flour, then the egg mix, then onto the breadcrumbs.  It occurred to me then, that I had no idea whether I was supposed to be breadcrumbing one side or both sides.  Although the one side I had done, had used an enormous amount of the breadcrumb mixture and I really wasn't sure it would last for all six.  Still, it didn't seem to make sense to do just one side, so after a bit of judicious dusting off, I breadcrumbed both sides.  In fact, I ran out of breadcrumbs towards the end and the last two had just one side breadcrumbed - so I'd make a little more, the next time I do this one.

Something else that I would make sure to do, is to turn the steaks halfway through cooking.  Because I didn't do this, one side was crunchy and the other a tad soggy - which was a shame.  However, you live and learn.

Once the Pork was safely in the oven and the Sweet Potatoes had been turned, I got on with the Tomato Salad.  It was a simple matter of slicing two large vine ripened tomatoes and some cherry tomatoes.  Then add liberal amounts of freshly ground pepper, a sprinkling of sea salt, a drizzle of balsamic vinegar and likewise of extra virgin olive oil.  Next, slice up a red onion and sprinkle that over the top, along with a little of the parsley - or basil, if you've got it.  Leave to let the flavours mingle for some 15-20 minutes before serving.

So, the last thing to do was the Chilli cream to go in the Baked Sweet Potatoes.  Again, this is incredibly easy.  Decant a small pot of soured cream into a bowl, add finely chopped fresh red chilli and some finely chopped parsley.  There is an alternative, which involves coriander instead of the parsley and lime zest.  I love this particular version, however son & heir isn't good with lime, so we had the parsley version.

I loved this meal, even though the Pork was way too garlicky for my taste.  Hubby had problems with the garlic too, and found the Pork wasn't tender enough for his preference.  He loved the Baked Sweet Potato and chilli cream, plus the tomatoes.  Son & heir ate everything except the last half of his sweet potato, which was incredible considering what a fussy-pants he's becoming.  He even ate the cherry tomatoes with balsamic on them!  Mind you, I didn't tell him about the balsamic.  *wink*  I thought I'd just wait and see.

So, apart from the problems I've outlined above, I think next time I'd flatten out two of the steaks in the hope that they would be able to become more tender during the cooking process.  I can't think of any other way of ensuring they come up more tender that doesn't include par-cooking them before adding the egg and breadcrumb mix, which isn't the best route!

Here's the recipe for the Pork, if you need the recipe for either the potatoes or the tomato salad, just let me know and I'll include them.

CRUNCHY BAKED PORK (feeds 3)

Ingredients :

6 pork steaks, or 3 pork chops
1 cup of plain flour
1 egg, whisked lightly
2 tsp Dijon mustard
1 cup of breadcrumbs
1 clove garlic, grated
1 tbsp chopped fresh parsley
1 tbsp chopped fresh tarragon
sea salt & freshly ground black pepper.

Method :

1.  Pre-heat your oven to 180deg C/350 deg F/Gas mark 4.

2.  Trim the pork of the majority of its fat and prepare a roasting tray to receive it once coated with breadcrumbs.

3.  Then, prepare three plates - one with the flour, plus some seasoning.  The second with the egg and mustard mixture and the last with the breadcrumbs, garlic and herbs.

4.  Dip each steak or chop into firstly the flour, then the egg, then the breadcrumbs and place it onto the roasting tray.

5.  Once every one is coated, place the roasting tray into the oven for 15 minutes.  At the end of that time, remove from the oven and flip over onto its other side.  Replace and bake for another 15-20 minutes, or until they appear to be done.

6.  Serve.

.

30 July 2011

Birthday lunch (there's going to be a "birthday dinner" later, you're right)


Ciabatta-style bread, drizzled with extra virgin olive oil, char-grilled.

Then rubbed with garlic and grilled again.

Then the vine ripened tomatoes were char-grilled, while the basil went onto the rolls, followed by the tomato when it was done.

Balsamic vinegar was then drizzled over the tomatoes and salt & pepper added, before a final flourish of Feta cheese.

Absolutely divine.

.

1 June 2011

The hummus muse hath struck!


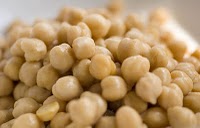
Since forever, my hubby has been saying to me “you should make your own hummus, you know” (much in the same way as he’s now saying “you should make your own gnocchi”).  So while the gnocchi still waits, I overcame my reluctance and bought some Tahini paste (which is made from sesame seeds), dried chickpeas – and waited for the muse to strike.

Well, the muse took her time – as 6 months down the line, I’ve just made my first batch of hummus.  I found that the first problem was remembering to put the chickpeas (also known as "little bums" - well, have you looked closely at one?) on to soak the night before.  Yes, I know you can use tinned chickpeas, but if reports were to be believed, the best hummus comes from dried, soaked and boiled chickpeas rather than tinned.  I am also controlled by the “I’ve got to do it RIGHT” muse, by the way.

So, having managed to remember to soak the chickpeas, I was then committed to doing something with them the next day.  The cooking of the chickpeas was easy enough – into a pan with a teensy amount of salt and a whole heap of water, boil for an hour.  Sorted.  Tasting them thereafter, I realise now why hummus purists prefer the dried version.  The flavour is far superior.  So anyway, I procrastinated as long as was possible over the next stage, then got on with it.

Chuck the chickpeas into a food processor, add olive oil, Tahini (I suggest you start with just a little and work your way upwards – basically because you can’t take it out once it’s gone in and it is a very strong flavour), a good quantity of lemon juice, a squashed garlic clove and some salt & pepper.  Blitz until the mixture runs smoothly, adding olive oil as you go, to get the right texture.

I found it was a trial and error thing with the quantities of olive oil, lemon juice and salt.  Very much a personal taste issue.

However, it really wasn’t as big a deal as I was thinking it might be.  It was really quite easy – and the hummus is a very forgiving substance, which you can blitz and taste, blitz and taste, without it getting all huffy and going wrong like egg whites will, in similar circumstances.

Of course, I got the quantities wrong and made an industrial sized quantity – so I’ll be scaling that down for future hummus makes – but it was really very nice indeed.  I ate it with a drizzle of olive oil and some cayenne pepper sprinkled on, with mini carrots and some little salty biscuits and it made a very yummy mid-film snack.


20 May 2011

Bonus dish : Mouttabal or Baba Ghanoush - you tell me!

If you've read about the Char-grilled Vegetable Couscous I made earlier this week, you will know that the Aubergine I was sent in this week's supermarket order, was E-NOR-MOUS.  It only required half (and the smaller "half", at that) for the couscous, which left me with a huge great lump with no home to go to.

I was mentally half prepared for this eventuality, however, as I had already flagged up (just in my mind - although how I can remember these things, when I can't remember names or words I've known for donkey's years, is beyond me) the roasted aubergine dip (whose name is a matter of contention, as you'll see) for occasions such as this.


So, I char-grilled the remainder of the aubergine at the same time as doing the vegetables for the couscous, and put it in the fridge to await a proper recipe.


It seems as though finding a "proper" recipe for Baba Ghanoush is about as easy as finding a "proper" recipe for Cottage Pie.  Everybody agrees on three ingredients, which are aubergine, olive oil and lemon juice.  After that, it seems like it's open season on ingredients, which is all very confusing.  However, having read what felt like a whole bookload of recipes, I settled on one which seemed to show the most promise where flavour is concerned, without being terribly complicated.

However, having read Oliver Thring's treatise on the humble aubergine this morning, I am now wondering whether I made Baba Ghanoush, or its very similar cousin, Mouttabal!  It would seem as though the only difference between the two is down to the addition (or not) of Tahini paste.  Well, my recipe definitely included Tahini paste, from which I detect that I may very well have made Mouttabal.

Either way, it's really rather delicious.  I won't claim to have made the best ever and I am sure that if I made it again, I'd change the quantities to those set out below, which I am convinced would result in a more balanced flavour - but it's definitely a "do again".

BABA GHANOUSH or MOUTTABAL (Smoked aubergine dip)

Ingredients :

1 aubergine, sliced and char-grilled, then removed from its skin.
half a garlic clove, grated (add more, if you like more garlic)

2 tsp Tahini paste
extra virgin olive oil, as necessary
sea salt
lemon juice to taste.

Method :

1.  Take the aubergine flesh and pop it into a food processor capable of reducing it to a paste.

2.  Add the garlic, Tahini paste and as much olive oil as is necessary.  Blitz to a paste - you might want to add some more oil if it isn't loose enough, but remember you are adding lemon juice next, so don't overdo the oil at this stage.

3.  Add a pinch of sea salt and the juice of half a lemon and blitz again.

4.  Taste and add more salt, oil or lemon juice, if necessary.

5.  The end result should be a light, mousse-like consistency that can be used as a dip or spread onto flatbreads.

.
Related Posts Plugin for WordPress, Blogger...