Showing posts with label preserves. Show all posts

18 September 2015

Watermelon & lime marmalade

I'm a bit in the habit of posting photographs of a particularly yummy breakfast or lunch to the Jenny Eatwell Facebook page.  Well, I like to share.  What can I tell you?  Having done so of hubby's new brew of Watermelon Rind & Lime Marmalade, quite a few people have shown just as much interest in it as we did when we first saw the recipe, here : http://food52.com/blog/13793-stop-throwing-out-the-best-part-of-the-watermelon .  The recipe has had quite a journey, having originated with Olia Hercules' cook book Mamushka, then been slightly adapted by Food 52's Kristen Miglore, before coming to roost with us!

A typical Facebook breakfast post - duck egg & marmalade.
The words "watermelon rind" caught my attention to begin with, as it begs the question "the green bit?".  Apparently not, however.  You peel off the green bit and use the white bit that's in between the fleshy layer and the outer green rind.  So, truth be told, it should be called "Watermelon pith and lime marmalade", but that doesn't sound very appealing.

So having established we're talking about a semi-edible bit of the watermelon, my attention is next caught by the idea of pairing it with lime.  I love lime.  Anything lime gets my vote, instantly.

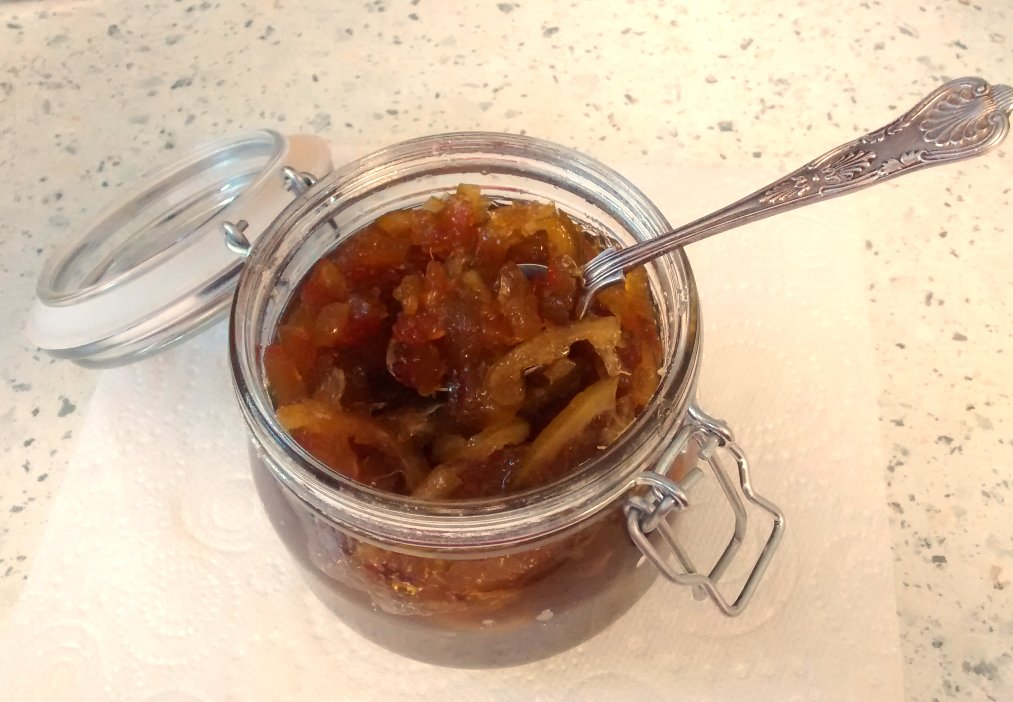
Well hubby was so intrigued, it became one of those "it has to be done" things.  So he did and I love it.  It has a really strong, bitter flavour that is akin to Frank Cooper's Vintage orange marmalade, which I love.  However, hubby finds the lime peel to be sliced too thick and the melon pith to be cut too small.  I do agree with him that slicing the lime ultra-thin, maybe just zesting some of the peel and leaving the watermelon pith a lot bigger, would have altered the balance of power between the two flavours, bringing the watermelon to the fore.  The watermelon undergoes quite a transition in the cooking process, becoming glassy and almost crystalline in structure, winding up looking like little square sweeties.  It tastes divine, but does have a tendency to be knocked sideways by the lime, currently.


Once I've eaten this batch (because I'm the only one who likes it), we're going to give it a go with the thinner lime zest and bigger watermelon pith - just to see what happens.  I can't say whether it'll work - but even if it doesn't, you'll still have a fantastic marmalade for your toast!


The fallback position of "hmmn, it's just the same" is fine by me!

WATERMELON & LIME MARMALADE  (Makes two 450ml (3/4 pint) jars)

Ingredients :

500g watermelon pith (sweet red flesh removed, green skin removed), diced
300g golden caster sugar
4 limes, halved and thinly sliced (or quartered and finely sliced).

Method : 

Mix all the ingredients together in a container (plastic or glass, preferably), cover with cling film, and leave in the refrigerator overnight.

Using a non-reactive saucepan, pour in the ingredients and cook gently over a low heat until the sugar is all dissolved.

Bring to a boil and cook at a lively simmer for 50 minutes or until the watermelon skin turns translucent.

The marmalade should reach setting point (where a small amount dropped onto a cold surface will develop a skin as it cools) before you remove from the heat.

Once at setting point, pour into 2 warm sterilized 450-ml (3/4 pint) jars, seal and cool.

The marmalade should be stored in the refrigerator and should keep, unopened, for several months.

Printable version

1 October 2012

Small batch chutney making : Spiced Rhubarb Chutney

Ever since Ruby our rhubarb plant, started to get really (no, really) big, hubby has been saying "we should make some rhubarb chutney".

Now I had a go at it, waaay way back when, which wasn't all that successful.  It tasted fine at the time, but I always know when something hasn't been as successful as it first seemed, because a) nobody eats it beyond the first day and b) nobody asks for it again.

So I'd been on the lookout for an "interesting" rhubarb chutney, but to no avail.  Everything just seemed like ordinary chutney, or was a "something else and rhubarb chutney", which would meant that the rhubarb took a back seat instead of being the star of the show.


Rhubarb, shallots, vinegar & spice - just starting to cook
As the year progressed, I was running out of time.  Ruby had burgeoned and been cropped twice and her growing year was coming to an end.  Then, sudden high winds overnight (no chortling, please - not THAT kind of "high winds"), left her battered, bruised and in desperate need of cropping.  Oddly, her daughter (Ruby 2) was left untouched by the gusty conditions, so we've got more rhubarb to come yet.

Cooking down and smelling amazing!


Hubby took the mighty kitchen knife and went out there last week and cropped a vast amount of rhubarb from Ruby.  We gave huge amounts to a neighbour and kept a small mountain for ourselves.  So far, that mountain has made this Spiced Rhubarb Chutney and a delicious Spiced Rhubarb Fool (yes, I'm big on spice at the moment).

I have no idea what to do with the remainder of the mountain, except make some more chutney, perhaps!

You see, this chutney is good.  No, it's very good.  The rhubarb is, without doubt, the star of the show and the mixed spice has served to warm it up beautifully.  The combination of the shallot, garlic and cider vinegar has had an amazing effect upon the tang and sharpness of the rhubarb.  Instead of being rendered a savoury version of a rhubarb jam, this is very definitely a tastebud tingler of a chutney.

The recipe had been in my hands all along.  I'd been given a book - The Complete Book of Preserving by Marye Cameron-Smith - a long time ago, by the lovely Laura Cousins.  I'd looked through it at the time, but it has since sat on the shelf doing nothing.  So when faced with a mountain of rhubarb, my thoughts became rather more focused and I suddenly remembered the book.  A quick peek inside led me to the Rhubarb Chutney recipe, which was so simple it just begged to be made.

It is, however, a very British chutney.  It's not the kind of chutney that you would have alongside a curry, for instance.  It is very definitely best with some salty, strong cheddar cheese - and in fact, when taste testing this batch (before it was cold, even), we'd got through a good percentage of our block of cheese.  Yup, it was that good.  I'm sure it would be fabulous with a pork pie, or some sausage rolls, too.

Because we don't have oodles of empty jars, nor oodles of empty cupboard space for the filled jars, I went for the "small batch" approach, in the same way as my jam making.  Being just a scaled-down version of the original recipe which made 6 pounds of the stuff (yes, I had to get the calculator out - my maths just isn't up to being able to work those sorts of sums out - and even then, I had to ask how many grams there was in a kilo), I saw no reason why it shouldn't work - and it did.

Next time, I'm going to make rather more and - ssssh! Don't tell! - use them as Christmas presents for those people who have everything and you just can't think of what to get them.  As hubby commented, well, money can buy just about everything - but it won't buy you this chutney!


Oh, and as a "cook's note" - I used the ultra-deliciously-gorgeous Maille Cider Vinegar.  If you should decide to have a go at this one, I heartily recommend you use it too - and why not have a teaspoonful neat while you're at it.  Your saliva glands will go into overdrive, but it's an experience that just has to be sampled.  I drink it by the tablespoonful now, as it seems to do good things for my arthritis.


SPICED RHUBARB CHUTNEY  (makes one large jarful)

Ingredients :

230g fresh rhubarb, sliced
38g shallot, sliced finely
a tiny grate of garlic (one third of a clove and no more!)
1 heaped teaspoonful of mixed spice
pinch of sea salt
85ml cider vinegar
85g granulated sugar.

Method :

1.  Into a small stainless steel pan, put the rhubarb, shallot, garlic, spice, salt and half the vinegar.

2.  Bring to a boil and simmer until the rhubarb is very soft.  I added a teensy tablespoonful of water as my rhubarb was resisting softening and the pan was running out of juice.

3.  Add the sugar and remainder of the vinegar and stir gently until chutney has thickened.

4.  Decant into a container and leave to cool.

Store in the fridge.

Printable version

13 August 2012

Rhubarb & Ginger Jam - well it was about time!

Long overdue, I'd say!

Having occurred to me that I had yet to blog anything Rhubarb & Ginger flavoured - if ever there was a missed opportunity, it's that one - I resolved to do something about that.

Now Ruby is, as ever, on a mission to take over our little garden - so I had no shortage of rhubarb.  In fact, we've had to crop her once and there was so much of it we gave rhubarb to all the neighbours whether they wanted it or not.

Sugary rhubarby promise of jam
Ruby 2 has yet to be cropped, but she's now in "young adult" stage and I can see that we're going to have to take a crop from her very soon - if we want to be able to see down the garden, that is.

I had taken the pinkest and prettiest stems from the crop to make jam with.  It's worth being colour-ist in this way if you're going to be making jam, because it's so much nicer to have a pretty pink jam, than a slightly muddy greenish jam.  Save the greenish stems for a nice pie, or maybe a crumble.

It had been a while since I'd made any Small Batch Jam and I'd completely forgotten the details as to how, but the trusty blog came to the rescue and here I give details on what to do.

Hotter than Eva Longoria modelling lingerie
I set to and washed the rhubarb, then cut it into jam-sized pieces.  I knew that I wanted the jam to retain some of the tartness of the rhubarb, plus I wanted to use some of the stem ginger syrup from the jar, so reduced the amount of sugar by around a quarter.  It always seems to me to be such a waste to throw away that beautiful gingery syrup that stem ginger comes with - and including it in jam is a perfect way of using it.

I was also aware of the fact that I didn't want the heat of the jam's cooking process to affect the flavour of the ginger pieces.  They would be cut so small, I felt it would be easy for them to become overcooked in the process if I added them from the beginning.  I'm not sure if ginger's flavour does change if it is overcooked, but imagine it would do.  Most things taste different if overcooked!  So, although I added the syrup at the beginning, I opted not to add the ginger pieces until the very end.  It was a bit of a gamble, I will admit - but one which happily paid off as the ginger flavour was pronounced but not overpowering to the rhubarb.  Gorgeous!


I've just passed some of this jam on to my Mum & Dad (as ever, I made too much!) and are waiting to hear how they like it.  I'm hoping they'll enjoy it, as we like it a lot.  I have to admit that we've even used it like a compote and added a couple of teaspoonfuls to a bowl of vanilla ice cream.  Now that really was delicious.

As ever with small batch jam, you can't keep it out of the fridge as the pots aren't sterilised.  However, if you want to sterilise your pots, you would be able to keep it sealed for as long as any jam can be kept.

It's undoubtedly the season for jam, plus scones - and maybe hot buttered toast and jam with a cup of steaming tea on those rainy days.  Personally, I think the satisfaction of knowing that I made the jam is very definitely worth every second of the short time it takes to make.

SMALL BATCH RHUBARB & GINGER JAM

Ingredients :

sticks of the pinkest rhubarb you can find - I used 8 or 9 large sticks
granulated sugar
stem ginger pieces - I used 5 walnut sized pieces (from a jar, not fresh)
3-4 tbsp ginger syrup from the jar.

Method :

1.  Wash and slice your rhubarb into smallish chunks.

2.  Weigh the rhubarb and take note of its weight.

3.  Place the rhubarb into a suitably sized non-reactive saucepan add 1tbsp of water and begin to heat on a high heat.

4.  Weigh out slightly less than the weight of the rhubarb, in sugar.  For instance, if you have 400g of rhubarb, I'd use around 310g of sugar.

5.  Once the rhubarb has begun to sizzle, is looking juicy and like it is beginning to soften, add the sugar and the ginger syrup.  It is worthwhile not adding the sugar until the fruit has begun to soften, as if there is a lack of liquid in the saucepan you can wind up with caramel beginning to happen, which can taint the flavour of the jam.  If your rhubarb appears dry, simply add a little more water.

6.  As the rhubarb cooks and the sugar dissolves, stir regularly to prevent it catching on the bottom of the pan.  Burnt rhubarb isn't very nice.

7.  Quickly chop the stem ginger pieces into a mixture of sizes - the largest of which should be no bigger than a quarter of a teaspoon.

8.  The jam will boil, at which point you need to take care not to connect with it as it is hotter than the surface of the sun (or seems like it) at this moment.  A long handled wooden spoon is to be recommended, for stirring with.

9.  Allow the jam to boil, as you need to cook off the majority of the water from the fruit.  How long this process takes depends entirely upon how much jam you're making.  For the ingredients I used, above, it took around 15-20 minutes.  You'll know when you are getting close to "jam", as the feel of the stirring will change.  Each pass of the spoon will become easier as the mixture changes from slightly granular to smooth glossiness.

10.  At this stage, get ready a metal spoon and a saucer of cold water.

11.  Once the jam has reached your preferred thickness - and is feeling glossy - drip a little into the metal spoon and see how easily it runs.  If you're doubtful still, drip a little into the water on the saucer.  Does it set quickly?  Can you run a finger through it without it dispersing into the water?

12.  Once the jam is demonstrating that it is setting well, remove from the heat and stir in the ginger pieces.  Set aside and allow to cool.

13.  Once at a safer temperature, decant into your pot of choice and put some bread into the toaster.  Well, you have to taste test your recipe, don't you?

Printable version
.   
Related Posts Plugin for WordPress, Blogger...