Showing posts with label nutmeg. Show all posts

16 September 2017

Chicken sausage, pea & courgette risotto - fresh and tasty!

As much as I would like to, I can't take credit for this delicious risotto recipe. No, that accolade needs to go to Heck Sausages. However, I found the recipe because it was featured on lovefood.com 
with credit going to Heck - so I suppose this is the great-grand daughter recipe recommendation, if you like!  I have changed the recipe a tiny bit, but it's only re-organising the order of play and not changing the ingredients.  Now I could have just placed the link here and not bothered to reproduce the recipe, but I have learned that sometimes favourite recipes disappear from the internet never to be found again - so I'm immortalising it here for future reference.

If you're still with me after such a meandering explanation, well done.  LOL


It has been ages since I made a risotto.  Hubby is ordinarily the risotto chef in our house - and he does a cracking job at it too.  However, he was otherwise engaged so I decided to give it a go.  I'd made some good risottos in the past, so my track record wasn't bad.

For all that it is currently autumn - and a good time for risotto - I have to say that this recipe would be very much at home in a springtime capacity.


The addition of the courgette and petit pois, with the light touch of the chicken sausages, definitely made us think of the relief of coming out of the heaviness of winter and into a relatively lighter menu, as spring comes around.  However, as all the ingredients aren't reliant upon seasonal produce (although, again, it is the perfect time for young courgettes), you can enjoy its fresh tasting loveliness at any time of the year.

As with all risottos, they live or die on the quality of the stock you are using. So at this point I have to blow my Essential Cuisine trumpet once again.  I used 75% Essential Cuisine chicken stock and 25% Essential Cuisine vegetable stock for this risotto and it was fantastic.  The very best part of the Essential Cuisine stable of stocks is their wonderfully intense flavours, however, because they are a stock powder (and they have a new range of liquid stocks, too) it is so simple to just increase the intensity by adding another half a teaspoonful as required.  For a risotto stock, this works perfectly.  So - I recommend them.  'Nuff said.


As for Cook's Tips, I have two :

Firstly, I wasn't looking forward to the unzipping the sausages and separating the sausagemeat into individual little meatballs.  It's a gacky thing to have to do, even if you baste your hands liberally with cold water so that the sausagemeat doesn't stick.  Then, I had this brilliant idea.  I unzipped each sausage from its skin, ran my chef's knife under the cold water and chopped each sausage into five pieces.  It worked, too!  You have to wet the knife in between each sausage, but it is SO much more of a pleasant way to do it.

Lastly, if you're wondering what pan to use to cook the risotto in, well I used our new wok.  It's quite compact, with high walls and fits nicely onto each burner so there are no cold spots to contend with.  So if, like me, you were worried about the rice catching on the bottom of your pan and/or can't see in to the top of a tall pan (alright, so I'm short and most unhelpfully, have to sit to cook), consider using a wok.  It worked absolutely perfectly for me.

So, without further ado, here's your recipe :

CHICKEN SAUSAGE, PEA & COURGETTE RISOTTO    (serves 3-4)

Ingredients :

1-2 tbsp olive or rapeseed oil
8 chicken sausages (Heck or Asda are our favourites), skinned and each sausage formed into 5 small meatballs
450g approx of courgettes, cut into half centimetre dice
1 sweet onion, diced small
2 cloves of garlic, chopped finely
125g Arborio risotto rice
pinch of sea salt
quarter of a tsp ground black pepper
1 litre of good quality hot chicken stock, or chicken/vegetable combined
half a tsp of ground nutmeg
1 heaped tsp of Dijon mustard
300g defrosted petit pois (peas)
1 handful basil leaves (I used Thai basil as we prefer it)
grated Grana Padano, Parmesan or Manchego cheese to garnish.

Method :

Heat the oil in a large frying pan and once heated, add the sausagemeat balls. Fry on a medium/hot heat until deeply golden on at least three sides, then remove from the pan into a bowl and reserve.

In the meantime, make up the stock in another saucepan and place on the heat to simmer.  Just before you are due to add the peas to the risotto, give them a few minutes in the stock pan to take the rawness off of them and heat them up.

Leaving the sausage flavoured fat in the pan, add the chopped courgettes and fry until just beginning to soften and take on colour.  Remove from the pan to the same bowl as the sausage balls and reserve.

Decant what little fat is left into a high sided saucepan or wok and add a little more oil if necessary.  Once the oil is hot, add the onion and garlic and fry over a medium/hot heat until softened and transparent.  Add the sea salt and black pepper and stir through.

Increase the heat under the pan to maximum and add the dry rice.  Stir well, to cover the rice in the flavoured oil and cook until you can see the rice is beginning to toast.  Add a ladleful of the stock and stir well, to release the starch from the rice.  Add the nutmeg and Dijon mustard and stir in.  Once the stock has all but disappeared, pour in another ladleful and stir consistently - it is the stirring that ensures you wind up with a creamy texture to your risotto. Once the pan is again almost dry, repeat with another ladleful of stock and continue this way until the rice is very nearly cooked through.  You may find that you have a little too much stock, or you may need to add a little boiling water as your last ladleful - it all depends on how much you stir and how starchy your rice is.

Add the petit pois along with your last ladleful of stock and stir through, then add the courgette/meatball combination and stir through.  Make sure to bring the pan contents to piping hot and add the torn basil.

Serve immediately, on warmed plates and with grated Grana Padano or Parmesan cheese as garnish.

Printable version

6 January 2015

Spiced Blackberry and Apple Lattice Pie

First of all, a very belated happy Christmas and a happy new year to you all!

I do apologise for being so belated and missing out on posting seasonal goodies, but I've been laid up with a sad case of cellulitis which led to an additional case of gout, in my left leg and ankle.  Not surprisingly, I've done quite a bit of staring at the same four walls from the dubious comfort of my bed, whilst hoping that the painkillers will work for a bit longer.

I'm not quite back on two feet yet - let's say it's one and a half feet, currently - but I do have a nice backlog of yummy things that we ate before I succumbed, to pass on to you.


So, initially, let's go a bit random for Rhubarb & Ginger and talk about dessert pies.  Well, to be specific, a spiced blackberry and apple lattice pie of much loveliness.

The very best time to be making this pie is in the Autumn, when the blackberry vines are laden with fat fruits.  However, as we now have the convenience of that wonder of the kitchen, the freezer, those fat fruits can be picked and frozen so that you can enjoy this pie whenever you so please.

Blackberries freeze incredibly easily and defrost really well, so you've no excuse.  Come next autumn, send the entire family out with a plastic container to go and seek blackberry loveliness.  Of course, the other advantage to freezing blackberries is that it will kill any wigglies that may be residing in your fat fruits.  A quick and gentle wash before you freeze them (laid out in one layer on a baking tray is the best way.  You can decant them into a freezer box once frozen and that way, they don't stick together) and a bit of an inspection once defrosted and said wigglies will be a thing of the past.

My blackberries came from my Aunty Joyce's garden and are enormous!  They definitely needed making into a pie, so as to maintain their shape and integrity.  It would have been criminal to have mushed them into a coulis or some such.

It was only as I was making the pastry, that I suddenly thought about the spicing aspect.  After all, I would spice an apple pie - and having made spiced blackberry compote before, I knew everything was compatible.  I think it gave an interesting edge to the fruity flavours that made the pie taste especially home made - which is very satisfying.


Now, as regards any Cook's Tips, the main one I have for you is not to skip the microwaving of the apple pieces.  You see, the apple - particularly if it is a Braeburn - will take a lot longer than the blackberries to cook and you don't want rock hard apple beside soft blackberries.  However, the good thing about Braeburns is that they don't dissolve to mush.  If you don't have a microwave (and I know not everyone does), then put the apple into a pan with a tablespoonful of water and cook on a medium heat until softened.  After that, treat them like the microwaved versions.

Naturally, you don't HAVE to make the top of your pie latticed - you could just lay a piece of pastry across and create a normal type of pie if you don't have the time or inclination to do the latticing.  However, it isn't difficult and - so long as the fruit is cool - only takes a few minutes longer.  It does look good, too!

Likewise, the almond pastry is not essential either, but it does go so well with the fruit and the almonds give the pastry a lovely sandiness that texturally is interesting on the tongue.  However, if you want to make an ordinary sweet shortcrust, who am I to say you nay?


Whatever way you make this pie, the combination of the spices, apples and blackberries are just incredibly homey and scrumptious.  I doubt you'll have much left!

SPICED BLACKBERRY AND APPLE LATTICE PIE    (serves up to 6)

Ingredients :

165g plain flour, plus extra for dusting
25g ground almonds
55g sugar, plus 3 tbsp for the fruit, plus a little for sprinkling
120g chilled unsalted butter, cubed
2 medium eggs, used individually
2-3 Braeburn apples
A good quantity (as many as will fit!) of blackberries
1 tsp ground cinnamon
half a tsp grated nutmeg
quarter of a tsp ground cardamom.

Method :

1.  Make the pastry by stirring the almonds into the flour and adding the sugar.  Stir through.  Rub the butter into the mixture until you have what look like breadcrumbs.

2.  Add one egg - bit by bit - until you have a soft not sticky, dough.  You may not need the whole egg for this.

3.  Form the pastry into a disc, cover with cling film and leave in the fridge to rest for at least 3 hours.

4.  Cut the pastry into two sections - a third and two thirds.  Using the two thirds, roll out and line the pie dish with the pastry, making sure you have no air bubbles.

5.  Line with baking parchment and fill with baking beans, then bake at 180degC/350deg F/Gas 4 for 20 mins, then remove the baking beans and bake again for 10 mins until the pastry is dry and sandy.

6.  In the meantime, sort the blackberries.  You want to remove any that might have mildew or damaged areas.  Peel the apples and cut into small chunks and place in a bowl, then microwave until they are softened and just beginning to break down.  Leave to cool a little.

7.  Once cooled, add the blackberries.  Add the spices and sugar (use your intuition as to how much sugar you will need.  If the apples and blackberries are particularly tart, add a bit more) and toss gently to coat evenly.

8.  Tip the spicy fruit into the part baked pastry, along with any juice.

9.  Roll out the one third piece of pastry and cut long thin strips.

10.  Using the second egg, egg wash around the edge of the part baked pastry, then lay the strips on top of the fruit, interweaving them as a lattice and press down on the ends to "glue" them to the part baked pastry and trim off the excess.

11.  Give the lattice a good egg wash and sprinkle with a little sugar.

12.  Bake at the same temperature as earlier, for 25-30 mins until the pastry is golden, cooked through and the fruit is softly cooked.

13.  Leave the pie to cool until just warm, then serve.

Printable version


12 October 2014

Easy peasy rice pudding

Well hello one and all!  I'm sorry for abandoning you all for so long - I have no excuse, other than sometimes the demands of finding time for blogging in amongst everything else are just too much.  So, we'll skip lightly over that and be happy that here I am again!

Now then.  What has brought me back to you all?  Well, something unusual for me - a dessert.  I wasn't anticipating blogging it, so didn't take many pictures.  D'oh!  I will admit that I'm not a great one for cooking desserts.  They are largely really bad for you calorie-wise and often require cooking at the same time as the main course is being cooked.  Well once upon a time I could multi-task, but it would seem not so much these days.  ~shrug~  Can't be helped - it's just one of those things that are sent to try us.

However!  This dessert - the humble rice pudding - is one of those lovely things that costs very little, takes the work of minutes to prepare, then can be left to chuckle along in a low oven for hours until done.  Perfect.

Another reason for liking this rice pudding recipe is that if you follow the straight, as published, recipe you wind up with a delicious, creamy, comfort food dessert.  However, it shows all sorts of promise for being dolled up in all kinds of directions, if you want to.  For instance, you could simply add a little cinnamon and some sultanas for a bit of a different slant, or serve with some baked apple, or melt chocolate into it, or take it down a Chai route with the appropriate spices.  Maybe even swap out the cow's milk for coconut milk.  I do love an adaptable recipe.

Looking good at half-time!
I had been wanting to make a rice pudding for the longest time, but it wasn't the right time of year (best made in Autumn/ Winter) and I hadn't found a recipe that I was entirely happy with.  Some recipes have the most ridiculous amount of steps in them for what seemed to me to be the easiest of things.  Then I tripped over a "cook with the kids" feature in my local Asda's magazine, which included a recipe for rice pudding.  (See here : http://recipes.asda.com/Recipes/classic-rice-pudding).  It involved rice, milk, evaporated milk and sugar.  Well that sounded a whole lot more like it!

Having decided to make it, I then had an internal argument over whether to use cow's milk or goat milk.  The cow's milk won on this occasion, as I felt it was better to go with the recipe 100% as it was something new to me.  Save the tinkering about with it until I'd cooked it once!  I was just crossing my fingers that the sudden intake of cow's milk wouldn't affect my tummy adversely (which, it would appear, it didn't - thank goodness).

If you, like me, have memories of your Mum making rice pudding and the kitchen filling with the most lovely smell of baking milky nutmeg - then you just have to make this.  It took me straight back to being a young teenager again.  Yes, it is a wee bit heavy in calories at 272 (reference : Calorie Counter) for a serving (a quarter of the pudding) - but it could be a whole lot worse!

CLASSIC RICE PUDDING (care of Asda's Recipes)  Serves 4

Ingredients :

15g unsalted butter 
75g pudding rice 
50g granulated sugar 
170g can Carnation Evaporated Milk 
530ml whole milk
Pinch (or more, to taste) ground nutmeg.

Method :

1.  Using a little of the butter, grease the inside of the baking dish.

2.  Mix together the rice, sugar, evaporated milk, milk and a dash of the nutmeg in the dish.

3.  Place into a pre-heated oven at 150degC/300degF/Gas 2 for 30 minutes.

4.  Remove, stir the contents gently and dot the remainder of the butter over the surface.  Grate on the remainder of the nutmeg.

5.  Replace into the oven to bake for another 2 hours.  You may need to turn the heat up for the last 30 minutes if you prefer your rice pudding top to have a darker hue.  I turned mine up to 180degC/350degF/Gas 4 and the top was perfect.

The pudding can wait in the oven (make sure to turn it off!) whilst the family eat their first course.  It is also fabulous cold, the following day.

Calories per serving : 272

Printable recipe
  

9 October 2013

Bacon & Orzo Stuffed Mushrooms and Peppers

Pepper on the left, mushroom on the right.
I've not had a very good track record with successful "stuffed" things in the past.  I've tried stuffed marrow several times, some have been good, some pretty poor.  I've tried stuffed peppers in the past, again to mixed reactions.  So when I saw the Hairy Bikers stuffing mushrooms, it got my "I can do that!" indignation fired up again.

I came to the conclusion that it was simply a matter of not stuffing things with the correct stuffing for my family's taste.  You see, I like "juicy" stuffings such as a bolognese style mince concoction for marrow, which as the marrow cooks inevitably becomes all watered down.  Now I'm fine with that, but the rest of the family aren't.  It's taken me a while to get to grips with that, as I thought the objection was in the flavour of the stuffing, not the texture.  I know, sometimes I can be really dense.

Now I wanted to stuff peppers and tomatoes, but hubby correctly pointed out that tomatoes stood a very good chance of going the same way as the marrow (i.e. watery) and anyway, son & heir isn't keen on cooked tomato.  He suggested Portobello mushrooms instead and as I'm ALWAYS in the market for a mushroom, that made a lot of sense to me.

So what would go well with long red peppers and mushrooms?  Well, bacon immediately sprang to mind, with shallot to help the savouriness and sweetness along.  I didn't want to use breadcrumbs, as I was very wary of the sogginess that can sometimes accompany a breadcrumb stuffing.  Thinking of things that hubby likes, brought to mind orzo.  It is very rice-like (although is actually a tiny pasta) and rice is another good stuffing ingredient.  I hadn't seen orzo used in too many stuffing mixes (and there may have been a reason for that) but it seemed like a good idea.

Now what could I use to provide some cohesiveness in this stuffing?  I didn't want to use egg but I did want something that would stick everything together a bit.  Thinking along the lines of what does son & heir like, produced mozzarella cheese.  If I dice a ball of mozzarella, it would melt and do that "sticking it all together" thing in an unobtrusively cheesy fashion.  Perfect.  Add a few herbs and seasoning and we're in business.


Ah, but what about the tops?  You need something to make a crunchy top, without cooking the heck out of the orzo and making it inedible.   Hmmn.  A slice of mozzarella would do that, but it doesn't carry much flavour.  What about if I grate some cheddar on top, then top that with the mozzarella slice?  Yes!  That'd do it.

In this way, the recipe was born.

I decided to leave the peppers without the mozzarella slice, just to see whether the cheddar would have been sufficient.  However, in the tasting, I think the addition of the mozzarella was a very good thing as it melted over the lot and provided a great "cap" that kept the moisture in the stuffing while the stuffed vegetable cooked.  The peppers weren't dry, but the cheese would have kept them from being that little bit less "cooked" if you get my drift.

The orzo was great as stuffing ammunition and I'll definitely use that again.  The mushrooms were by far the best end result as the mushroom itself provided enough body to support the stuffing.  The peppers were a bit thin - could have done with being a bit meatier - and cooked up to being a little bit papery.  Still, the flavour was great!


I served the stuffed mushrooms and peppers with a simple sweet potato mash (into which I added a little nutmeg and lots of butter) and some peas.  Apart from the paperiness of the peppers (I'd use round peppers instead of long ones next time), everyone really liked this dinner.  Just goes to show that life isn't too short to stuff a mushroom - you just have to get the stuffing right!


BACON & ORZO STUFFED MUSHROOMS AND PEPPERS  (serves 3)

Ingredients :

6 rashers of smoked back bacon, finely chopped
1 tbsp rapeseed oil
2 small shallots, finely chopped
1 tbsp fresh parsley, finely chopped
half a tsp dried basil
freshly ground black pepper
50g orzo
2 balls mozzarella cheese, 1 finely diced, 1 sliced thickly
2 red peppers
3 Portobello mushrooms
a handful of mature cheddar, grated.

Method :

1.  Place the bacon into a dry frying pan that has been heated to a moderate heat and fry the bacon until the moisture has totally evaporated and the fat has begun to render out.  Once the bacon begins to caramelise and turn golden, remove to a bowl using a slotted spoon, to retain as much of the bacon fat as possible in the pan.

2.  Add the shallots to the pan and reduce the heat slightly.  Cook, stirring regularly, until softened and beginning to take on colour.  Add them to the bacon in the bowl and allow to cool while you cook the orzo, according to the manufacturer's instructions.  Once cooked, spread evenly out on a plate, to cool. 

3.   Once everything has cooled but is not cold, add the parsley, basil and a good pinch of freshly ground black pepper to the bacon/shallot mixture and stir to combine.

4.  Add the orzo, taking care not to "drown" the bacon mixture with orzo.  You need to have a 50:50 sort of mix, which may result in your having some orzo left over, which you can make into a little pasta salad for your lunch.  

5.  Add the one ball of mozzarella that has been finely cubed to the bowl and make sure to give the stuffing a good stir so that all the flavours have as good a chance to combine as possible.

6.  Slice the pepper in half so that it will lay flat on a baking tray.  Remove the seeds and pith from the inside of the pepper, but keep the stalk base intact or your stuffing will all fall out.

7.  Remove the stalk from the mushroom by carefully cutting it free.  You don't want a huge hole in the middle of your mushroom!  Turn the mushroom over and cut a cross into the crown, which should go right through.  This will allow any excess liquid to escape.  Place it, frill side up, onto the baking tray.

8.  Now divide the stuffing mix between all the mushrooms and pepper halves, pressing it firmly into each.

9.  Place a sprinkle of cheddar cheese onto each - a little more on the peppers than on the mushrooms.

10.  Place a round of mozzarella cheese on top of the cheddar on the mushrooms - you can add mozzarella to the peppers too, if you like.

11.  Place into a pre-heated oven at 180degC/350degF/Gas 4 for 40 minutes.

Serve with sweet potato mash and peas.

Printable version  


14 September 2013

Pumpkin Pie!

Yup, I think I've cracked it this time!

My first attempt at pumpkin pie was a bit ho hum, because I used canned pumpkin.  However, the second go - with fresh pumpkin - went so well that I resolved to make it again very soon.  So, seven years later, I finally managed it.  ~rolls eyes~  Goodness only knows what I was doing in the meantime.

Now you know what I'm like when I'm making something for the first or even second, time.  I don't stick to just one recipe, I read a dozen or so and decide to make something that uses bits from each.  It doesn't always work, but looking at today's attempt (above), yup, I think I've got this recipe sussed.

Just look at the glorious colour - it's like the sun came out!
The bake was easy peasy - it made the flat smell utterly gorgeous - and the filling set up beautifully into a mousse-like texture that was light and fluffy.  One thing I will say, is that your pumpkin will vary as to how moist it is.  As such, I recommend that you keep the milk back until you've added the pumpkin to the filling mixture and use the milk to let it down to a suitable consistency.  This might take more, or very often considerably less, than the milk you've set aside for it.  Far better to do it that way than land up with a filling that's just pumpkiny milky water!

My second and rather more successful attempt
Oh my goodness though - the flavour.  Oh wow!  Now I know why the Americans go so potty over pumpkin pie.  It's only a shame that it has taken so long to find out.  The nutmeg, the cinnamon, the soft, yielding unctuousness that just coats your tongue and says "everything is okay now" in motherly tones.  I know it is a Greg Wallace-ism, but it really does give you a great big, warm, fluffy, cinnamon scented hug.  Which is odd, considering I served it cold.

Today's pie - a better depth of filling
For today's pumpkin pie, I made the shortcrust pastry base - I'd cut a finger last time, so employed a shop bought pastry case which really wasn't deep enough.  So today I was able to choose a pie dish that enabled a much better depth of filling.  To a man - and one woman - we all took our first bite and chewed for approximately three seconds before rolling our eyes heavenwards and saying "mmmnnnhhhh" in that "oh, this is gooooood!" kind of way.  In fact, it isn't good - it transcends good.  It is amazing.

Go get yourself a pumpkin and make yourself a pie.  You have to.  You just simply have to.

PUMPKIN PIE    (serves 6)

Ingredients :

750g pumpkin, peeled and cut into chunks
140g granulated sugar
half a tsp salt
half a tsp freshly grated nutmeg
1 tsp ground cinnamon
2 large eggs, beaten well
25g salted butter, melted
40ml semi-skimmed milk
225g equivalent of shortcrust pastry
Icing sugar to decorate.

Method :

Place the pumpkin chunks into a saucepan and cover them with boiling water.  Place onto a moderate heat and simmer until tender.  Drain and leave the chunks to cool.

Roll out your pastry and line a pie dish with it, cover with baking parchment and fill with baking beans.  Bake at 180degC/350degF/Gas 4 until part baked, for around 20 minutes.  Once baked, simply set aside and increase the oven temperature to 200degC/400degF/Gas 6.

When the pumpkin chunks have cooled, place into a food processor (or use a blender) and render them down to a smooth puree.

In a separate large bowl, combine the sugar, salt, nutmeg and cinnamon, then whisk in the eggs and melted butter.

Add the pumpkin puree to the bowl and gently stir it through until combined.  Add a little milk (or rather more, if your mix appears to be quite dry) until you have a pourable consistency.

Pour the filling into the part baked pastry shell and bake for 10 minutes, then turn the oven down to 180degC/350degF/Gas 4 and bake for another 35-40 minutes, or until the filling is set.  You may have to rotate the pie half way through, to get an even bake.

Allow to cool, dust with icing sugar and serve chilled, with cream or ice cream.

Printable version

3 December 2012

Heirloom Christmas Pudding

Look!  It's my first ever little, delicious, Christmas Pudding!

In our family, it has always been one person's task to produce the Christmas Puddings for the remainder.  Now obviously, when we lived in Germany, it was a tad tricky for my Nanna to get a pudding to us for Christmas - so generally, we came back to England for Christmas and got our pudding that way.  However, for the years when we couldn't return to England, my Nanna sent her recipe to my Mum so that she could make the same pudding.  We really aren't sure where Nanna got her recipe from, as she was separated from her parents due to emigration to Canada.  It is possible that she could have asked her Mum for her recipe and received it by post during this time, or alternatively, she could have picked up a recipe from just about anywhere.  Unfortunately, she has been gone these last twenty years or so and we can't ask her.
Nanna's Christmas Pudding recipe, written on Air Mail paper, having been sent to my Mum in Germany.

As the years went by and my Nanna became less able to do the serious arm-work of stirring the puddings, my Mum took on the job.  The recipe remained the same for a number of years, until the awareness of health issues began to make themselves felt in changes to the old familiar recipe.  Things like using a sunflower margarine instead of suet, for instance.  Also, people's tastes began to change and we all agreed that we really didn't like the candied citrus peel, so marmalade began to be used instead.
Mum's trusted slow-cooker recipe

Then the recipe evolved a little further, in that the slow cooker had been introduced and made it so much easier to cook the puddings.  Far better to be able to steam them in the slow cooker, where it was unlikely to run out of water, than on the hob where you had to keep checking the water levels and couldn't leave the process alone for longer than half an hour.

This year, for the first year ever and following my Mum's comments that, last year, the making of the puddings was rather more taxing than ever before, I managed to convince her to hand the mantle over to me.


Doing a quick calculation on my fingers, it seems to me that the original recipe (still in my Nanna's own handwriting from where she sent it to my Mum all those years ago) has to be in excess of 100 years old.  Knowing how - over the years - the recipe has evolved, made me want to add my little adjustment to it.  My additional fingerprint in the ingredients.  I love the thought that the puddings now have all our fingerprints - my Nanna, my Mum and myself - involved in the recipe.

I must admit that I threw all notions of making the puddings healthier, straight out of the window.  Well, you eat Christmas Pudding just once a year (unless you cook one for Easter, which does happen!), so to have a richly indulgent Christmas Pudding is entirely right and proper.

So, my puddings were made with 100% butter.  Changes to the recipe also included adding some Medjool dates - we'd found some at a local greengrocer and I'd been sent some even nicer ones to sample.  They were so juicy and delicious, it just made sense to include them.  I also steeped the fruit in non-alcoholic Ginger cordial from The Dorset Ginger Company before mixing.  This plumped up the fruit and added a lovely warmth to the base pudding flavour.  However, the biggest change to the puddings was that I didn't use flour in the recipe at all.  The mix was made with 100% breadcrumbs, a mix of 60% white bread/40% wholemeal, which made a huge difference to the texture of the puddings.

Now I know how much difference it made, because I made a small tester pudding too!  Well, when it's your first go, it pays to be on the cautious side.

So cute - so yummy!  All glamorous photographs will have to wait until Christmas!

I steamed the puddings individually in the slow cooker, each for 12 hours.  The buttery, spicy juices overflowed slightly as the puddings cooked and the house was filled with gorgeous smells that tantalised in a most promising fashion.

The time came to try the tester pudding and my heart was in my mouth as I turned the ramekin upside down into the bowl.  Would it come out in one piece, would it pour out disgustingly, or would it be like concrete?  No!  The pudding was light textured - definitely not one that would stick your teeth together, as so many of them do.  With juicy fruit, lovely spicing with the warmth from the ginger, the occasional flavour bomb in the shape of a whole cherry which seemed to have sucked up the Guinness stout and spiced rum into its hollow interior, soft prune, sticky date, earthy nuttiness and the richness of butter - it is a triumph.

I cannot begin to tell you, how relieved and happy I am that the puddings have turned out so well.  Perhaps you can imagine!  After all, I had 100 years of successful Christmas Pudding making behind me to live up to.  That's fairly heavy responsibility, for someone about to change the recipe.

So, if you haven't yet made your Christmas Puddings and are looking for a richly indulgent, light textured pud with the wisdom of ages woven through its recipe, you can't go far wrong with this one.

HEIRLOOM CHRISTMAS PUDDING  (makes 2 medium sized puddings - and a tester!)

Ingredients :

450g raisins
225g currants
225g sultanas
200ml ginger cordial with 100ml hot water
50g medjool dates, pitted and sliced into chunks
150g glace cherries, approx half of them sliced in two, the remainder left whole
50g orange marmalade
zest of half a lemon
20g blanched almonds, roughly chopped
20g hazelnuts, roughly chopped
20g walnuts, roughly chopped
50g ground almonds
half a tsp freshly grated nutmeg
half a tsp (generous) ground mixed spice
half a tsp (generous) ground cinnamon
quarter tsp sea salt
65g soft brown sugar
1 (generous) tbsp black treacle
450g softened butter
375g fresh breadcrumbs (60% white/40% wholemeal)
6 large eggs, beaten
4 tbsp spiced rum
170ml (approx) Guinness Foreign Extra Stout.

Method :

1.  Place the raisins, currants and sultanas into a very large bowl.  Mix the ginger cordial with the hot water and pour over the fruit.  Cover with cling film and leave for 30 minutes in a warm room.

2.  Uncover the fruit and give them a stir.   Next, add the dates, cherries, lemon zest, marmalade, almonds (both chopped and ground), walnuts, hazelnuts, nutmeg, mixed spice, cinnamon and salt.  Give everything a good stir to mix the spices through evenly.

3.  Next, add the soft brown sugar and the treacle and stir again, until the treacle has been mixed through thoroughly.

4.  Add the softened butter.  Put your spoon to one side, make sure your hands are spotlessly clean, your sleeves are rolled up - and scrunch the butter into the fruit mixture with your fingers.  Once it is evenly spread, add one third of the breadcrumbs and scrunch again to incorporate them into the mix.  Repeat until all the breadcrumbs are included and the butter is evenly spread.

5.  Add the beaten eggs.  You can go back to using a spoon if you like - but I found using my hands to be so much easier, as you can feel the texture of the mix.  Continue to mix until the eggs are completely combined.

6.  Add the rum and half the stout.  Stir well to combine.  Now how much of the remainder of the stout you include, depends entirely upon how wet the mix is by now.  The end result you are after, is thick enough to clump together on a spoon, but wet enough to be able to drop easily from the spoon, if turned.   So continue to add the stout until the correct texture has been reached.

7.  Using a little additional butter, grease your two pudding basins liberally - and a tester ramekin if you're using one.

8.  Divide the mixture between the two basins, pressing down as you go, to make sure they are completely full.   Try to leave a quarter of an inch (at least) lip around the top of the basin, to allow for expansion during cooking.

9.  Take a square of greaseproof paper and fold a pleat into the centre.  Place the pleat over the middle of the basin and fold the sides roughly over the edges.

10.  Fold a doubled piece of silver foil with a pleat and place this over the greaseproof, smoothing it down over the sides.

Words fail - see picture!

11.  Take a piece of string and lay it across the top of the pleat, making sure you have enough spare to tie it either side - this will form a handle which will make removing the basin from the slow cooker, a lot easier.

12.  Place a large piece of string below the lip of the basin and knot it, pulling tight so that the greaseproof and foil are held tightly to the basin and the single piece of string has either end caught under the tightening string.  Knot it securely.

13.  Tie the ends of the "handle" to the tightening string, remembering to leave room to get a finger underneath!

14.  You should now have a made Christmas Pudding, all ready to go into the slow cooker for the next 12 hours.  The tester pudding will need to have something to sit on in the cooker, to prevent it from submerging and it can be cooked alongside one of the larger puddings.  The water level needs to be a good third of the way up the larger pudding basin - and start off with boiling water, as this saves the slow cooker from having to do the heating of it.

Before being cooked, the puddings will last for a few days in the fridge.  However, once cooked, remove the greaseproof/silver foil combo and replace with a clean version.  The pudding can now be kept in a cool, dark place for as long as you need it to be.  I have known puddings be left for some 2 years or more and still come out looking and tasting perfect.

Printable version
 

5 June 2011

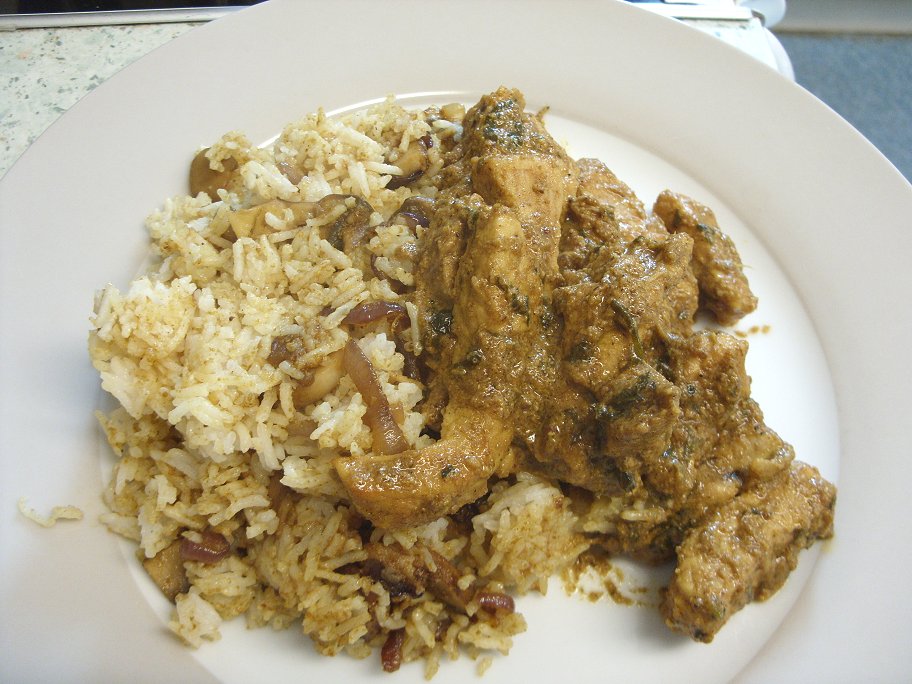
From the Gurkha section of the British Army Cookbook : Fried Pork Curry with sauce

There now, that's an intriguing title for a blog post!

The lovely Willie turned up at my work the other day, clutching a brown envelope in which was a copy of the Gurkha section of the British Army Cookbook for me.  Now this on it's own would have been interesting enough, but of course, I had to try at least one recipe from it - and if that recipe went off well, maybe more.

I have huge respect for the Gurkhas, having spent time in their vicinity when Dad (who was a Royal Engineer, Warrant Officer Class 1)  - and the whole family - was stationed at the same place as them in the past.  I can always remember feeling very safe when there were Gurkhas around.  My impression of them was that they were incredibly cheerful little chaps who had a fearsome reputation as a Soldier, and an unshakeable moral code.

So that lent a little connection to the recipes I had before me.

The booklet is fascinating and leads me to believe that there is little a Gurkha won't eat, just so long as it is combined with a curry in some form or another.  For example, Liver Curry, Curried tinned vegetables, Omelette with curry and Scrambled Eggs Gurkha style which involves eggs, onions, tomatoes, chillies, mustard leaves, ginger and Garam Masala.
Having eaten the Pork curry we had last night, I can tell you that the Gurkha digestion has to be one of the most impressive out there.

One thing that you quickly come to realise, when reading through the booklet, is that "a curry" is not one thing.  There are as many curries out there as the imagination can rustle up.  It seems to me as though the definition of "a curry" is "a substance that has been cooked in hot (as in chilli-hot) and fragrant spices" and that's about where you have to leave it.

With some of the curries I have cooked in the past, (not all), Hubby's complaint has sometimes been that "it doesn't taste of curry".  With this Gurkha cookbook, this is something that Hubby had to throw over his shoulder and forget about.  Not all curries taste of curry.  Whilst undoubtedly being "a curry", the meal we had last night could in no way be described as "tasting of curry".   In fact, it tasted as though lemon was involved quite heavily - yet there wasn't a lemon in sight.  An education for the tastebuds!


The first challenge I had was to scale down the recipe quantity-wise, as it was in two grades - the first for 10 people, the second for 50.  Well, they ARE feeding an army, when all is said and done.  I mean, how do you scale down a pinch of nutmeg?  So it took some intuitive knowledge of how each ingredient tasted and the effect it was likely to have on the whole.  One big change from the original recipe is that I increased the amount of Garam Masala from 1 tsp (approx) to 3 tsps.  We particularly enjoy the flavour of Garam Masala and I couldn't imagine that the 1 tsp sprinkled over the top (which was what was recommended) was going to do it for us.


Once I'd got into the cooking of it, I can remember thinking to myself how much I enjoy cooking curries.  I think it's the randomness of the result, dependent upon just how much of each spice you use and how you deal with them.  After all, curry spices put "raw" into a stew-like substance will taste totally different to those that have been fried before the wet ingredients are added.  Same ingredients, just a different way of dealing with them that ends in a completely different flavour.  Fascinating stuff.


Oh yes - and I have to make mention of the beautiful pork that I got from Spring Fields butchers.  I asked for their six pork steaks for £2.99 and came away with so much pork that I put two of the steaks in the freezer for another time.  Cut from the loin, they had that stripe of fat along their back, but otherwise were completely lean.  I trimmed the fat off and roasted it, saving the rendered fat for the roast potatoes again and gave the crispy pieces to the dogs, who couldn't stop licking their lips.  Amazing value for an amazing product.


GURKHA FRIED PORK CURRY WITH SAUCE  (feeds 3)


Ingredients :


500g of lean pork, sliced into strips
half a tsp of cayenne pepper
half a tsp of sea salt
4-5 tbsp low fat plain yoghurt

a large thumb-sized piece of ginger, peeled and grated
large knob of butter
5-6 black peppercorns, crushed in a pestle & mortar, or freshly ground
half a tsp of turmeric
2 tbsp fresh coriander, chopped
3 tsp Garam Masala
pinch of ground nutmeg
Water as necessary.


Method :


1.  Place the pork into a large bowl and sprinkle with the cayenne pepper and salt.  Mix to combine.


2.  Add the yoghurt and ginger and mix well to ensure everything is well coated.  Cover and leave to marinade for as long as you've got - to a maximum of 2 hrs.


3.  Pre-heat the oven to 200deg C.  

4.  Melt the knob of butter in a deep frying pan and once it's sizzling, add the pork with all the marinade.  Add the turmeric and black pepper and keep on stirring until it has reached a boil.


5.  Decant into a warmed casserole dish, cover and cook for an hour.


6.  Remove from the oven and add the coriander, then drizzle some 2-300ml of water down the sides of the casserole dish.  Add the Garam Masala and give everything a jolly good stir (and don't panic at the fact that it looks remarkably like pond water).  Replace, uncovered, in the oven for 15 minutes.


7.  You can take two routes with this curry from hereon in.  Either leave it in the oven to reduce, or take it from the oven and pour back into the deep frying pan and boil to reduce, which is what I did.  I think this is the preferred method, as it puts you much more in control of what the sauce looks like, as with judicious stirring, it does improve in texture.  Once the sauce has stopped resembling pond water and started to look like a sauce, you're done.  Add the pinch of nutmeg, give a last stir - taste to check the seasoning and adjust if necessary.


8.  Serve with mushroom rice.


.


10 October 2010

Ottolenghi to the rescue! Kosheri & spicy minced beef.


Kosheri on the right, Spicy minced beef on the left
We are currently going through a period of extreme financial embarrassment (least said, soonest mended) and have been making meals out of very little.  For instance, this last week, our total groceries bill came to just short of £45 - which I think is something of a record.
On the menu list for the Saturday, was entered "Rice & stuff".  Now this is the name of a moveable recipe which, in our house, can mean absolutely anything - it's one stipulation is that it has to involve rice.  I had been pondering over this "Rice & stuff" as to what kind of "stuff" I could utilise.  I knew we had a pack of minced beef in the freezer for use in this dish, but what form it would take thereafter was in the lap of the gods.

A few days into this pondering, I suddenly remembered a recipe I'd seen in the Ottolenghi book "The Cookbook", which I had borrowed from the Library.  To the best of my recollection, it involved rice (tick), lentils (tick), vermicelli noodles (hmmn, no vermicelli in the cupboard, but I did have egg noodles) and spices, all of which I had in stock.  So I looked it up.  "Kosheri" is, apparently, an Arabian street vendor dish.  Well, that suited the lack of vermicelli, as I reckoned that if street vendors made it they probably didn't go off down to their local deli for noodles.  Kosheri is traditionally served with a spicy tomato sauce, which got me to thinking regarding the minced beef.  If I could make a spicy tomato-based minced beef, that might go quite nicely.

Well, it did.  I have blogged the minced beef recipe here.

A couple of notes on the recipe itself - firstly regarding the lentils.  I used dried lentils and put them on to cook as it said in the recipe, to boil for 25 mins.  Then it occurred to me to check the cooking time on the bag.  Which said "soak for min. 12 hrs".  Yikes!  Well, I couldn't do anything about that now, so continued with the cooking.  I tested them at around 15 minutes and they were becoming softened, so put my trust in Ottolenghi's recipe and continued.  Suffice to say, they didn't need the 12hrs soaking.  For sure, if they had have been soaked, they'd have needed far less cooking - so that's something to bear in mind for the future.

Secondly, where the chicken stock was concerned, I used a chicken stock cube.  However, having watched Masterchef far too many times and consequently having had the words "get lots of flavour into your food" drummed in, I had an idea which turned out to be a blinder.  I keep a dripping cup in the fridge.  Whenever I roast a joint, I tip the fat into the dripping cup and use it for my roast potatoes, next time.  Inevitably, I also get a layer of jelly in the dripping cup.  Now I know that this jelly is like concentrated chicken (as that's the meat we predominantly roast) stock.  So I included a tablespoonful of it in the stock - which upped the chickeny flavour by a measure of many.  Well worth doing, I'd say!


NOTE : Here's a picture of our second go at Kosheri, this time accompanied by some spicy lamb mince.  Just as good!

KOSHERI (feeds 4)

Ingredients :

150g green lentils, unsoaked
200g basmati rice
40g unsalted butter
50g vermicelli noodles (I used egg noodles)
400ml chicken stock
half tsp grated nutmeg
one and a half tsp ground cinnamon
one tsp salt
half a tsp ground black pepper
2 tsp olive oil
2 onions, halved and thinly sliced.

Method :

1.  Place the lentils in a large sieve and wash them under cold running water.  Transfer to a large saucepan, cover with plenty of cold salted water and bring to the boil.  Reduce the heat and simmer for 25 minutes.  The lentils should be tender but not mushy.  Drain in a colander and leave to one side to keep warm.

2.  Heat the oil in a large frying pan, add the onions and sauté over medium heat for around 20 minutes until dark brown.  Transfer to kitchen paper to drain and keep warm.

3.  Rinse the rice and drain well.  Melt the butter in a large saucepan over a medium heat.  Add the raw vermicelli or noodles, stir and continue frying and stirring until they turn golden brown.  Add the drained rice and mix well until it is coated in the butter.  Now add the stock (with or without the chicken jelly included), nutmeg, cinnamon and pepper.

4.  Stirring all the time to prevent the rice sticking, bring to the boil, cover and reduce the heat to a minimum and simmer for 12 mins.  Turn off the heat, remove the lid, cover the pan with a clean tea towel and put the lid back on.  Leave like that for around 5 minutes, which helps to make the rice light and fluffy.

5.  To serve, lightly break up the rice with a fork and add the lentils & most of the onions, taste for seasoning and adjust accordingly.  Top the rice with the remaining onions.


Related Posts Plugin for WordPress, Blogger...