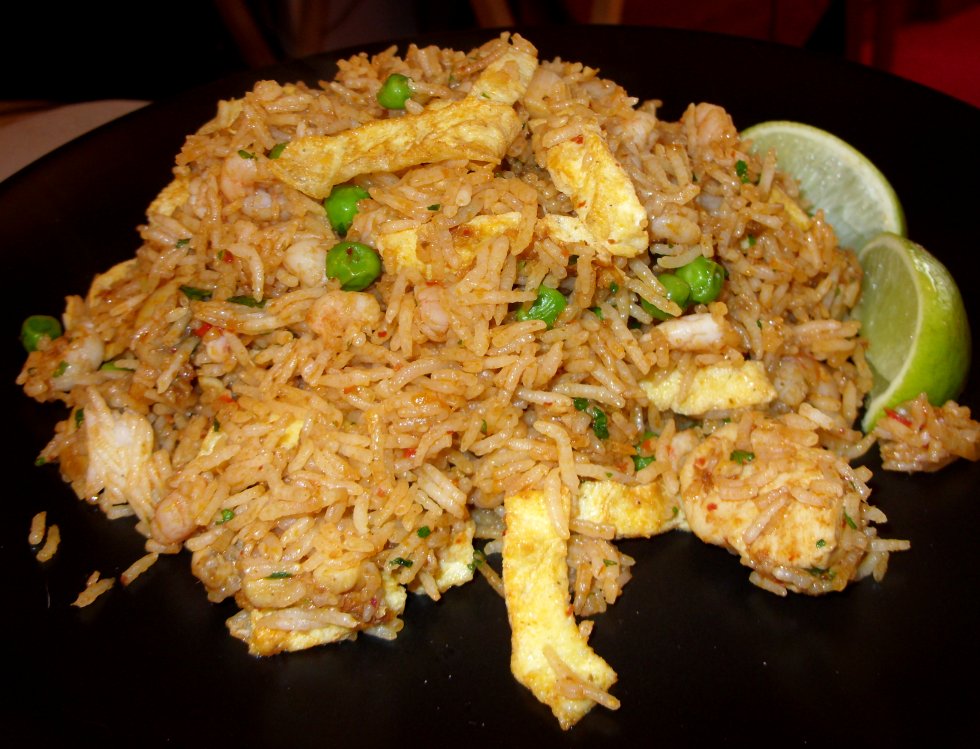
And when I say "my new favourite thing", I'm talking about it being right up there alongside Nasi Goreng and Shepherd's Pie. Now THAT is high praise indeed.
I don't mind admitting that I was a wee bit intimidated by this recipe. You see, I had attempted a Pad Thai a very long time ago - before I started blogging, so around seven or eight years ago - and it was a singular failure. Having just cooked the dish again, I can see that first go didn't work because I didn't understand the first thing about any of the ingredients. However, without the benefit of getting a good one under my belt, I was a bit worried that it would fail again.
Coming out the other side of having completed an outstandingly successful rendition of Pad Thai, I now haven't a clue what I was worried about as it was incredibly simple to make. However, you do need to have your mise en place done before you begin to cook, as you cook at such a pace that you really have no time in which to turn around and chop a spring onion, for instance. That, and overcooking the noodles in a big way, are much of the reason why the first one didn't work.
Having everything chopped, squeezed, measured out and ready to go is essential. You almost need to put everything in order, the cooking goes that quickly. However, once you've got everything ready, the cooking is fabulously simple and the results spectacular.
I've seen lots of different Pad Thai recipes, some ask for tamarind, some for coconut milk. This one doesn't ask for any of those things, it keeps things clean and simple with just fish sauce, oyster sauce and gorgeous lime juice to stitch all the other flavours together.
I used John Torode's recipe from BBC Good Food as the guide for this recipe but several things are different and because of that things happen in a slightly different order, so I decided to blog the recipe so as not to lose it. The original recipe is here if you are curious. I think my version just simplifies things a little bit further.
The only Cook's Tip I have for you is what I have already stated - get your chopping, peeling and squeezing done before you start cooking!
So, onwards to major, serious, deliciousness and clean, wholesome eating.
PRAWN PAD THAI (serves 2-3)
Ingredients :
200g rice noodles, the white, vermicelli style
2 tbsp olive or coconut oil
2 eggs, beaten
pinch of sea salt & black pepper
2 large garlic cloves, chopped
1 tsp granulated sugar
1 tbsp fish sauce
2 tbsp oyster sauce
1 large lime, juice only
6 spring onions, sliced diagonally
1 red chilli (leave the seeds in for additional heat)
200g beansprouts
15g coriander, chopped to include the stems
250g cooked coldwater prawns, drained
100g dry roasted peanuts, chopped slightly.
Method :
To begin, set a saucepan of water to boil. Once boiling, add the rice noodles and remove from the heat. As soon as the noodles have softened, but before being fully cooked - around a minute and a half - drain well and run under cold water to stop the cooking process. Set aside to drain fully.
Add a pinch of sea salt & black pepper to the beaten egg and stir through. Heat the oil in a wok over a moderate heat and once the oil appears to shimmer slightly, add the beaten egg and stir gently to form an omelette. Reduce the heat to low, so as not to burn the underside of the omelette and once formed and set, remove from the pan with a slotted spoon so as to keep the majority of the oil in the pan, onto a plate to keep warm.
Still over a gentle heat, add the chopped garlic to the wok and stir fry it very gently until the pieces have turned a gentle golden colour. Don't rush this process, or the garlic will burn and become bitter. Slow and steady wins the day.
Next, add the sugar, fish sauce, oyster sauce and lime juice, along with the spring onions, chilli, beansprouts and three quarters of the coriander. Increase the heat to moderate and stir regularly as the onions soften and cook. This should take no more than around 4-5 minutes.
Add the cooked prawns, the drained noodles and a third of the peanuts and stir and toss to combine and heat through. Keep the contents of the pan moving, so that nothing catches on the underside and the noodles combine well with the other ingredients.
Once well mixed, serve into warmed bowls and garnish with the remaining peanuts and chopped coriander.
Tuck in and enjoy!
Printable version
You remember how keen I was on the shin of beef dishes I've made just recently? Or perhaps how excited I was about the Pot Roasted Brisket? Well, this one surpasses all of those. Truly!
I kept a little secret from the boys about this dish, which was that it originated from the Weight Watchers Oriental Express recipe book! Anything that has "healthy" or "low fat" in its title always engenders much suspicion in a chap's breast, it seems. So, I figured it was better that they didn't know, right up until such time as I could commit the big "reveal", or admit it was another failure. Whichever was appropriate. In fact, as I didn't have any low fat cooking spray, I substituted olive oil where that was required but used it sparingly. I also tweaked the quantities of orange juice to water, winding up with a little more of the juice than the water, largely because two oranges came to 150ml, once juiced, and I wasn't prepared to find a home for the extra half - so used it.
I had scheduled this dish for a Sunday evening when, normally, we'd have some sort of Sunday roast. I reckoned it wouldn't hurt us to not have a traditional Sunday roast - and as it used almost as much beef brisket as had the previous Sunday's meal, it was almost a Sunday roast - just prepared differently. In truth, I think I was justifying it to myself as I really don't suppose the boys care whether we have a Sunday roast or not - so long as something yummy turns up for dinner each day, I doubt they consider it much further than that.
I had liked the sound of the recipe at the first read-through, plus it also had the benefit of my having just about everything in the fridge or spice cupboard already, barring the meat and the butternut squash. This made the purchase of these two more expensive ingredients rather more affordable.
The 800g of brisket was a lovely piece of meat. It took just a little trimming on one side to remove some short runs of gristle, plus a bit of a trim of the fat on the other side. I didn't remove all the fat, as I knew it was going to be cooking for some two and a half hours and fat doesn't usually survive that! Dustbins 1 and 2 were in attendance, of course, and soon took care of any offcuts.
Where the rice was concerned, on the previous day we'd been shopping - doing a top-up shop for the weekend and the beginning of the following week. I always like to have a cruise (don't forget, I use a disability buggy) down the world foods aisle where, to my surprise, I found a bottle of authentic oyster sauce. At £2-odd, it was a little pricey when I didn't have anything in mind for it - but too good to leave there, so I bought it. Only as I was assembling the ingredients for the special fried rice, did I remember the oyster sauce. Using authentic soy (Yellow Plum brand), authentic fish sauce (Squid brand) and the authentic oyster sauce, put the tin lid on our attempts to make an authentic-tasting special fried rice. I thoroughly recommend you put together some authentic ingredients like these, when you have a go at the rice recipe - they make all the difference.
ORIENTAL BEEF WITH BUTTERNUT SQUASH (feeds 3-4)
Ingredients :
800g lean beef brisket, visible fat trimmed & sliced
olive oil
2 onions, sliced
1 star anise
1 tsp Chinese 5 spice powder
5cm (2") fresh root ginger, grated
150ml fresh orange juice
250ml water
4 tbsp dark soy sauce
1 red chilli, de-seeded if you prefer, and chopped
400g butternut squash, peeled, de-seeded and chopped into 1cm pieces
salt & pepper
Method :
1. Heat a large lidded saucepan or casserole dish - one which will go in the oven. Pre-heat oven to 190deg C.
2. Add a little olive oil and half the beef strips. Sear until browned all over, then remove and sear the remaining half and remove.
3. Add the onions to the pan with a little more olive oil if necessary. Fry over a medium heat for 4 minutes, stirring occasionally. It doesn't matter of some onions take on some colour, but you're aiming for them all to be softened.
4. Add the star anise, 5 spice powder, ginger and chilli and stir fry for a minute.
5. Pour in the water, orange juice and soy sauce. Stir and ensure that you have de-glazed the pan, getting up all the lovely baked on flavour and stirring it in. Re-introduce the beef and stir to combine.
6. Bring to the boil, cover and then place in the oven for 2 hours.
7. Remove from the oven, stir and add the squash, stirring to combine. Replace into the oven for 30 minutes or until the squash is tender. You probably won't need to cover the pan at this stage.
8. If the sauce remains too watery, add a little cornflour and stir to combine until the favoured consistency has been reached.
Serve with Special Fried Rice :
SPECIAL FRIED RICE (feeds 3-4)
Ingredients :
a knob of butter
1 tbsp olive oil
2 eggs
a bunch of spring onions, trimmed and chopped finely
a small piece of ginger, shredded finely
2 mushrooms, chopped finely
a small handful of frozen peas
a small handful of frozen sweetcorn
1 tbsp dark soy sauce
1 tbsp oyster sauce
2 tsp fish sauce
2-300g long grain rice, cooked and allowed to cool.
Method :
1. Heat the knob of butter and olive oil in a deep frying pan or wok. Add the beaten egg one by one and cook to form an omelette. Place both omelettes somewhere to keep warm.
2. In the remaining butter/olive oil mixture, stir-fry the onion, mushroom and ginger for around 2-3 minutes or until the onions are appearing softened.
3. Add the peas and sweetcorn and continue to cook until they are tender.
4. Add the soy, oyster & fish sauces and stir through on a low heat.
5. Add the cooked rice and stir through gently on a medium heat or until the rice is heated through. Add the shredded egg omelettes - and serve.
.
You may be wondering why the addition of "at last!" in the title there.
Well, you see, I was beginning to think that I'd never get the chance of making this 'ere pasta dish. The last THREE times it has appeared on the menu list, it has been bumped off for one reason or another. I was beginning to think it was cursed - or that hubby and son viewed its inclusion on the list with such trepidation that they were going to all kinds of lengths to avoid having it.
However, it turns out it was just unfortunate circumstance that brought about its loss from the menu lists and we successfully ate it for dinner a few nights ago.
Now you may also wonder about the addition of tuna to the recipe, as I know that a strict pasta puttanesca is largely vegetarian (if you forget about the anchovies). The trouble is, that my boys (both large and small) are committed carnivores. If the meal doesn't include meat of some kind - and fish is included under the heading of "meat" for this purpose - then it's not "dinner".
So, having come across Delia Smith's recipe for straight Pasta Puttanesca and liking the look of it very much, I immediately began to consider what meat I could include and how it would go. Should it be included in the recipe, or the recipe used as a side dish to the meat? I considered bacon, but we've already got a number of successful pasta dishes that use bacon and I'd rather use something else. Then, the anchovies raised their delicious little heads, which got me to thinking tuna. Having re-read the method, it seemed entirely logical to include a tin of tuna right at the end when the sauce is pretty much made. That way, the tuna wouldn't be broken up too badly.
I have to admit that I tinkered around with Saint Delia's recipe something awful (shallot, red pepper, wine, fish sauce, ketchup .. the list goes on) - but then considering the scrumptious dish that resulted, I'm not of a mind to apologise for doing so! I think I can safely say that this is the first dish I've made, that I've been actively aware of the Umami (the fifth taste sensation) involved.
PASTA PUTTANESCA WITH TUNA (feeds 3)
Ingredients :
350g spaghetti or linguine (more, if you are hungry!)
3 drops olive oil
1 pinch sea salt
2 tbsp extra virgin olive oil
1 shallot, chopped fine
1 red pepper, seeds removed and sliced small
2 cloves garlic, grated
2 tsp fresh basil, chopped
150ml red wine
50g anchovy fillets, drained
1 tsp fish sauce
1 tbsp tomato ketchup
50g pitted black olives
1 tbsp capers, drained
400g tin cherry tomatoes
1 tsp sugar
tin of tuna in spring water, drained
pinch black pepper.
Method :
1. To make the sauce, heat the oil gently in a medium saucepan then add the shallot and red pepper and cook them slowly until softened.
2. Add the garlic and basil and cook for 1-2 minutes. Then add the red wine and allow it to bubble until reduced by approximately half. This should only take a few minutes.
3. Add the anchovies, fish sauce, ketchup, olives, capers and tomatoes and season with black pepper. Do not use salt, as you've already got salt in the form of the anchovies and fish sauce.
4. Turn the heat down to low and let the sauce simmer uncovered for some 40 minutes, stirring from time to time, by which time it will have reduced to a lovely thick mass with very little liquid left. Taste for seasoning and add the sugar if the acidity is too much.
6. Add the tuna and a little extra basil to the tomato sauce and stir gently to combine. Allow it a minute or two to heat through sufficiently.
5. While the sauce is reducing, cook the spaghetti or linguine to manufacturer's instructions, except adding the three drops of olive oil and making sure the water is salted. Drain the pasta when there is still a little bite left in it and return it to the pan. Aim to have the pasta ready when the sauce is finished.
6. Serve on warmed plates with plenty of grated parmesan cheese and garlic bread.
.
Some twenty five years ago, my then boyfriend and I went to a baby's christening. The baby's parents, Michael & Vida (they ran the Singapura Restaurant in Fulham), hailed from China and Singapore respectively and this was no ordinary christening. Regrettably, owing to one of my horses being poorly at the time and requiring veterinary intervention, we missed a large part of the Christening itself but managed to get back in time for the reception afterwards.
This was a very good thing, as Vida's Mum was in the kitchen of the hired Hall, making Nasi Goreng (amongst other things) for all the guests. Huge platters kept appearing, with piles of steaming rice, chicken and prawns on board - which tasted divine.
Now, I knew I liked Nasi Goreng, as because my father was in the Royal Engineers we had lived abroad quite a bit during my childhood. I was born in Malaysia and we spent intervals in Germany. I'm not sure about experiencing Nasi Goreng as a baby in Malaysia (I doubt it, somehow!), but my parents (or my Dad, to be specific) obviously enjoyed it because I recall that when we were in Germany, we would often buy a big tin of Nasi Goreng from the Naafi. I can very definitely remember eating that and liking it a lot.
That flavour - of Nasi Goreng (or Fried Rice) - has stayed with me down the years.
I can remember getting very excited some years ago when Sainsbury's started stocking small packs of Nasi Goreng seasoning, which contained instructions on making Nasi Goreng. I tried it out, but the flavour wasn't quite how I remembered Vida's Mum's Nasi Goreng tasting, so it wasn't quite right.
Since then, I've tried a recipe from the BBC Good Food website - and it's the first recipe that's ever let me down in a big way, as it was not only horrible, but didn't taste in the slightest bit right.
That has to have been some three or four years ago.
So there I was, on Monday evening, trying to think of something relatively easy that I could make on Tuesday evening (following a busy day). I've described how, at moments like this, I examine how I'm feeling and what I would really like to eat - and there, out of the gloom, came the answer "Nasi Goreng". As ever, my mouth watered at the very idea.
It occurred to me that I had some chicken left from the weekend's roast, which if I added a bag of prawns to, would do fine. Next, I needed an authentic recipe so turned to the internet. There are plenty of recipes out there, but everything is slightly different, but intrinsically the same. Having read them all, I decided that none of them were right but the thought had occurred to me that maybe I'd be better off following my memory of the flavours. After all, I knew what I didn't want - a very highly flavoured, saucy, mixture - and I knew the flavours I did want - heat, sweetness, savouriness, but in a dry rice mix. I had some Mirrin (sweet Japanese rice wine) in the cupboard, along with Soy sauce and Fish sauce. I had chicken and could get prawns. I could get some spring onions, I had ginger and coriander .... the thought had formulated into a plan.
The recipe is below and if this isn't Nasi Goreng, then Vida's Mum must have been making something else!
 24.05.2013 : I've cooked this Nasi Goreng recipe a number of times since the first go - but this time of trying made me realise how much better I am getting, at handling a blisteringly hot wok. I very definitely cooked this attempt far more proficiently - which basically means far quicker - than ever before and it showed. The flavours were beautifully balanced, the chicken didn't dominate and the prawns were still pinkly munchy. Having been given the idea by my Facebook friend Viv Braznell, I put a few fresh lime wedges on the side, as they do in Thailand. It was a bit of a departure from the Chinese/Singpore tradition, but is a wonderful addition - so thanks, Viv! Good gracious, but I love this dish!
NASI GORENG (FRIED RICE) (feeds 2-3) NEW IMPROVED RECIPE!
Ingredients :
2-300g Basmati rice, cooked and cooled
2 eggs, lightly whipped
salt & pepper
3 individual knobs of butter
1 tbsp rapeseed or vegetable oil
2 skinless, boneless chicken breasts, cut thinly on the diagonal
a bunch (6 or 7) of spring onions , cleaned and chopped
a medium hot red chilli, stalk removed and chopped - seeds are optional
2 fat cloves of garlic, grated
2 thumb-sized pieces of ginger, grated
4 chestnut mushrooms, cleaned and sliced
a handful of frozen peas
fresh coriander, chopped, to taste
3 heaped tsp of red Thai curry paste
3 tbsp dark soy sauce
2 tbsp fish sauce
1-2 tbsp mirrin (Japanese Rice Wine)
300g cooked and peeled prawns, drained but not rinsed.
Method :
1.
Cook the basmati rice according to the instructions on the packet, but
stop the cooking a fraction before it is done, leaving a slight bite in
the rice. Drain it well and spread it out onto a plate (or two) to
cool. Fork the rice over from time to time to keep it fluffy. Don't
use a spoon, as this will encourage the grains to break and clump
together.
2.
Empty the prawns into a colander and leave to drain.
3. Using a deep frying pan or wok, melt one of the knobs of butter and add half the seasoned
egg mixture. Roll the pan to spread the egg out thinly and cook to form a thin omelette, then reserve to keep warm
whilst you cook a second omelette. Reserve to keep warm, on top of the
first.
4.
Melt the butter with the oil until really quite hot and add the chicken. Fry until the chicken is almost cooked through and has gained some golden colour.
5. Add the spring onions and chilli. Stir and fry until softened - around 4-5
mins or so.
6. Add the ginger and garlic and continue to stir and fry for another 1-2
minutes, taking care not to let it stick to the bottom of the pan. Add
the mushrooms and continue to fry until the mushrooms have gained some
colour and softened a little.
7. Add the
Thai curry paste. Stir well and cook for some 4-5 mins.
8.
Add the soy
sauce, fish sauce and mirrin and reduce the heat to prevent it burning. Continue
to cook until a sticky and thick consistency has been achieved.
9. Add the frozen peas and stir until they have defrosted and softened slightly.
10. Add the rice and toss regularly to prevent it
sticking.
11.
Add the prawns and stir to combine.
You'll need to increase the heat slightly to make sure that the rice and prawns heat through properly.
12.
Take the two omelettes, roll and cut into strips. Once everything is heated through and piping hot, add the coriander and omelette strips and stir through.
Serve at once.
Printable version