 |
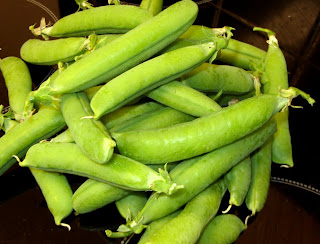
| Aren't they lovely? |
Needless to say, you don't HAVE to use home-grown peas! Ours were ready to pick and a risotto was the first thing that came to mind when I was considering what to use them with. Got to say, it was one of my better ideas. :)
There really is little nicer in the vegetable line, than a fresh pea taken straight from the pod.
I can remember, as a child, my Nanna buying fresh peas from the greengrocer and giving them to me to "shuck". I'm sure she must have bought more than we needed, as I worked on the premis of one (at least) from each pod going down my gullet. They really are one of nature's little treasures.
Now, before I go any further, let me introduce you to Chillibob (on the right there - don't worry, he's fairly harmless) - who you know as "Hubby" - who will take you through this recipe :
This is a very simple risotto, the keys to how good it can be are the quality of the ingredients and the attention given to the cooking. The peas for this dish came from our garden and the bacon is from our local butchers and is consistently fantastic quality (and cheaper than from the supermarket).
Of course, the central plank of any risotto is the stock. I use Marigold swiss bouillion powder for its clarity and complexity of flavours but, as a rule, the better the stock the better the risotto. As a final note, many risotto recipes have a splash of vermouth or white wine included. I have deliberately omitted the wine from this recipe as I had a feeling it would just be one flavour too many.
 |
| Aaah, happy memories! |
Bacon and Pea Risotto Ingredients (serves 4) 2 large banana shallots (or 4 small ones) 50g butter 300g Arborio rice 1.7 litres of good hot vegetable stock 400g smoked back bacon 200g freshly shucked peas (thats 200g after being de-podded) 50g grated parmesan cheese plus a few shavings for garnish. Preparation: 1. Blanch the peas in rapidly boiling water for two minutes and then refresh in a bowl of iced water. 2. Grill the bacon until crisp, reserving a small amount of the resulting fat. Once cool, cut four long slivers of the cooked bacon for garnish and then chop the remainder into smallish bits (or largish, depending on your preference). 3. Very finely chop the shallots. 4. Prepare the stock so that it is hot when added to the rice. Never add cold stock to a risotto as it will stop the rice from releasing its starch. 5.
Melt the butter and the bacon fat together in a deep saucepan before adding the finely chopped shallots. Cook gently until the shallots are soft and then turn the heat up before adding the rice.
6. Swoosh the rice around the pan, making sure that each grain is coated and hot. Keep the rice moving to prevent it from sticking to the pan. Once the rice is coated, sizzling hot and begging for mercy, add a ladleful of the stock and stir rapidly. This first ladle of stock will be absorbed very quickly, so be ready with a second ladleful. Add the chopped bacon and then reduce the heat to a highish simmer (not a boil). As each ladle of stock is absorbed by the rice, add another, stirring gently but continuously. 7. Continue this process until the rice is almost cooked, at which point the peas can be added. Once the peas have warmed through, the rice is fully cooked and the risotto is nicely oozy, place a lid (or a plate) onto the pan and take it off the heat to rest for a minute or so. It is important that the peas are added as late as you dare to in order that they retain their freshness and colour. 8. Finally, stir the grated parmesan through the risotto, season with freshly ground black pepper only (there's enough salt in the bacon already) and then serve onto hot plates, garnished with a bacon sliver and the shaved parmesan. Serve with the man/woman of your dreams and a nice glass of chilled white and a side salad (in exactly that order of preference).
.


