As previously mentioned, I will admit to being somewhat seduced by a loin of pork when shopping in Asda. Now, in my defence, I have to say that this doesn't happen often - but when a simply spanking special offer presents itself, I'd consider it churlish to turn it down.
This is why a salt & cracked black pepper coated pork loin had been roosting in my freezer since last week and how come we had the most splendid Sunday roast.
We had the choice of either plain or the coated pork loins and, although I'd have preferred to have had the plain, wound up with a coated one because it appeared to be the leanest. At a full 1kg, it was a good sized joint to have on a Sunday and yes, I know I'd said I wouldn't be doing a Sunday roast again in a hurry, but like I say, a special offer just can't be refused. (All of this aversion to cooking Sunday roasts has been totally blown out of the water by what arrived this morning - but we'll get to blogging about that on another day!).
Surprisingly, I'd never cooked a loin previously. I've done legs and several shoulders, but never a loin - and having seen them cooked on various t.v. programmes, knew just throwing it in the oven and hoping for the best just wasn't the way to go about it.
A bit of research was required - and it is at moments like this that I wonder what we ever did without the internet. I suppose I'd have telephoned my Mum and taken her advice on the subject. As it was, I looked up various different recipes and opted for the average method for cooking - that of 20 minutes at blisteringly hot, then an hour - covered - at a medium temperature, followed by another 10 minutes at blisteringly hot. We didn't have any crackling to produce, as the skin layer had been removed to let the fat layer take on the salt & pepper. However, this method satisfactorily renders what fat there is and effectively bastes the meat as it cooks.
The resulting roast pork joint was perfectly cooked, being still moist, beautifully tender and with a delightfully crunchy tasty crust.
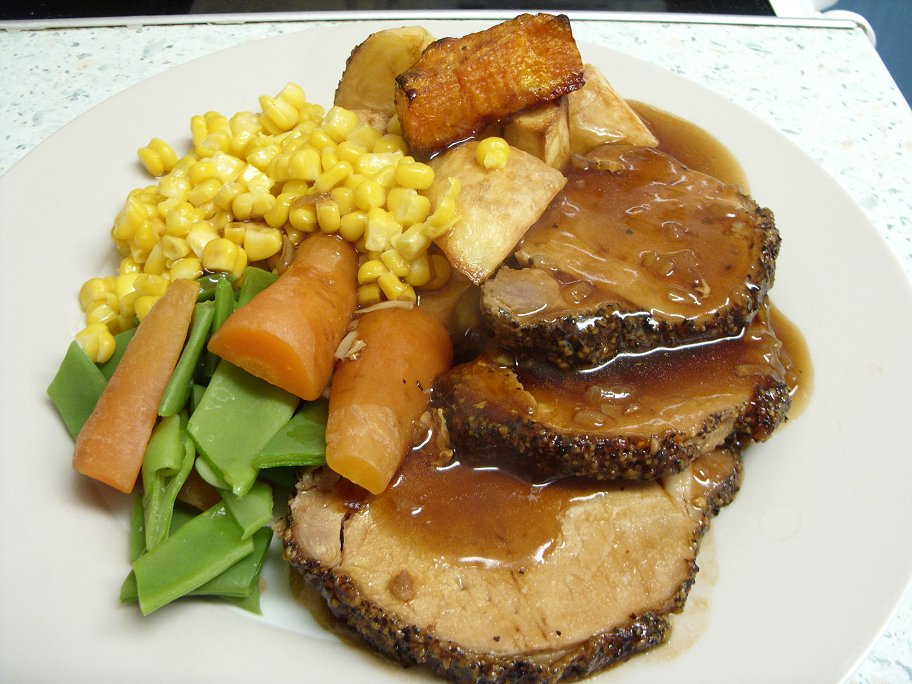
I served it with roast potatoes, roast parsnips and roast butternut squash, some boiled stringless beans and two cobs of sweetcorn, which I'd separated from their cobs to make eating the kernels easier - oh, and apple sauce, of course.
The gravy was interesting - and fabulous - as in the bottom of the roasting tin was some unctuous dark brown goo that just shrieked "yummy!" at me. So I drained off the fat (into the roast potatoes & parsnips pan) and made the gravy on top of this epitome of roast pork that is so very intensely savoury. I sweated off a small chopped onion and added it to the pan along with some chicken stock (having run out of pork stock, it would appear!). Now don't wince, but I used some Bisto Roast Pork gravy granules to thicken the gravy and wound up with some of the most delicious, dark brown, glossy gravy ever to have graced a table. It was so good, I kept the leftovers for dipping something into the next day. (Probably several dogs' tongues, if I can't find any other use for it - but at least it wasn't wasted!).
ROAST LOIN OF PORK
Ingredients :
1kg loin of pork
sea salt & freshly ground black pepper
olive oil.
Method :
1. Pre-heat your oven to 220deg C/425deg F/Gas 7.
2. If your pork has its skin left on and you are wanting crackling, dry the skin layer with some kitchen towel, score the skin (if it hasn't already been done for you) with a sharp knife and rub sea salt into the skin. If, alternatively, you aren't bothered about crackling then take a sharp knife and remove the skin layer, leaving a layer of fat on the meat. Sprinkle the fat layer liberally with freshly ground or cracked black pepper and a little salt and pat to make sure it sticks. Drizzle a little olive oil over - but not so much that it washes the salt & pepper off.
3. Place the loin with the fat side uppermost, into a roasting tin that is a suitable size for it and put into the oven for 20 minutes.
4. Remove from the oven and cover tightly with tinfoil, then replace, turn the oven down to 170deg C/325deg F/Gas 3 and roast for 30 minutes per 500g - so an hour for a 1kg piece.
5. Remove from the oven and uncover, turn the oven back up to 220deg C/425deg F/Gas 7 and roast again for a maximum of 10 minutes.
6. Remove, cover and place somewhere warm to rest for 15-20 minutes.
7. Carve.
.
Showing posts with label roasting method. Show all posts
17 November 2011
25 July 2011
Happiness is .. Pot Roasting a Chicken.
You'll all know that I’ve not been very well for the last few days, which is why you haven’t heard from me recently. As I've said in my last blog post, this caused a bit of an upset in the menu planning line. However, one dish that very definitely made it to fruition was the Pot Roast Chicken we had for dinner last Sunday.
I really love cooking pot-roast chicken. There’s something so homely and comforting about having a chicken chuckling in a stock pot on your cooker. I think it’s also the smell of the herbs and vegetables that go to make up the stock ingredients, combined with the knowledge that the chicken will emerge from its bath both subtly flavoured and succulent.
I always roast the chicken for a half hour at 200deg prior to dunking it into its bath of gorgeous stock ingredients. I think it imparts some of the “roasted chicken” flavour without resulting in the sulphurous effect that can be brought about by just roasting alone.
For the stock, you can use anything you like - carrot, any type of herb you have handy, coriander seeds, fennel seeds, the choices are endless. I used what I had at the time, which was onions, garlic, celery, thyme, parsley, basil, black peppercorns and included a star anise for that lovely and very distinctive flavour it imparts. The smell, as the chicken cooked, just improved as the 90 minutes (it was a big chicken!) went on.
Once the cooking time is up, I remove the chicken from the stock and place it on a plate, swathed in silver foil, to keep warm and just rest. I could do with a bit of a lie down when I come out of the bath sometimes, so why should my chicken be any different? I just don’t indulge in the silver foil for myself, you understand – although it is an idea, especially on a cold day.
Getting back to the chicken, after removing some stock to make the gravy with – it makes superb gravy - the stock is strained and allowed to cool before freezing. I can thoroughly recommend Ramen noodles made with your own chicken stock, as a lovely mid-week lunch!
I served the first half of our chicken with some steamed Jersey Royals, roast parsnips, broccoli and carrots, plus some sausage meat balls that I'd made. Unfortunately they didn't really work, as we couldn't get the butcher's sausages that I was originally intending to use - and the Tesco's substitutes just didn't compare, being all pasty and pappily nasty. I'll have another go at those for the next chicken, but make sure I get some good quality sausagemeat, this time!
POT ROAST CHICKEN (Serves 6 - or two separate dinners, for 3, one hot/one cold).
Ingredients :
A chicken, minus giblets and trussing string
POT ROAST CHICKEN (Serves 6 - or two separate dinners, for 3, one hot/one cold).
Ingredients :
A chicken, minus giblets and trussing string
a tbsp of olive oil
salt & black pepper
herbs of your choice
stock ingredients of your choice, but must include : an onion, a garlic clove, two sticks of celery and a handful of parsley. After that, it's up to you.
Enough water to fill your saucepan or stock pot.
Method :
1. Pre-heat the oven to 200degC.
2. Taking a suitably sized roasting tin or dish, place the chicken inside and pour over it the olive oil, season with the salt and pepper and add whatever herbs you've decided to use, to add to the flavour and aromatics. I like thyme, rosemary and lemon - at this stage.
3. Place the chicken into the oven to roast for 30mins - 45 mins depending on the size. I like to see the top of the chicken has become golden and crispy, before removing from the oven.
4. When the time is up, remove the chicken from the oven and place it into a large saucepan or stock pot. Add the juices from the roasting pan, plus the vegetables and herbs, packing them in around the sides and remember to season again.
5. Fill the saucepan with water to the point where the top of the chicken is just about to be submerged - but not quite. Place on the heat and wait for the liquid to boil.
6. Once boiling, reduce the heat to the minimum required to keep the liquid simmering very gently.
7. Cook in this way (with a lid on) for the next 60-90 mins (again, depending on the size). I think it is fairly difficult to overcook a chicken this way, but do the classic "looking for pinkness" test when you remove the chicken from the stock, just to be sure that your chicken isn't undercooked.
8. Once the cooking time is up, remove the chicken from the stock (as above) and place on a plate. Swathe it in silver foil and leave in a warm place for it to rest.
9. In the meantime, put the stock through a sieve and remove enough of the stock to make a delicious gravy with. The remainder can be set aside to cool, after which it can be frozen for use in a multitude of ways.
Serve your chicken!
.
Subscribe to:
Posts (Atom)


